- Good Sam Community
- Groups
- Travel Trailer Group
- Forum
- Re: Cool Mods - Thread restored 10/18/2012
- Subscribe to RSS Feed
- Mark Topic as New
- Mark Topic as Read
- Float this Topic for Current User
- Bookmark
- Subscribe
- Mute
- Printer Friendly Page
Cool Mods - Thread restored 10/18/2012
- Mark as New
- Bookmark
- Subscribe
- Mute
- Subscribe to RSS Feed
- Permalink
- Report Inappropriate Content
Jun-03-2007 01:48 PM
I had been wanting to add a 12-volt fan to the main living area anyway, so I decided to tackle both jobs today. A trip to Wal-Mart for two fans($8.48 each) and we're halfway there.
She picked the spot, and I got to work -
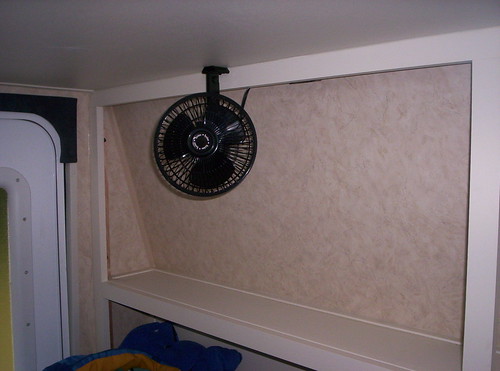
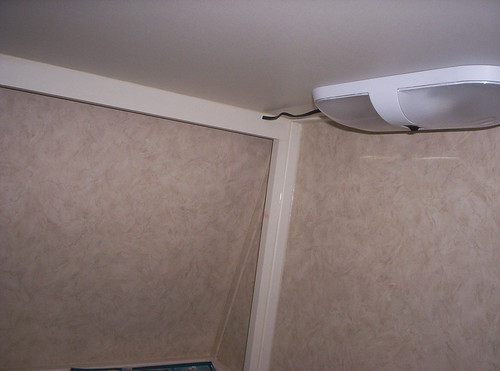
I picked up the power from her overhead light. All I have left is to install a short piece of wire cover and I'm done -
I added one in the main area -
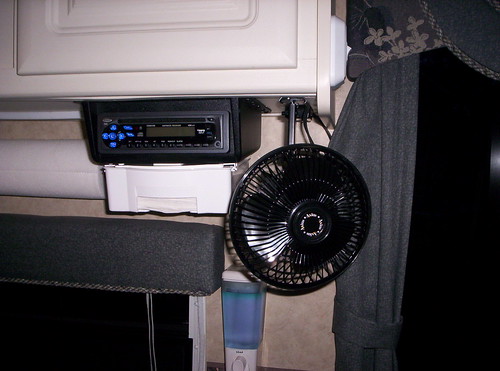
I dropped by Lowe's and found this cool soap dispenser. I also just installed these Pop-a-Toothbrush holders -
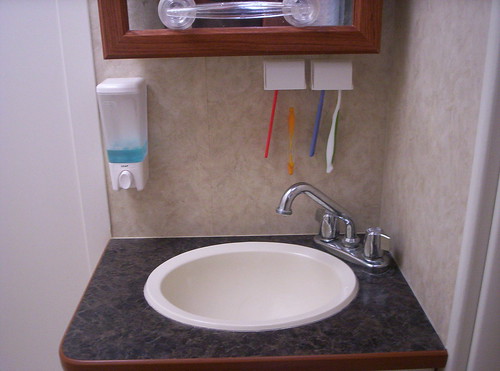
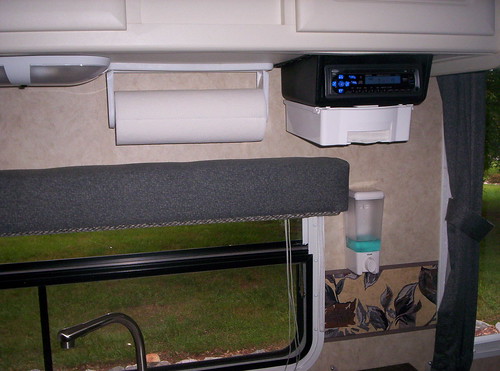
I added a sopa dispenser to the kitchen area as well. I also installed a Pop-a-Napkin under the radio -
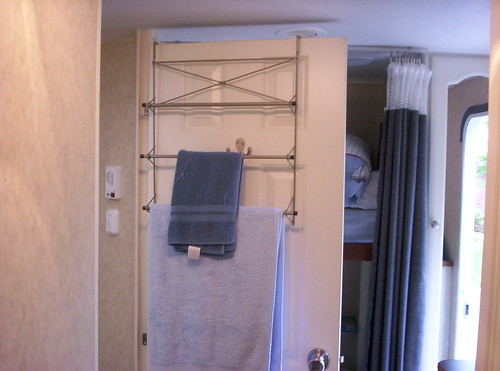
Here's an easy mod. I found this over the door towel rack at Walmart and it works great -
2005 Rockwood 2516G (sold)
2005 Max-Lite 24RS (sold)
2019 Rockwood 2608BS (sold)
2020 Grand Design 337RLS
2018 Chevy 2500HD
- Mark as New
- Bookmark
- Subscribe
- Mute
- Subscribe to RSS Feed
- Permalink
- Report Inappropriate Content
Jul-21-2017 07:30 PM
RedRocket204 wrote:
Yes, at PB you can do a one time download of your album as a zip file. OR, pay the hefty ransom fee of $399 a year to be able to have PB host your pictures and also post third party links.
Do you download the zip file to your computer or another hosting site?
- Mark as New
- Bookmark
- Subscribe
- Mute
- Subscribe to RSS Feed
- Permalink
- Report Inappropriate Content
Jul-21-2017 05:08 AM
FYI, if you are already an Amazon Prime member, you can have your pics hosted on Amazon and use third party hosting like you did at PB with no additional charge. Picture hosting/linking is unlimited as a Amazon Prime member.
- Mark as New
- Bookmark
- Subscribe
- Mute
- Subscribe to RSS Feed
- Permalink
- Report Inappropriate Content
Jul-20-2017 02:36 PM
On the Road Again
My Home - 2002 Glendale Titanium, 32/37DS with a basement slide.
Our Home's Leader - Dodge Ram 3500 Cummins Turbo Diesel Dually
Our Leaders - Sam(Bird), Chirp(Bird), Nellie(FAT cat), Lucy(Kitten), Willie(Dog) & Daisy(Dog)
- Mark as New
- Bookmark
- Subscribe
- Mute
- Subscribe to RSS Feed
- Permalink
- Report Inappropriate Content
Jul-20-2017 08:44 AM
beemerphile1 wrote:
The photos are not being kept from the owners, they just no longer allow third party access. They can be retrieved by the owner and posted to Imgur and then linked to an edited RV.net post. Heck of a lot of effort but doable.
I doubt many people will bother.
Yeah, I know that, but the amount of work you have to do may as well be ransom.
You do the work, or you pay.
Nothing is free in this world.
1996 Safari Sahara Edition 35' Diesel Pusher. Just getting the Solar stuff started.
- Mark as New
- Bookmark
- Subscribe
- Mute
- Subscribe to RSS Feed
- Permalink
- Report Inappropriate Content
Jul-20-2017 07:31 AM
nadkaw1957 wrote:
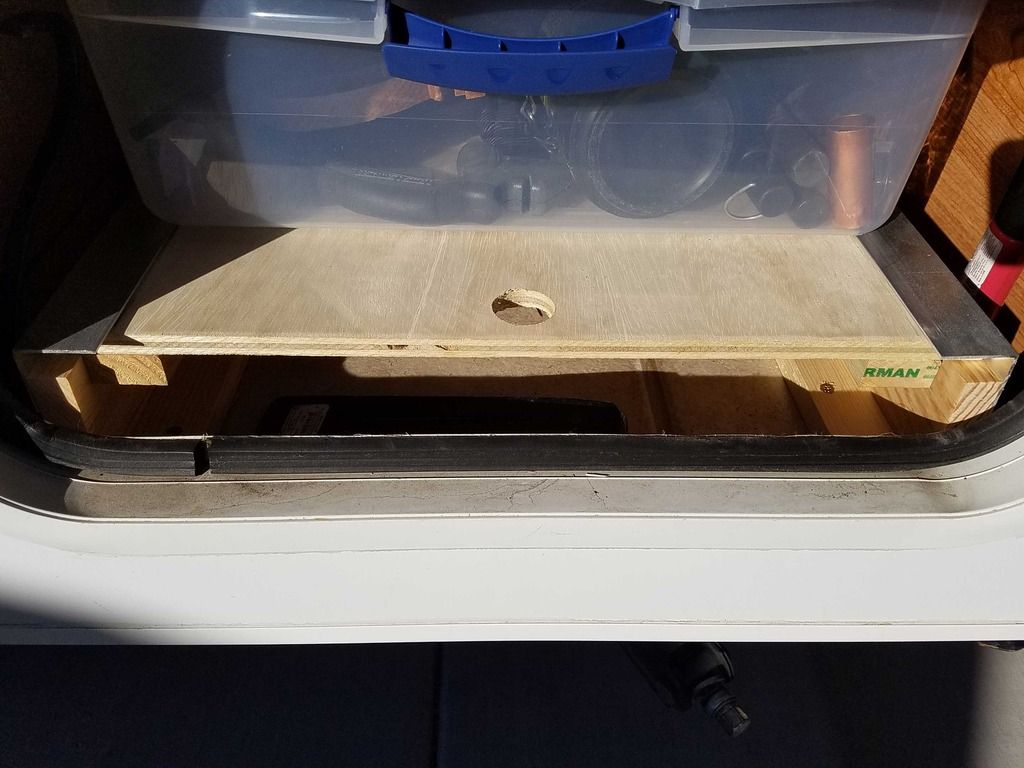
Here is how I built my storage slide:
All lumber is cut to length according to your space. The plywood width is cut to accommodate your door width. The 1X4 height can be adjusted to whatever height you need to clear the door frame.
Glue and screw the lower 1X2 to the 1X4 to act as a base.
Drill and screw the 1½” angle aluminum to the top of the 1X4, allowing just enough room for the ½” plywood to slip in between the angle and the lumber. You don’t want it TOO tight, but it needs to be snug. Screw the base to the trailer floor at the appropriate place to allow clearance through the door frame. Make sure it is lined up to the door frames on both sides of the trailer if you want to access it from either side and make sure that the slides are parallel and square to each other.
Measure the width from the inside of one angle aluminum to the inside of the other to determine the width of the plywood. Again, you want it to be snug, but not so tight as to hinder movement. Cut it to the correct width and slide it in. Mark the inside edge of the 1X4 on the bottom of the plywood, then glue and screw the upper 1X2’s to the bottom. This will act as a guide as it slides, as well as adding strength to the length of the plywood. If your door is wide, you may want to add another 1X2 to the center of the plywood for more linear strength.
Drill 1” holes in the center at each end of the plywood for someplace to grip.
I am able to pull the slide out more than halfway with little to no sagging. I also installed plastic bins at each end and another in the middle to keep things organized. The plywood is snug enough that it won’t slide either direction on its own, so there was no need for latches of any kind.
I accept any and all advice you can give me, and I hope to be able to help in my limited capacity. 🙂
- Mark as New
- Bookmark
- Subscribe
- Mute
- Subscribe to RSS Feed
- Permalink
- Report Inappropriate Content
Jul-19-2017 05:14 PM
I doubt many people will bother.
2016 Silverado 3500HD DRW D/A 4x4
2018 Keystone Cougar 26RBS
2006 Weekend Warrior FK1900
- Mark as New
- Bookmark
- Subscribe
- Mute
- Subscribe to RSS Feed
- Permalink
- Report Inappropriate Content
Jul-19-2017 03:06 PM
I post mine in a photo site that is for a GMC motorhomes. That group previously had the problem where the sites where stuff was stored kept going out of business and stuff was lost.
So, They got their own, and people donate a little bit every year to keep it alive. I was a member, so I have some stuff there, and what I store there isn't 100% relevant, but it is RV based and therefore seems to be tolerated. Some of my projects are not really model specific.
It's progress. Photobucket and the rest all suck anyway.
1996 Safari Sahara Edition 35' Diesel Pusher. Just getting the Solar stuff started.
- Mark as New
- Bookmark
- Subscribe
- Mute
- Subscribe to RSS Feed
- Permalink
- Report Inappropriate Content
Jul-19-2017 02:51 PM
Graycat wrote:
It is so disappointing that photobucket changed their rules and now a lot a great mods pictures are gone. Is there any way to recover those pictures?
Every photo I have put on Photobucket, and there are a lot of them, I still have on my hard drive and it has been backed up. If I need to re-post a photo that has disappeared I use this website: http://photoposting.is-great.net/?i=1. It is really easy to use. Check it out here.
2018 Winnebago Minnie 2250DS
- Mark as New
- Bookmark
- Subscribe
- Mute
- Subscribe to RSS Feed
- Permalink
- Report Inappropriate Content
Jul-19-2017 02:30 PM
- Mark as New
- Bookmark
- Subscribe
- Mute
- Subscribe to RSS Feed
- Permalink
- Report Inappropriate Content
Jun-28-2017 06:50 PM


All lumber is cut to length according to your space. The plywood width is cut to accommodate your door width. The 1X4 height can be adjusted to whatever height you need to clear the door frame.
Glue and screw the lower 1X2 to the 1X4 to act as a base.
Drill and screw the 1½” angle aluminum to the top of the 1X4, allowing just enough room for the ½” plywood to slip in between the angle and the lumber. You don’t want it TOO tight, but it needs to be snug. Screw the base to the trailer floor at the appropriate place to allow clearance through the door frame. Make sure it is lined up to the door frames on both sides of the trailer if you want to access it from either side and make sure that the slides are parallel and square to each other.
Measure the width from the inside of one angle aluminum to the inside of the other to determine the width of the plywood. Again, you want it to be snug, but not so tight as to hinder movement. Cut it to the correct width and slide it in. Mark the inside edge of the 1X4 on the bottom of the plywood, then glue and screw the upper 1X2’s to the bottom. This will act as a guide as it slides, as well as adding strength to the length of the plywood. If your door is wide, you may want to add another 1X2 to the center of the plywood for more linear strength.
Drill 1” holes in the center at each end of the plywood for someplace to grip.
I am able to pull the slide out more than halfway with little to no sagging. I also installed plastic bins at each end and another in the middle to keep things organized. The plywood is snug enough that it won’t slide either direction on its own, so there was no need for latches of any kind.
2018 Toyota Tundra 5.7L
- Mark as New
- Bookmark
- Subscribe
- Mute
- Subscribe to RSS Feed
- Permalink
- Report Inappropriate Content
Jun-26-2017 05:29 AM
- Mark as New
- Bookmark
- Subscribe
- Mute
- Subscribe to RSS Feed
- Permalink
- Report Inappropriate Content
Jun-25-2017 06:38 PM
Photos Here

1996 Safari Sahara Edition 35' Diesel Pusher. Just getting the Solar stuff started.
- Mark as New
- Bookmark
- Subscribe
- Mute
- Subscribe to RSS Feed
- Permalink
- Report Inappropriate Content
Jun-25-2017 05:43 PM
1996 Safari Sahara Edition 35' Diesel Pusher. Just getting the Solar stuff started.
- Mark as New
- Bookmark
- Subscribe
- Mute
- Subscribe to RSS Feed
- Permalink
- Report Inappropriate Content
Jun-23-2017 04:56 PM
PennyPA wrote:
I second that request!!!
I second the second!...
2017 Chevy Colorado (Duramax)
- Mark as New
- Bookmark
- Subscribe
- Mute
- Subscribe to RSS Feed
- Permalink
- Report Inappropriate Content
Jun-22-2017 07:46 PM
On the Road Again
My Home - 2002 Glendale Titanium, 32/37DS with a basement slide.
Our Home's Leader - Dodge Ram 3500 Cummins Turbo Diesel Dually
Our Leaders - Sam(Bird), Chirp(Bird), Nellie(FAT cat), Lucy(Kitten), Willie(Dog) & Daisy(Dog)
