- Good Sam Community
- Groups
- Truck Camper Group
- Forum
- Re: Avion truck campers - Hundreds of photos
- Subscribe to RSS Feed
- Mark Topic as New
- Mark Topic as Read
- Float this Topic for Current User
- Bookmark
- Subscribe
- Mute
- Printer Friendly Page
Avion truck campers - Hundreds of photos
- Mark as New
- Bookmark
- Subscribe
- Mute
- Subscribe to RSS Feed
- Permalink
- Report Inappropriate Content
May-11-2011 10:33 AM
Our planned trip to Montana in June is called off. heh.
However, I have now convinced my dear Jane that its time to really update the TC. After drying for several days we pulled out the interior. Amazingly the Zolatone paint that I had applied last year is good as new after a cleaning.

Without burdening the TC family overmuch, I'd like to ask some advice other than don't park too near a flood :-).
My DW was overjoyed that I had a plan for the bathroom: a composting toilet developed by Nature's Head http://www.natureshead.net/. Our holding tank was practically unusable and there was no real grey water tank on the 67 Avion. Our plan is to rip out the bathroom and install one of these and converting the blackwater to a greywater tank. Any experience with this?
Finally, the roof. I admit that I have not really done the work I should have. Now, I need to remove the various sealants on the roof and repair it. We are also setting up for a solar installation. Any advice as to this?
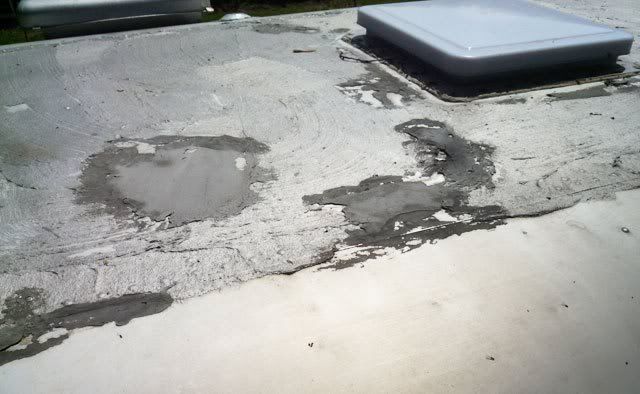
Here's hoping I have posted the pictures correctly. And many thanks in advance for your advice.
- Labels:
-
Truck Campers
- Mark as New
- Bookmark
- Subscribe
- Mute
- Subscribe to RSS Feed
- Permalink
- Report Inappropriate Content
Jun-30-2012 08:31 PM
I looked at a lot of aircraft and boating forums about this and they all say that the amount of corrosion is very very little, people with SS screws in saltwater aluminum boats for 20-30 years without a problem.
Every screw that I removed from a damaged area is rusted and not corroded from this type of reaction.
- Mark as New
- Bookmark
- Subscribe
- Mute
- Subscribe to RSS Feed
- Permalink
- Report Inappropriate Content
Jun-30-2012 07:36 PM
Personally, I would be hesitant using a stainless sheet metal screw without some kind of plastic washer. Using stainless nuts and bolts, I would definitely use some kind of antiseze (sp).
Did Avion use stainless fasteners when they built the Avions?
Wayne
2004.5 Ram SLT LB 3500 DRW Quad Cab 4x4
1988 Bigfoot (C11.5) TC (1900# w/standard equip. per decal), 130 watts solar, 100 AH AGM, Polar Cub A/C, EU2000i Honda
Toad: 91 Zuke
- Mark as New
- Bookmark
- Subscribe
- Mute
- Subscribe to RSS Feed
- Permalink
- Report Inappropriate Content
Jun-30-2012 04:57 PM
Just my research.
- Mark as New
- Bookmark
- Subscribe
- Mute
- Subscribe to RSS Feed
- Permalink
- Report Inappropriate Content
Jun-30-2012 12:35 PM
'02 GMC DRW D/A flatbed
- Mark as New
- Bookmark
- Subscribe
- Mute
- Subscribe to RSS Feed
- Permalink
- Report Inappropriate Content
Jun-30-2012 11:55 AM
67avion wrote:
I wish I had thought to place a reinforcing bar at the base of the cabinet. I actually studied the thing for a long time, concerned about the cantilever effect and the gray water holding tank as well. We did place reinforcement behind the wing, connecting the overhang.
But still, I don't think you can be careful enough with the issues in the overhang of the coach. Especially the toilet; when we pulled it out, we learned it was just barely hanging there with the minimal support that the factory had built in nearly nonexistent.
You guys are giving us inspiration to finish up the restoration. All of the Corian for the countertops are sitting next to the camper. All the appliances are in the workshed.
But, its 105 in the shade.
I feel for you. It was 112, in the shade, when I did a lot of the work on my Avion. Why can't I do a rebuild in the winter time?
1988 Avion Triple Axle Trailer
1969 Avion C-11 Camper
- Mark as New
- Bookmark
- Subscribe
- Mute
- Subscribe to RSS Feed
- Permalink
- Report Inappropriate Content
Jun-30-2012 10:40 AM
But still, I don't think you can be careful enough with the issues in the overhang of the coach. Especially the toilet; when we pulled it out, we learned it was just barely hanging there with the minimal support that the factory had built in nearly nonexistent.
You guys are giving us inspiration to finish up the restoration. All of the Corian for the countertops are sitting next to the camper. All the appliances are in the workshed.
But, its 105 in the shade.
- Mark as New
- Bookmark
- Subscribe
- Mute
- Subscribe to RSS Feed
- Permalink
- Report Inappropriate Content
Jun-29-2012 06:39 PM
67avion wrote:
Great rebuilds going on with Blackflag and 69 Avion! I think we documented the repair of the tub on this thread. We pulled the sides together with clamps and secured angled metal on the corners with a polyurethane sealant, and them held in place with 4 inch SS screws. I was cautioned by Sleepy that the SS and aluminum may have metal to metal issues, so take that into consideration.
69 Avion. As best I understood your post on the cabinet: "The cabinet was real tight when we took it out and the new flooring is thicker, but I also sanded some off of the bottom of the cabinet. We may have to take it all the way out again to sand more off of the bottom."
It seems to me that there was a knockout piece that allowed the bottom to be released when it was removed. I note that you have solved the issue, so it probably doesn't matter.
By the way, these two restorations are going at warp speed. Congratulations.
There was a little 1 x 1 block that held the closet to the floor and more of these blocks that held it to the wall. The wall 1 x 1 blocks were reused. The floor block was replaced with steel 2 x 2 x 1/8" angle iron that is used more for structural reinforcement for the floor along with the weight bearing mount for the stainless steel gray water tank, but it also is used to screw the closet base to. When removing the closet, once all the mounting screws were removed, we had to pull out the top first. It was really tight. My new floor was slightly thicker, but I had to sand a lot more than that thickness to get the closet back in, and the steel reinforcement wasn't the cause of this issue.
1988 Avion Triple Axle Trailer
1969 Avion C-11 Camper
- Mark as New
- Bookmark
- Subscribe
- Mute
- Subscribe to RSS Feed
- Permalink
- Report Inappropriate Content
Jun-29-2012 06:34 PM
ticki2 wrote:
69 avion ,
I notice in the third picture the plywood under the lower cabinets doesn't show any signs of blocking . Mine had 1" blocking that the 1/4" finish panel attached to . I insulated that area with blue styrofoam board . Have you done something different or are just not finished with that yet ? Same thing along the base of the dinette and under the frig .
I'm just not done with that yet. That will be near the end of the interior work.
1988 Avion Triple Axle Trailer
1969 Avion C-11 Camper
- Mark as New
- Bookmark
- Subscribe
- Mute
- Subscribe to RSS Feed
- Permalink
- Report Inappropriate Content
Jun-29-2012 10:10 AM
69 Avion. As best I understood your post on the cabinet: "The cabinet was real tight when we took it out and the new flooring is thicker, but I also sanded some off of the bottom of the cabinet. We may have to take it all the way out again to sand more off of the bottom."
It seems to me that there was a knockout piece that allowed the bottom to be released when it was removed. I note that you have solved the issue, so it probably doesn't matter.
By the way, these two restorations are going at warp speed. Congratulations.
- Mark as New
- Bookmark
- Subscribe
- Mute
- Subscribe to RSS Feed
- Permalink
- Report Inappropriate Content
Jun-28-2012 12:11 PM
I notice in the third picture the plywood under the lower cabinets doesn't show any signs of blocking . Mine had 1" blocking that the 1/4" finish panel attached to . I insulated that area with blue styrofoam board . Have you done something different or are just not finished with that yet ? Same thing along the base of the dinette and under the frig .
'02 GMC DRW D/A flatbed
- Mark as New
- Bookmark
- Subscribe
- Mute
- Subscribe to RSS Feed
- Permalink
- Report Inappropriate Content
Jun-27-2012 05:39 PM
Here is a picture. The rear of the closet area is also lined with Dynamat. It cost me $60, but it is well worth the money.
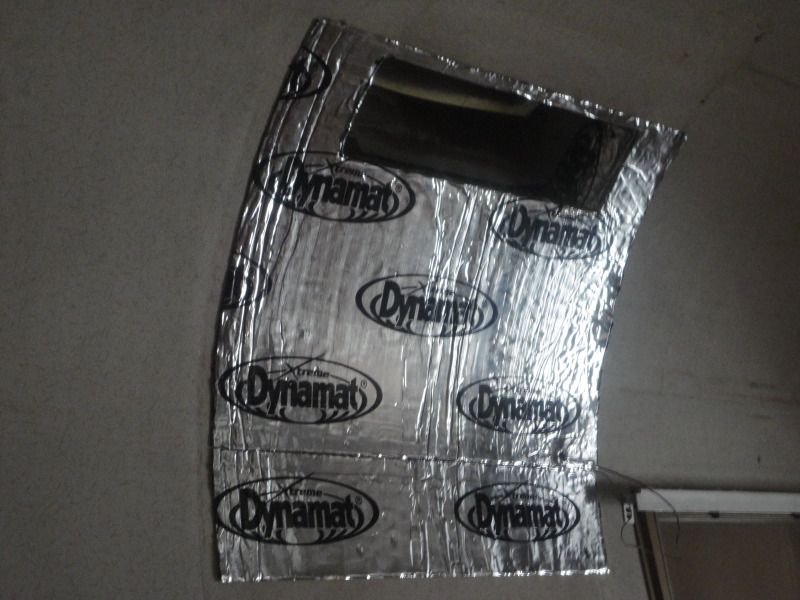
A picture looking up in the refrigerator duct area with the Dynamat on it.
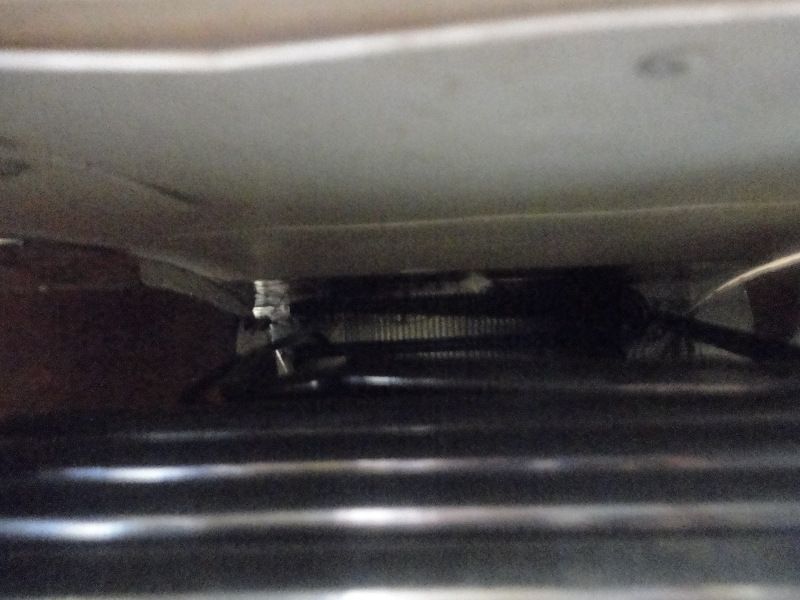
Here is a picture of the closet going back in. Notice the Dynamat on the back of the closet, where the refrigerator duct is.
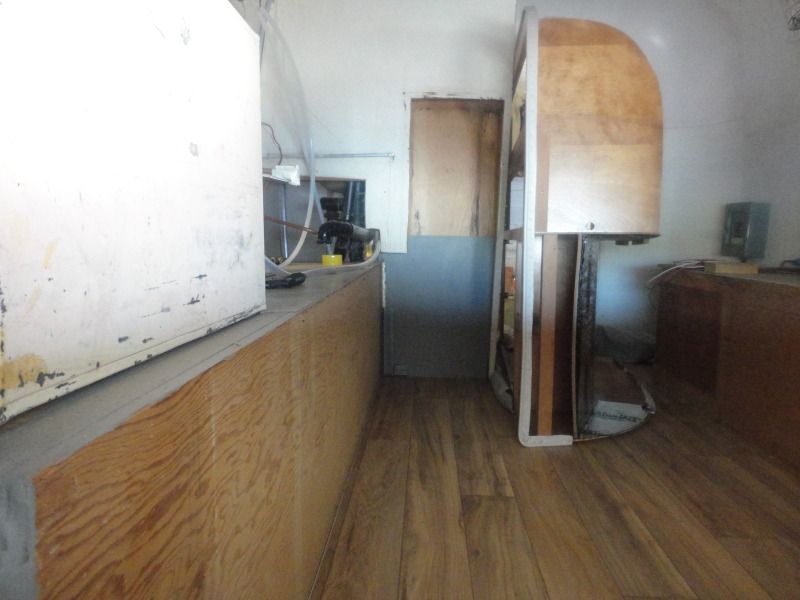
Here is a picture of me sliding my reinforcing steel under the cabinet before it is pushed against the left wing. I highly recommend this piece.

Picture of the new 5 cu' refrigerator. It was a close fit through the door.
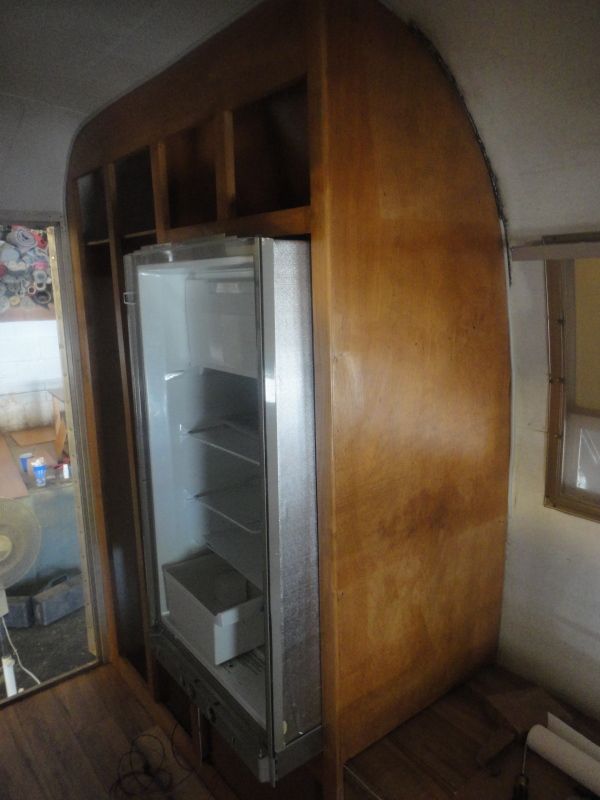
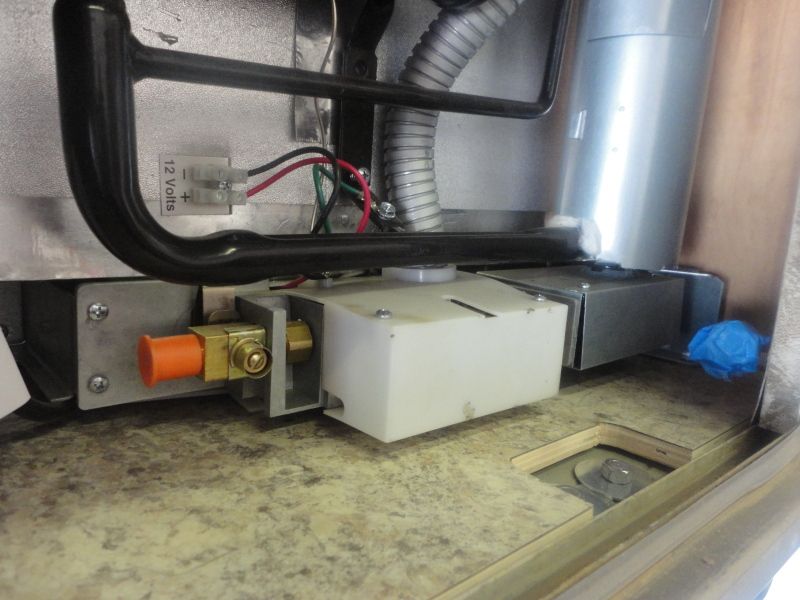
Back of installed refrigerator. Notice the formica covered pad.
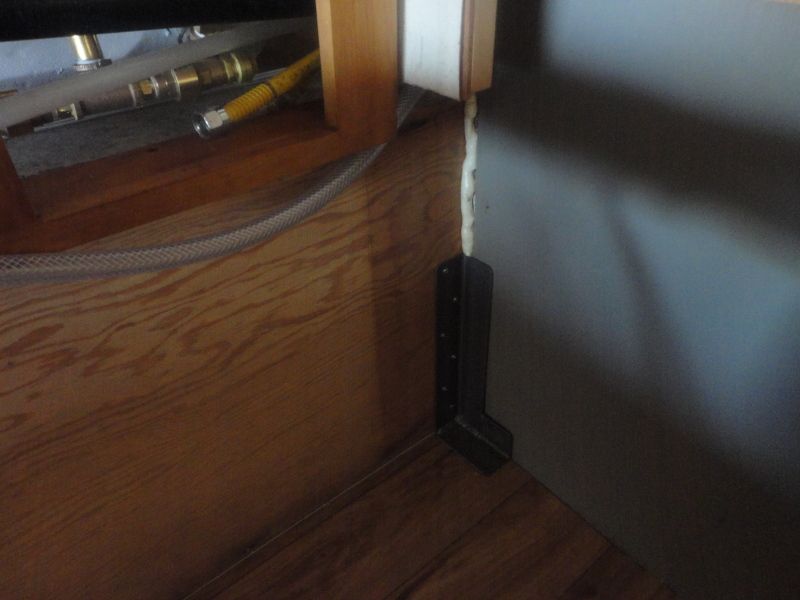
A picture of my right wing steel reinforcement for the stainless steel gray water tank.
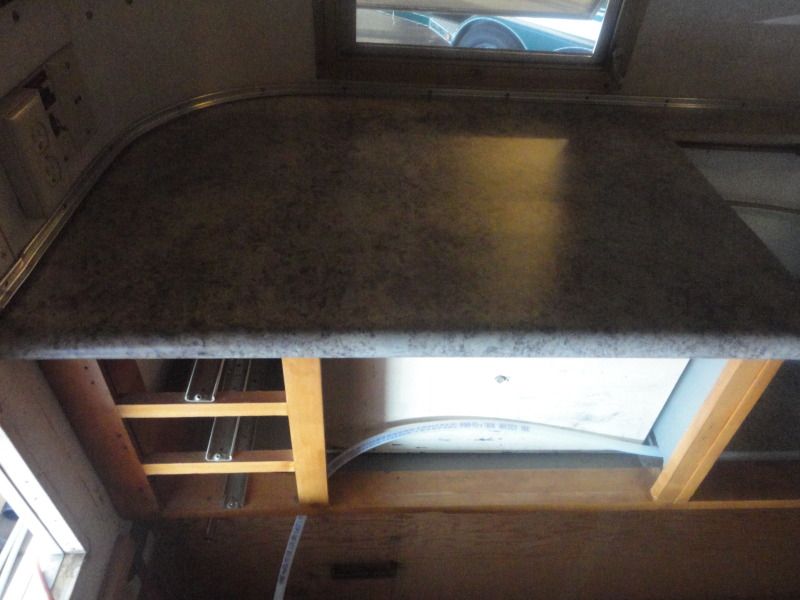
Picture of new counter top.
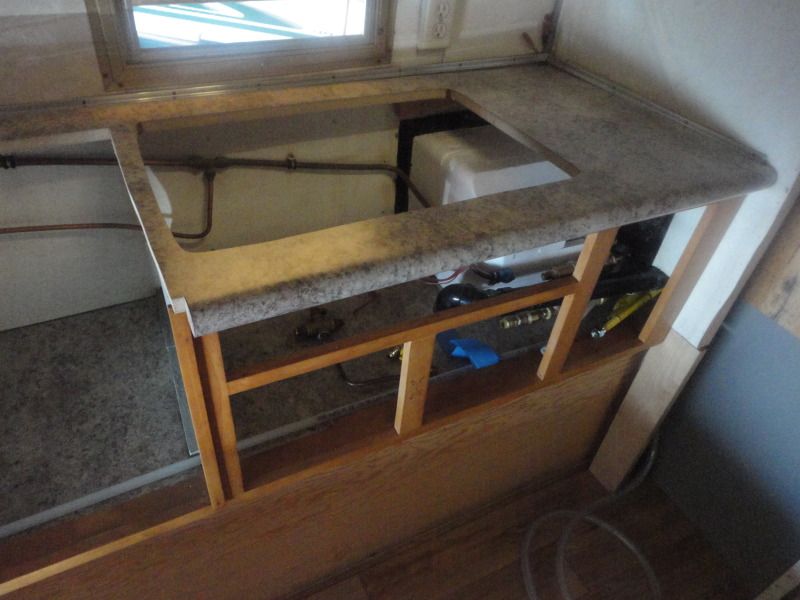
width=640
1988 Avion Triple Axle Trailer
1969 Avion C-11 Camper
- Mark as New
- Bookmark
- Subscribe
- Mute
- Subscribe to RSS Feed
- Permalink
- Report Inappropriate Content
Jun-27-2012 05:31 PM
BlackFlagForge wrote:
Woohoo, so removing the carpet/linoleum I bumped the tub wall out about 3 inches so I figured its time to remove the staples and add some real fasteners, getting up close and personal with my floor and tub area I found that it only has water damage in the front corners where it was sprayed down by the PO's rear end while he had it on a trailer >_> I used some Rot Fix on the small areas of damage and reconnected wall and floor with some liquid nails and 3.5" exterior screws and boy that pulled things together! I'll still need to replace some of the tail end Im sure as the stairs have pulled through the floor and I have yet to remove the bathroom floor to see what all has gone wrong but so far at least 80% of the floor is still in great shape!
That is good news. It looks like you got a good camper to work on.
1988 Avion Triple Axle Trailer
1969 Avion C-11 Camper
- Mark as New
- Bookmark
- Subscribe
- Mute
- Subscribe to RSS Feed
- Permalink
- Report Inappropriate Content
Jun-27-2012 12:26 PM
- Mark as New
- Bookmark
- Subscribe
- Mute
- Subscribe to RSS Feed
- Permalink
- Report Inappropriate Content
Jun-27-2012 07:45 AM
1988 Avion Triple Axle Trailer
1969 Avion C-11 Camper
- Mark as New
- Bookmark
- Subscribe
- Mute
- Subscribe to RSS Feed
- Permalink
- Report Inappropriate Content
Jun-26-2012 10:34 PM
You are fortunate to be doing this on a trailer, but you may still need heavier tires before you are all said and done. And hopefully you have a good swaybar under the trailer!
Good luck!
Garry in Kodiak
Wife + 4 kids
Retired Military Family.... Alway's on the move....
2002 F350 CCSB 5.4 6spd 4x4 in AK
1966 Avion C-10 Truck Camper


