- Good Sam Community
- Groups
- Truck Camper Group
- Forum
- Avion truck campers - Hundreds of photos
- Subscribe to RSS Feed
- Mark Topic as New
- Mark Topic as Read
- Float this Topic for Current User
- Bookmark
- Subscribe
- Mute
- Printer Friendly Page
Avion truck campers - Hundreds of photos
- Mark as New
- Bookmark
- Subscribe
- Mute
- Subscribe to RSS Feed
- Permalink
- Report Inappropriate Content
May-11-2011 10:33 AM
Our planned trip to Montana in June is called off. heh.
However, I have now convinced my dear Jane that its time to really update the TC. After drying for several days we pulled out the interior. Amazingly the Zolatone paint that I had applied last year is good as new after a cleaning.

Without burdening the TC family overmuch, I'd like to ask some advice other than don't park too near a flood :-).
My DW was overjoyed that I had a plan for the bathroom: a composting toilet developed by Nature's Head http://www.natureshead.net/. Our holding tank was practically unusable and there was no real grey water tank on the 67 Avion. Our plan is to rip out the bathroom and install one of these and converting the blackwater to a greywater tank. Any experience with this?
Finally, the roof. I admit that I have not really done the work I should have. Now, I need to remove the various sealants on the roof and repair it. We are also setting up for a solar installation. Any advice as to this?
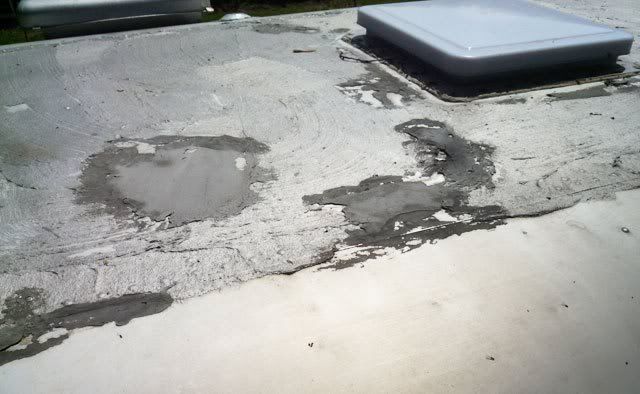
Here's hoping I have posted the pictures correctly. And many thanks in advance for your advice.
- Labels:
-
Truck Campers
- Mark as New
- Bookmark
- Subscribe
- Mute
- Subscribe to RSS Feed
- Permalink
- Report Inappropriate Content
Aug-05-2015 06:12 PM
67avion wrote:
Sweet Jane and I are sitting next to our Avion next to the water of a lake near Council Grove, Kansas....the head of the Santa Fe Trail. There's a cooling breeze that keeps us more than comfortable as we enjoy a few cold beers.
The Avion is such a pleasure at times like this. It's like an old friend who has spent a lot of time with you. And I must say, Canjunavion's quote that every gas station is a press conference is true. No matter where we stop people come over smiling - asking about the camper. Something about the old girl makes people happy.
And it makes us happy too!
Onward!
You could be enjoying a delightful 112 degrees in Phoenix. LOL
1988 Avion Triple Axle Trailer
1969 Avion C-11 Camper
- Mark as New
- Bookmark
- Subscribe
- Mute
- Subscribe to RSS Feed
- Permalink
- Report Inappropriate Content
Aug-05-2015 05:51 PM
The Avion is such a pleasure at times like this. It's like an old friend who has spent a lot of time with you. And I must say, Canjunavion's quote that every gas station is a press conference is true. No matter where we stop people come over smiling - asking about the camper. Something about the old girl makes people happy.
And it makes us happy too!
Onward!
- Mark as New
- Bookmark
- Subscribe
- Mute
- Subscribe to RSS Feed
- Permalink
- Report Inappropriate Content
Aug-05-2015 02:43 PM
69 Avion it makes sense that there would be screws under the cab over as there is wood just above. Not sure why the PO would not have put at least a few screws in ...
08 GMC 3500 Sierra
- Mark as New
- Bookmark
- Subscribe
- Mute
- Subscribe to RSS Feed
- Permalink
- Report Inappropriate Content
Aug-05-2015 02:24 PM
It says that it is a model: 9-3513SD
The serial number is: S-11138
I think mine was made in California.
1988 Avion Triple Axle Trailer
1969 Avion C-11 Camper
- Mark as New
- Bookmark
- Subscribe
- Mute
- Subscribe to RSS Feed
- Permalink
- Report Inappropriate Content
Aug-05-2015 02:20 PM
1988 Avion Triple Axle Trailer
1969 Avion C-11 Camper
- Mark as New
- Bookmark
- Subscribe
- Mute
- Subscribe to RSS Feed
- Permalink
- Report Inappropriate Content
Aug-05-2015 11:25 AM
If you take the letters in the serial number and find it's numerical place in the alphabet it will give you the year , G = 7 and J = 0 . The 50 is its place in the production run .
Interesting that yours has stays for the upper cabinet doors . All the Avions I have seen have magnetic catches attached to the ceiling .
Nice trip you have planned , it is on my to-do list . You do realize you will owe us a trip report .
'02 GMC DRW D/A flatbed
- Mark as New
- Bookmark
- Subscribe
- Mute
- Subscribe to RSS Feed
- Permalink
- Report Inappropriate Content
Aug-05-2015 10:26 AM
67avion wrote:
Glad to have you on board. At a certain point we will name you an official Avionista and share the secret route to Muley Point.......
I had never heard of Muley Point, as it turns out it is in one of the few areas of North America I have not traveled, the American south west. At some point I intend on correcting that wrong and I am definitely intrigued and thus will need that secret route 🙂
08 GMC 3500 Sierra
- Mark as New
- Bookmark
- Subscribe
- Mute
- Subscribe to RSS Feed
- Permalink
- Report Inappropriate Content
Aug-05-2015 09:28 AM
I am now a little confused, I was advised the camper was a 1969 however on the water tank I noted a date stamp of 1970 I suppose the tank could have been replaced). The serial number is GJ-050. Does anyone have a list comparing serial numbers to year of manufacture?
Ticki2 – Unfortunately the pictures were a little deceiving. However there are no bullet holes as others have been dealing with. There is damage around the front right lower corner and near the clearance light on the front right corner. For some reason a lot of the rivets were missing underneath the overhang. I was able to source some water resistant (nothing is waterproof) rivets at a tractor trailer repair place and they also advised they could supply roof sealant and any aluminium I would need.
I have had to rewire the exterior lights as the PO had not hooked up the reverse or clearance lights and the wire that was used was a couple of pieces of old extension cord. I took the time to put on a new 7 pin plug and 7 strand wire. Surprise, surprise almost all the lights work. Only one clearance light on the front had to be checked and it was missing the bulb and the ground was not connected.
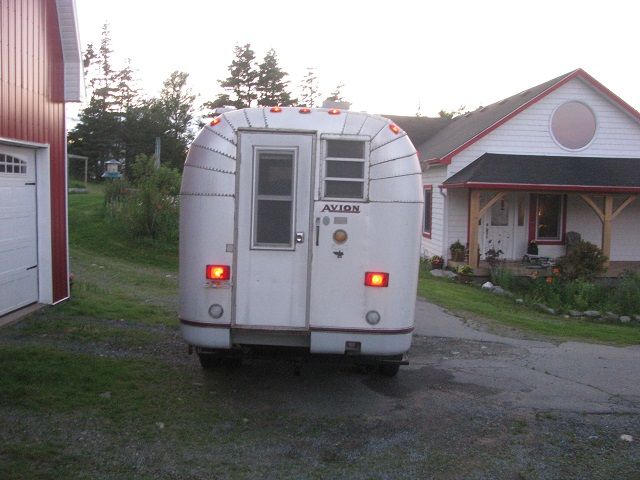
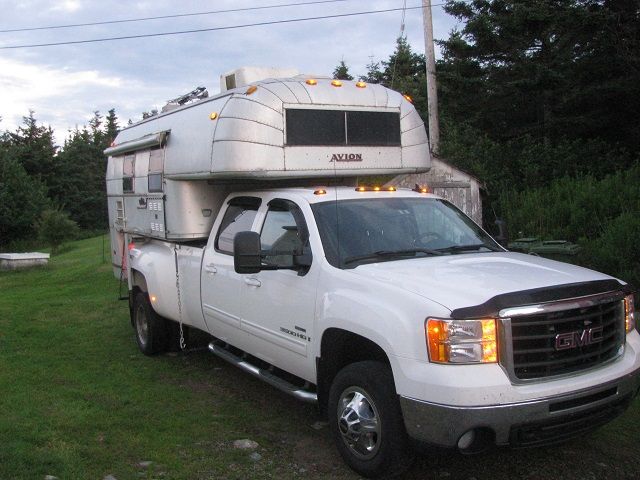
As there was propane remaining in one of the old horizontal tanks I’ve confirmed that the propane stove works. The other tank has been given to a friend in the propane business to get re-certified and filled. He was surprised by the tank as he had never seen one before. I have not checked the heater yet but I’m not planning any winter camping at the moment … not quite as cold as where Garry is camping.
When taking off all the upper cabinet doors I found out I am missing two of the stays. Does anyone know where I can purchase them? Picture below. I have purchased the two types available from Lee Valley which is a very good source of hardware but they are not the same length. I checked Vintage RV and unfortunately they do not have anything listed. Also noted multiple types of screws and some damage to the cabinet carcases where the screw holes are. Now I see some finer woodworking in my future. The upper cabinet doors painted and just finishing off a couple coats of varathane before the re-install which should be done this coming weekend.
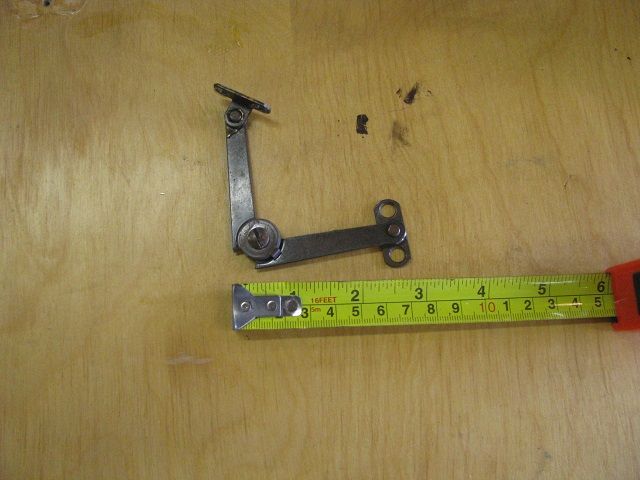
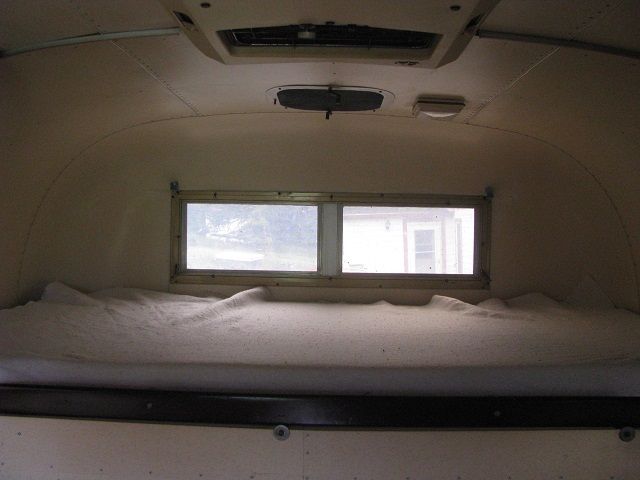
Here are some interior pictures currently. I repainted the top of the stove. Condition is pretty good until you look in the "closet" and find the skeltons.
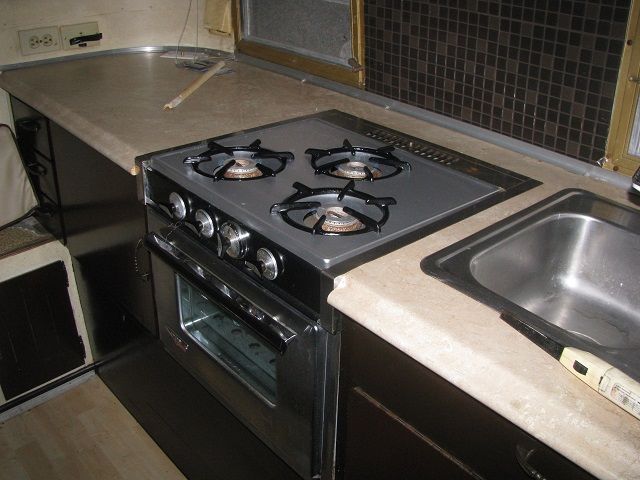
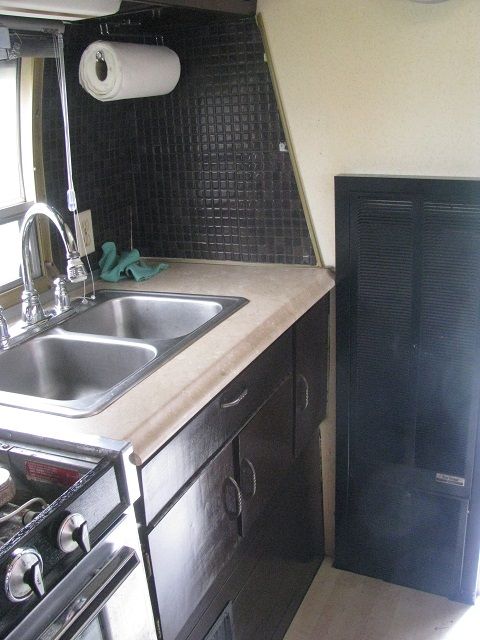
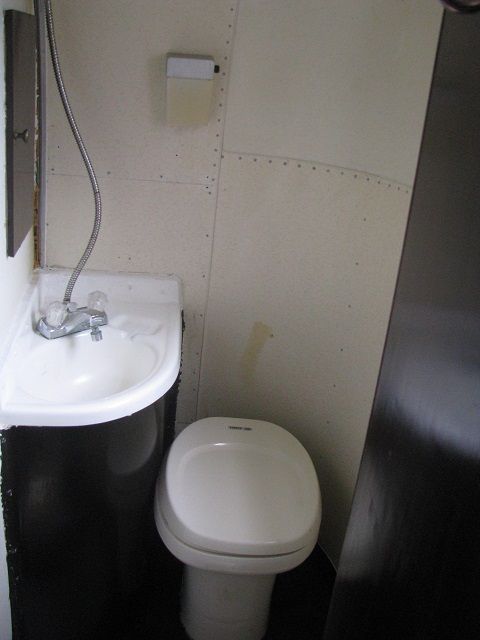
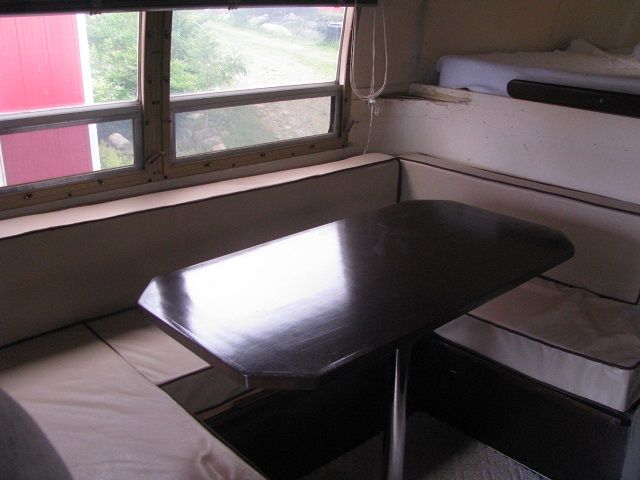

Finally got around to putting water into the water tank … which thankfully held. Turned on the old par pump and …. no water movement. Fortunately a friend has just replaced a pump he had in his Fuzion toy hauler because he wanted one with more flow. When I tested it, the pump worked but the pipework to the hot water tank had been disconnected. The fitting is an odd size so once I find some fittings I will have to try the water systems again. Ultimate goal for now is to get water to the toilet. If not we will just fill up some water cans and take with us. It is now obvious PO did not antifreeze the water system so I am concerned on how much hidden damage there is. I agree 67Avion I see pex in my avions's future but for now ...

Drove through some very heavy rains the other morning and noted a leak around the rear vent and coming out of the top of the front curbside window. A look at the roof and again some interesting products up there done by POs. One side of the roof is covered in a metallic foil put on in approximately 6 inch strips the length of the camper.
So bottom line; I have leaks, wood rot, plumbing issues, no steps, no hot water tank … and the bathroom will need to be gutted and rebuilt properly. However we stayed in it the other night, and enjoyed it. So for now the plan is to do the minimum needed in order to spend two weeks going through western Newfoundland, Labrador, eastern Quebec and New Brunswick. Garry I will take a page from your book, use it as is and repair and modify when time and money allows.
I had the awning partially out and it looks in pretty good shape. Meant to set it up and take some pictures, will do so for my next post, this one is definitely long enough, my apologies.
08 GMC 3500 Sierra
- Mark as New
- Bookmark
- Subscribe
- Mute
- Subscribe to RSS Feed
- Permalink
- Report Inappropriate Content
Aug-04-2015 08:21 AM
Onward!
- Mark as New
- Bookmark
- Subscribe
- Mute
- Subscribe to RSS Feed
- Permalink
- Report Inappropriate Content
Aug-04-2015 07:09 AM
I considered several tank options for Argo. With so many plastic tanks available, it would seem a suitable size could be found. My welder is going to fabricate a couple of aluminum tanks for me in the new Argo configuration. A competent welder could duplicate your plastic tank in aluminum or stainless easily.
At one point, I considered putting a flexible bladder inside the black water space in Argo's bustle. Many sizes and fittings available in that scenario.
The end result for me was to create an integral tank, using the space inside the bustle occupied by the plastic tank as three sides and the bottom. I laminated a top, the fourth side, and a couple of internal baffles of fiberglass inside the bustle. Also a straightforward job. The folks at TAP could probably connect you with someone who could do that for you, if you didn't want to take it on yourself.
****
- Mark as New
- Bookmark
- Subscribe
- Mute
- Subscribe to RSS Feed
- Permalink
- Report Inappropriate Content
Aug-04-2015 06:53 AM
Then there's the black water tank and fashioning a gray water tank. We've all done this stuff so you'll have a lot of knowledgable folks.
I'm sure you are aware of the pitfalls of a restoration project. It can get overwhelming and discouraging. We've all been there too.
Best of luck. Glad to have you on board. At a certain point we will name you an official Avionista and share the secret route to Muley Point.......
- Mark as New
- Bookmark
- Subscribe
- Mute
- Subscribe to RSS Feed
- Permalink
- Report Inappropriate Content
Aug-04-2015 06:07 AM
Page 72 on this forum.
When I went in to have the tank made, I had the old tank as a pattern and I had cutout cardboard patterns for the new tank along with a drawing. The only issue I had is that I didn't specify that the 3" drain needed a 1/4" per foot angle when welded into the tank. I had to have it removed and a new one put in with the angle on the drain. I think it is around 20 gallons now.
If I could find a plastic manufacturer, that would probably be much cheaper, but I didn't have that available.
1988 Avion Triple Axle Trailer
1969 Avion C-11 Camper
- Mark as New
- Bookmark
- Subscribe
- Mute
- Subscribe to RSS Feed
- Permalink
- Report Inappropriate Content
Aug-04-2015 05:04 AM
69 avion , IIRC you had a SS tank made , any details , thanks
'02 GMC DRW D/A flatbed
- Mark as New
- Bookmark
- Subscribe
- Mute
- Subscribe to RSS Feed
- Permalink
- Report Inappropriate Content
Aug-02-2015 02:08 PM
ticki2 wrote:
Seems I have developed a small leak in the black water tank . Has anyone had any luck repairing one ?
My original tank had so many hairline cracks that it wasn't worth chasing them.
1988 Avion Triple Axle Trailer
1969 Avion C-11 Camper
- Mark as New
- Bookmark
- Subscribe
- Mute
- Subscribe to RSS Feed
- Permalink
- Report Inappropriate Content
Aug-02-2015 01:05 PM


