- Good Sam Community
- Everything RV
- DIY Maintenance
- Re: Introduction and New Project
- Subscribe to RSS Feed
- Mark Topic as New
- Mark Topic as Read
- Float this Topic for Current User
- Bookmark
- Subscribe
- Mute
- Printer Friendly Page
Introduction and New Project
- Mark as New
- Bookmark
- Subscribe
- Mute
- Subscribe to RSS Feed
- Permalink
- Report Inappropriate Content
Sep-07-2015 12:24 AM
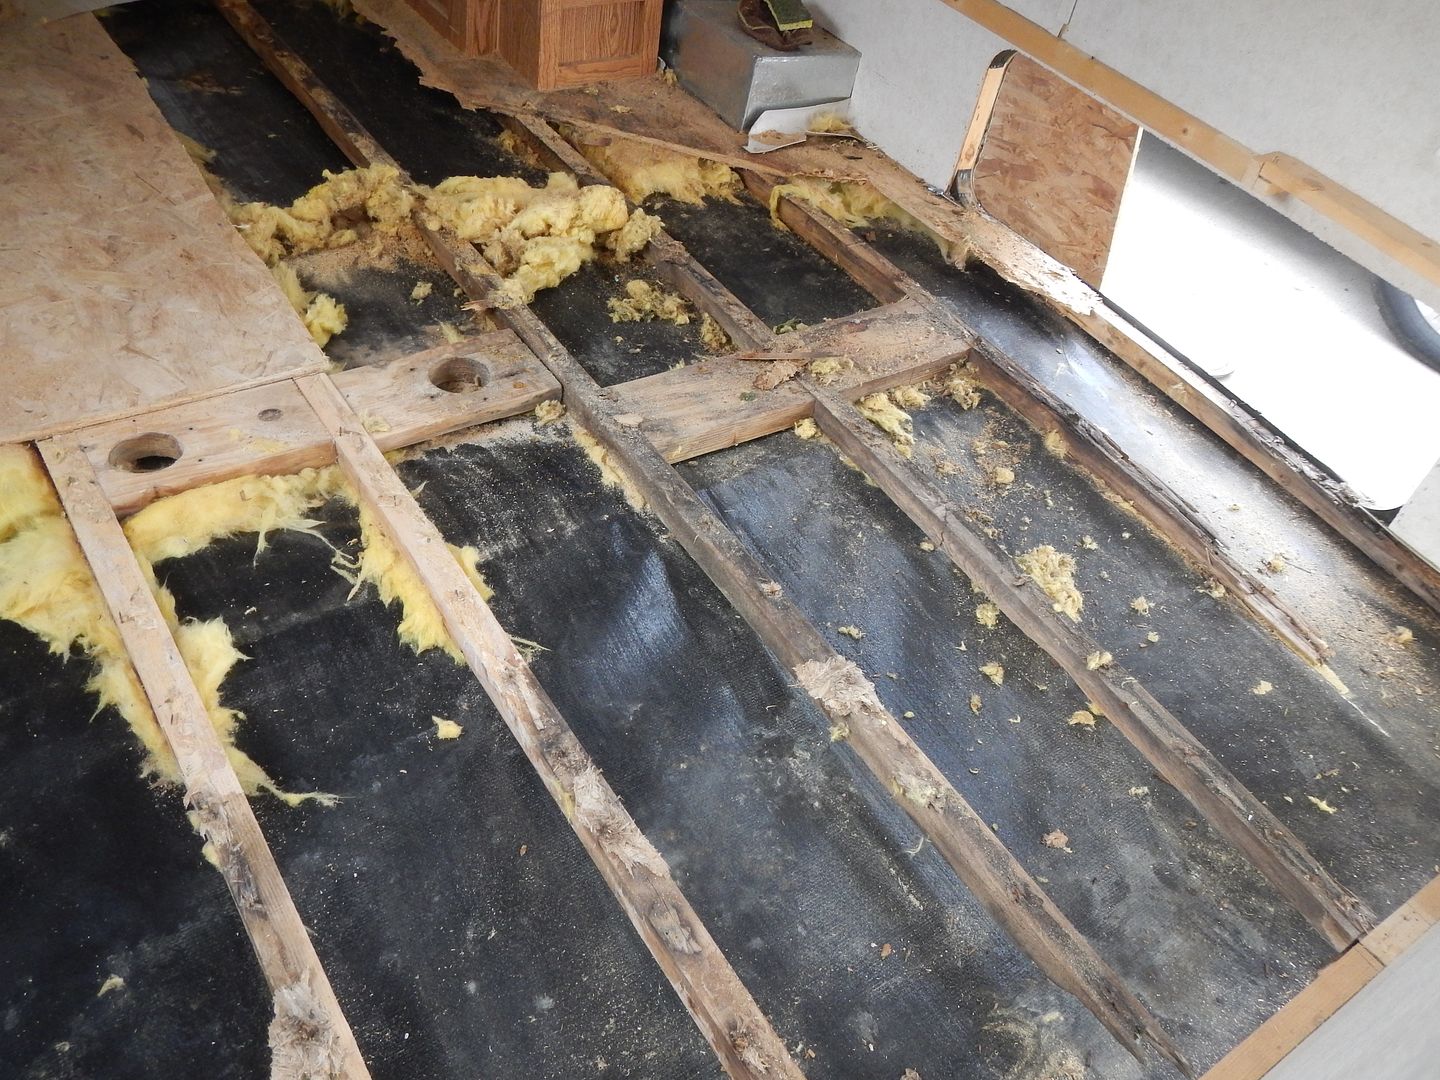
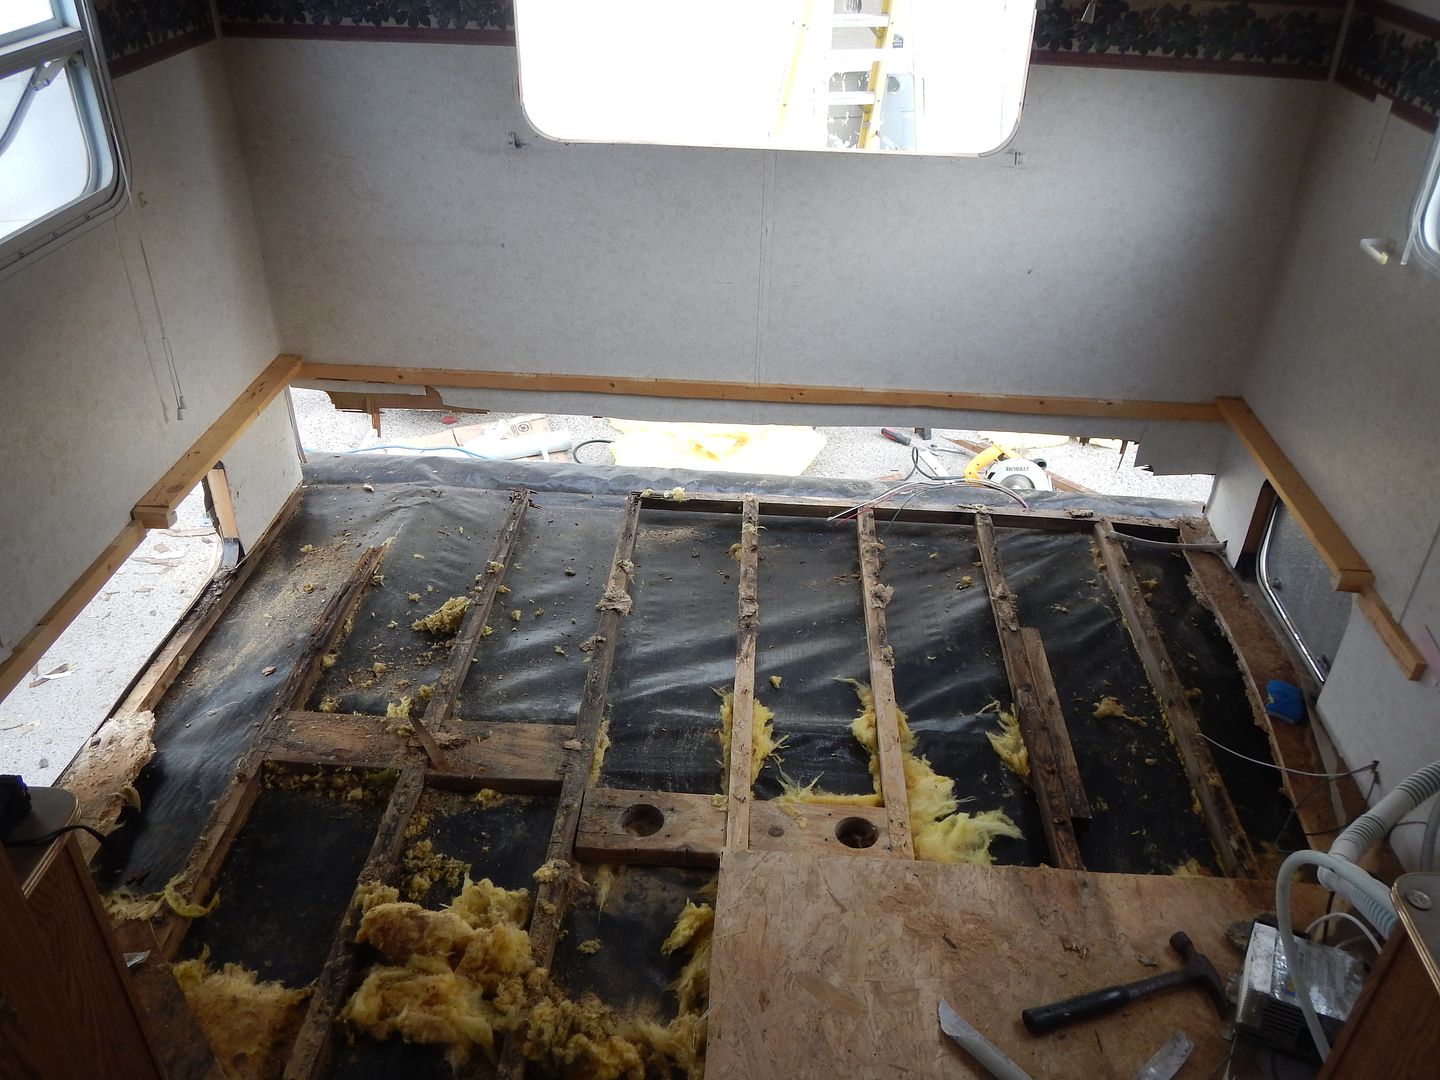
- Mark as New
- Bookmark
- Subscribe
- Mute
- Subscribe to RSS Feed
- Permalink
- Report Inappropriate Content
Aug-14-2016 01:09 PM
- Mark as New
- Bookmark
- Subscribe
- Mute
- Subscribe to RSS Feed
- Permalink
- Report Inappropriate Content
Aug-14-2016 12:47 PM
Water Heater Leak Thread
- Mark as New
- Bookmark
- Subscribe
- Mute
- Subscribe to RSS Feed
- Permalink
- Report Inappropriate Content
Aug-14-2016 12:16 PM
- Mark as New
- Bookmark
- Subscribe
- Mute
- Subscribe to RSS Feed
- Permalink
- Report Inappropriate Content
Aug-14-2016 12:04 PM
DB rebuilt the front end of his trailer after he found severe rot due to a water leak. My nephew said the shipping on the front cap cost more than the cap.
2019 F250 XLT Supercab
Just DW & me......
- Mark as New
- Bookmark
- Subscribe
- Mute
- Subscribe to RSS Feed
- Permalink
- Report Inappropriate Content
Aug-14-2016 11:55 AM
- Mark as New
- Bookmark
- Subscribe
- Mute
- Subscribe to RSS Feed
- Permalink
- Report Inappropriate Content
Sep-13-2015 10:55 PM
Trailering Texans wrote:
Looks like you are doing great. We had an older trailer we loved - with a great interior - that we had to get rid of and buy a new one because DH health would not allow this extensive a repair. But we loved our old trailer and wish we could have saved it. Good luck to you.
One more thought - get someone who knows about these kinds of roofs to look at it. If the roof is older than 12 years you probably need to think about replacing it or recoating it. It would be ashame to do this amount of work and then have another roof failure within a couple of years. As a salesman told me once - it isn't a case of will the roof leak it is WHEN will the roof leak.
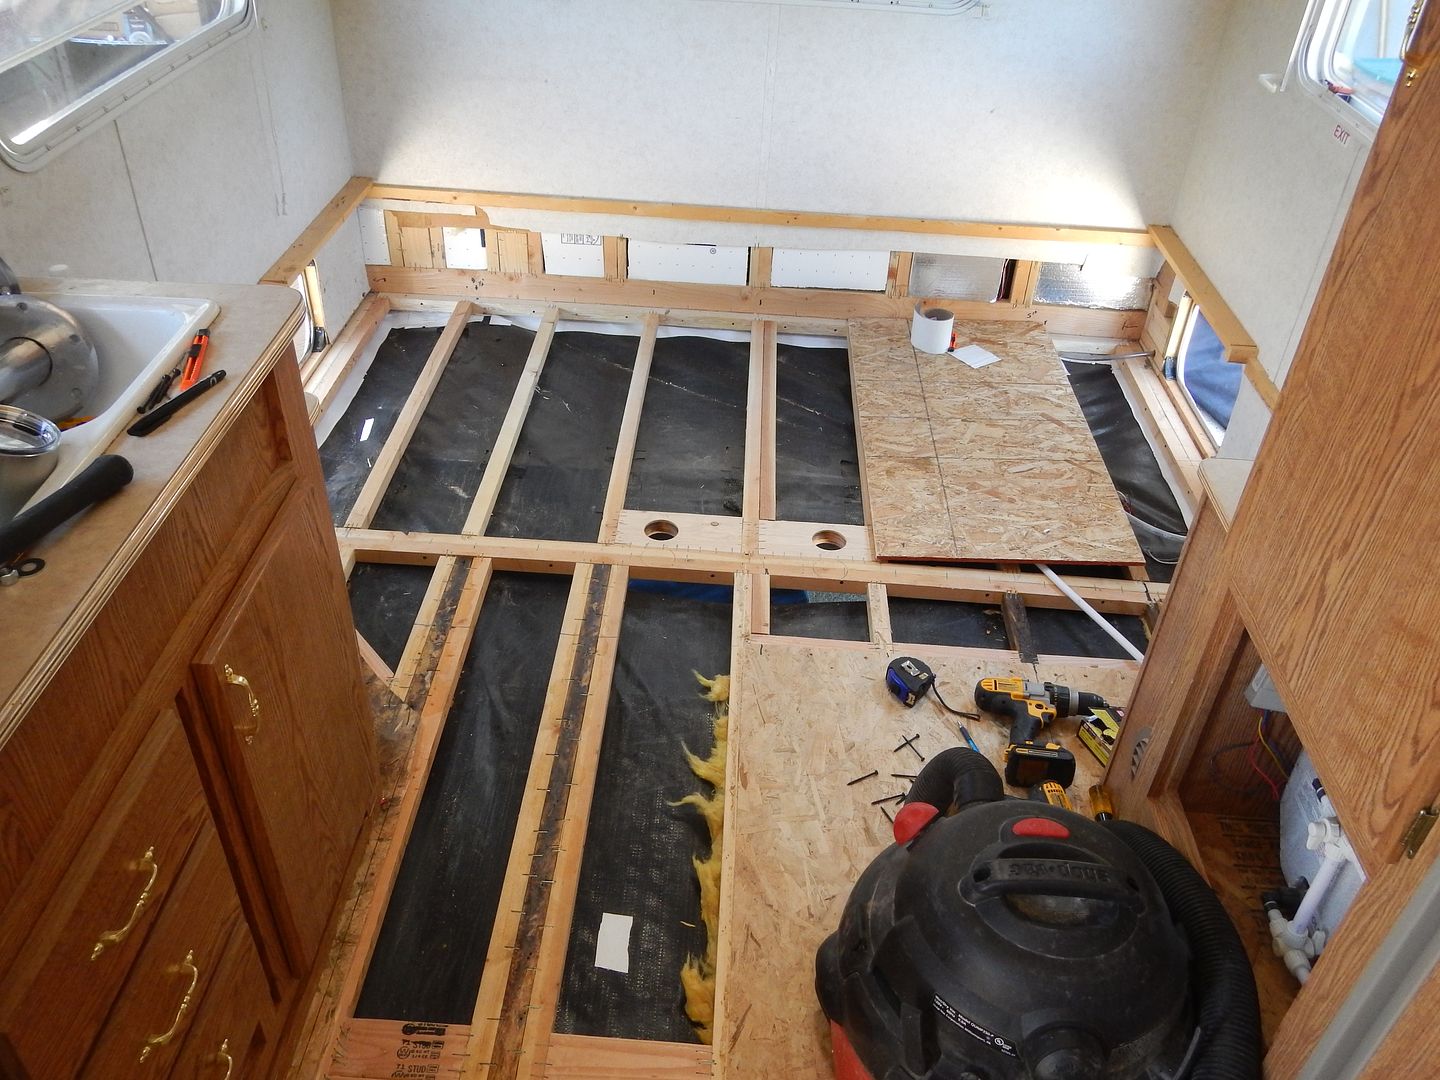
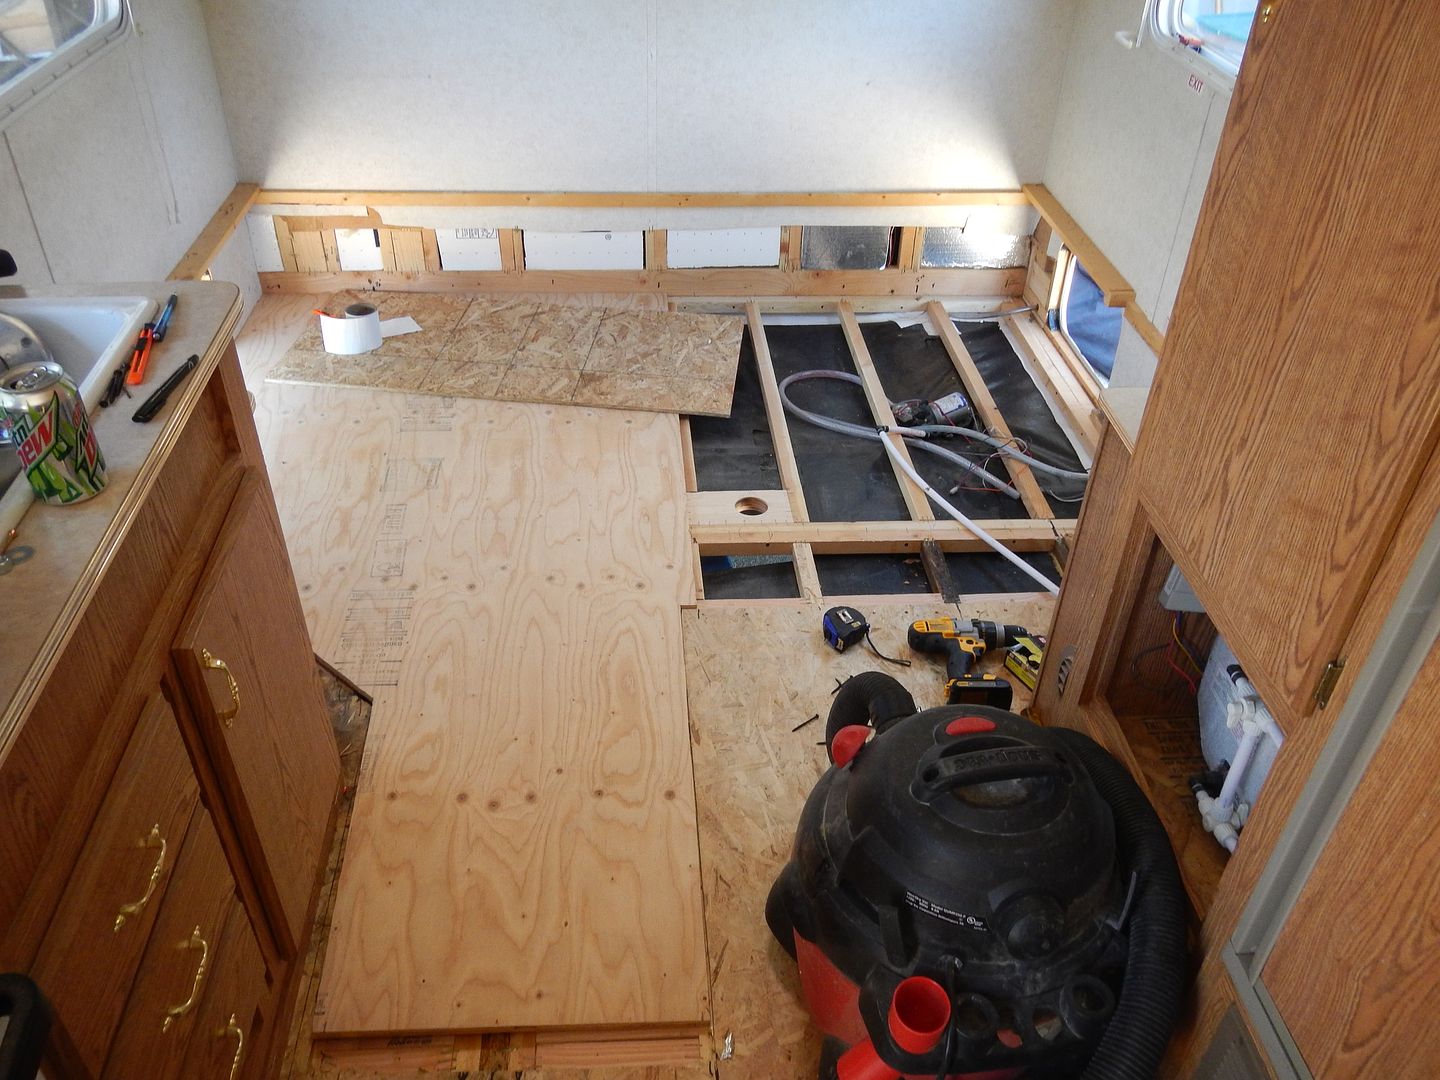
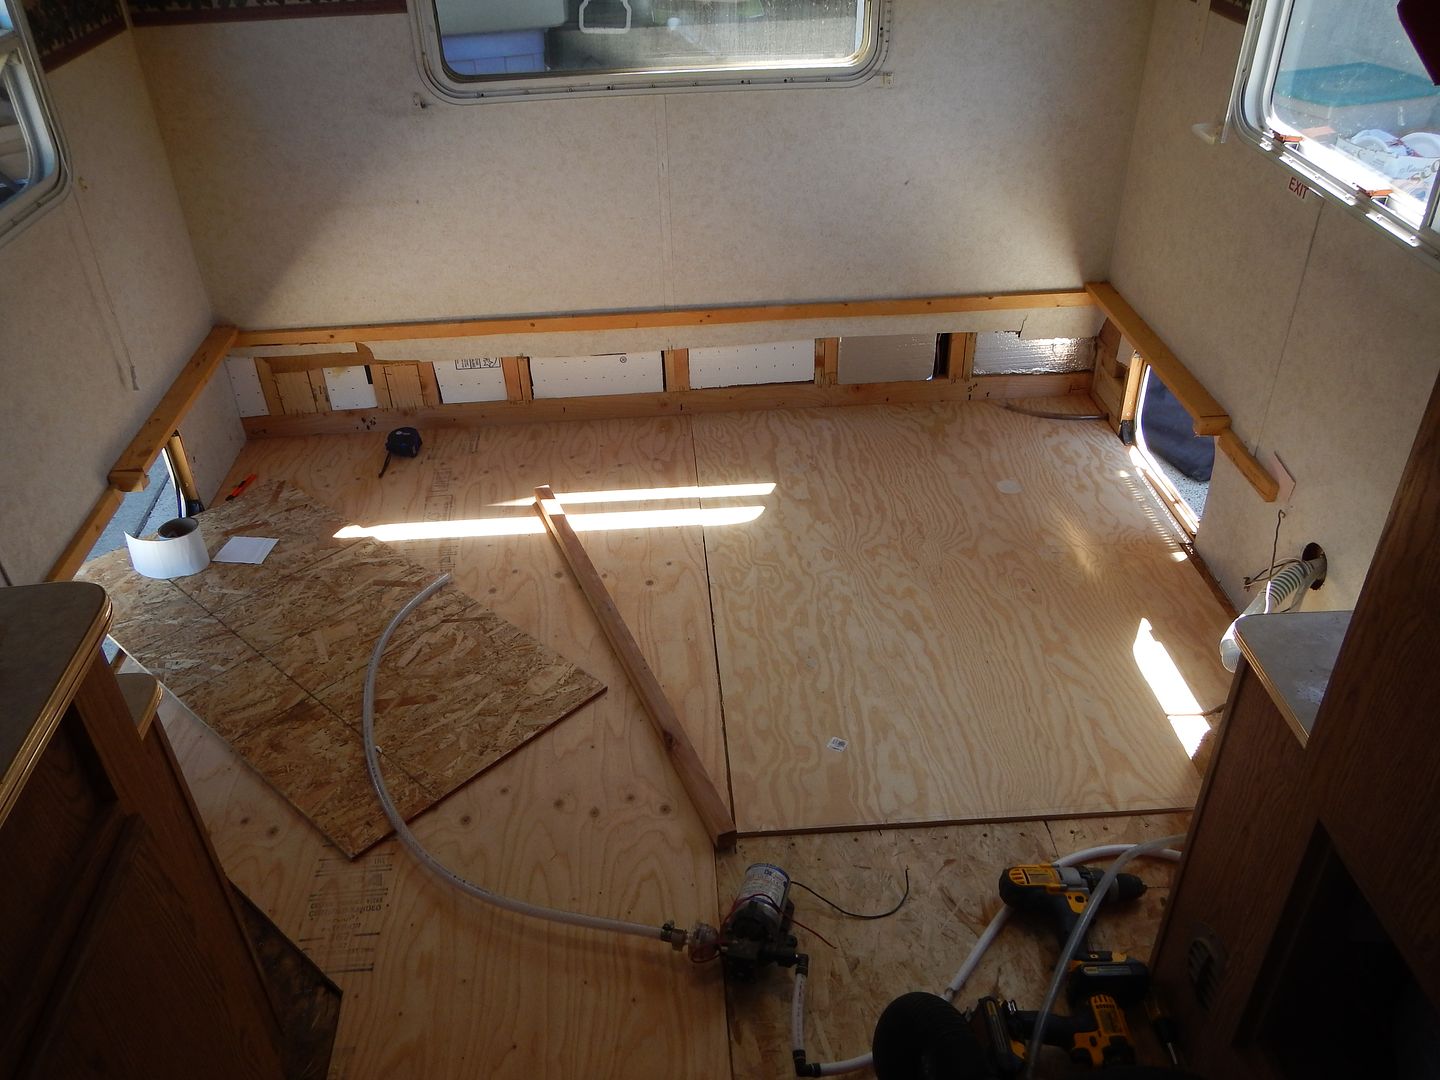
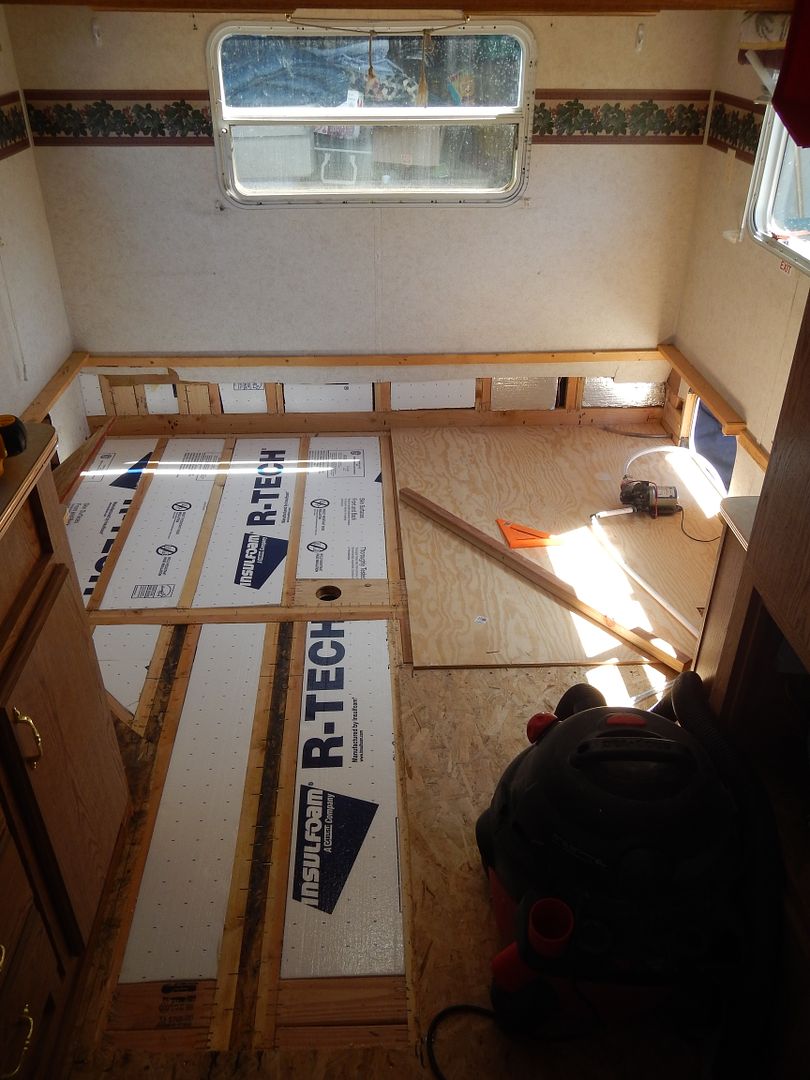
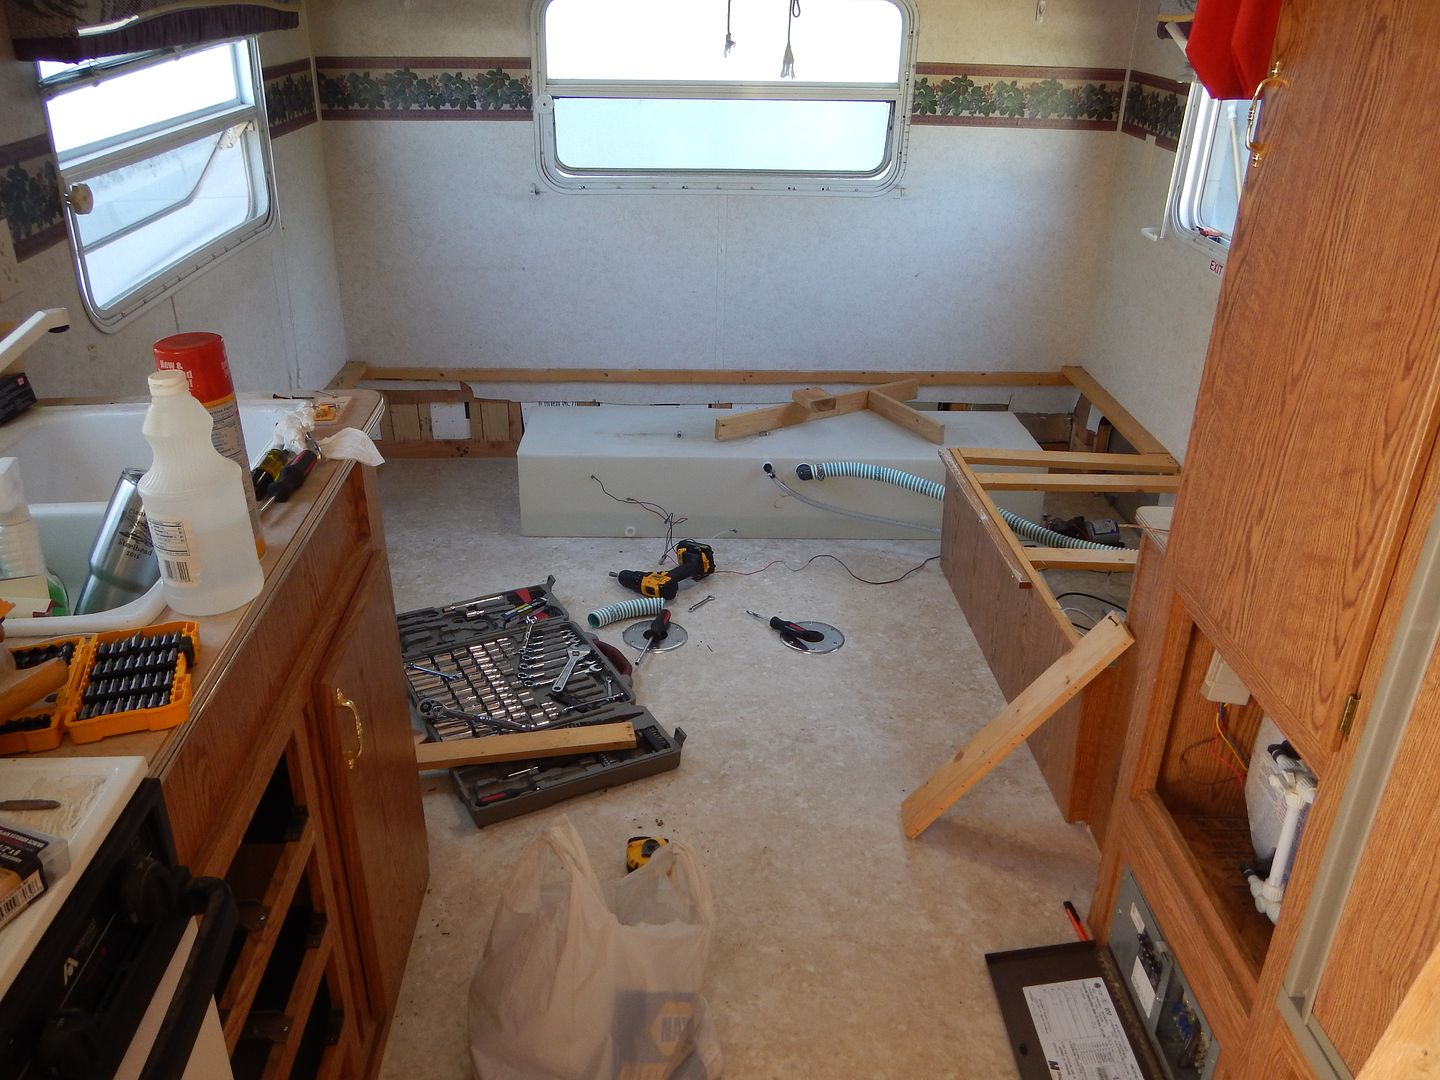
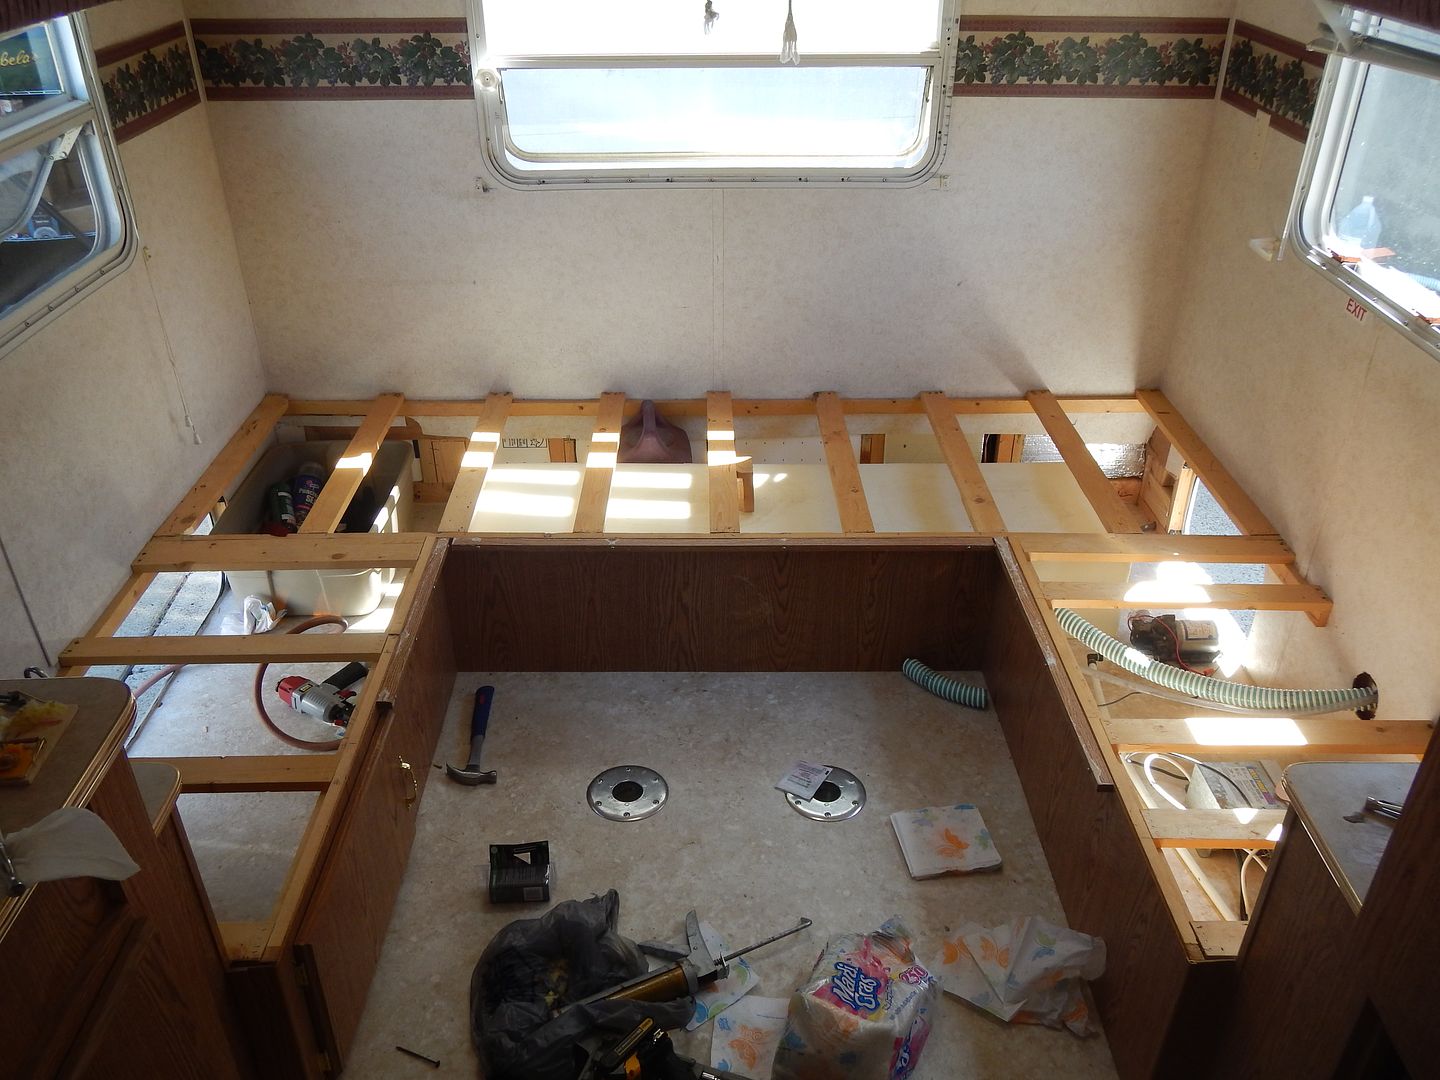
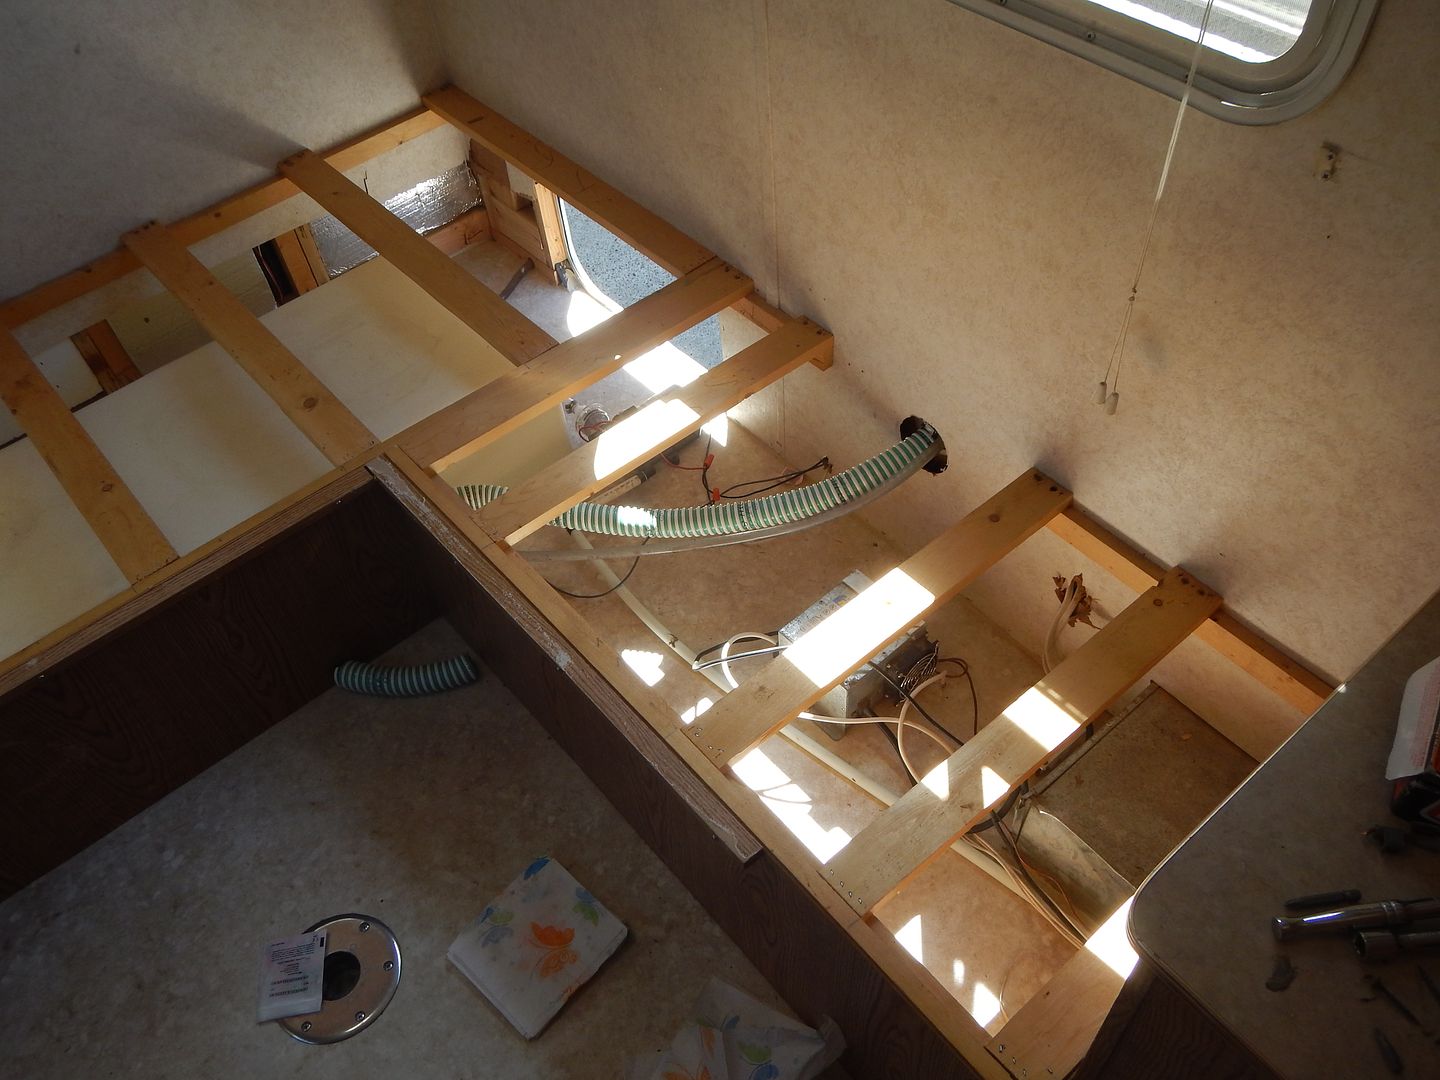
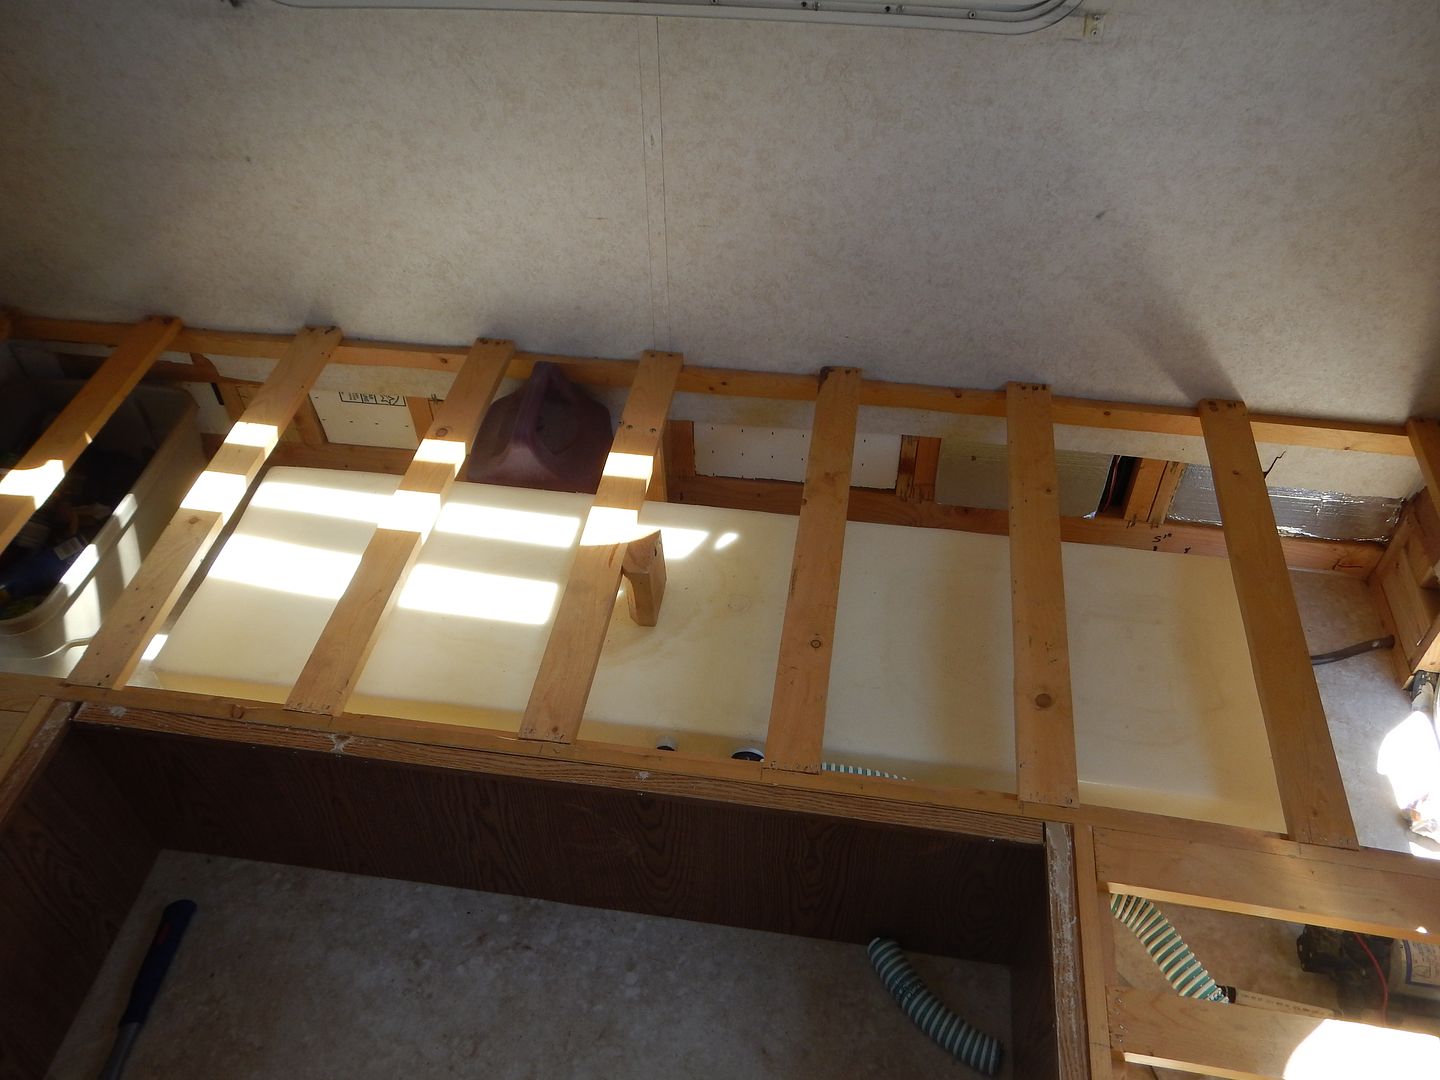
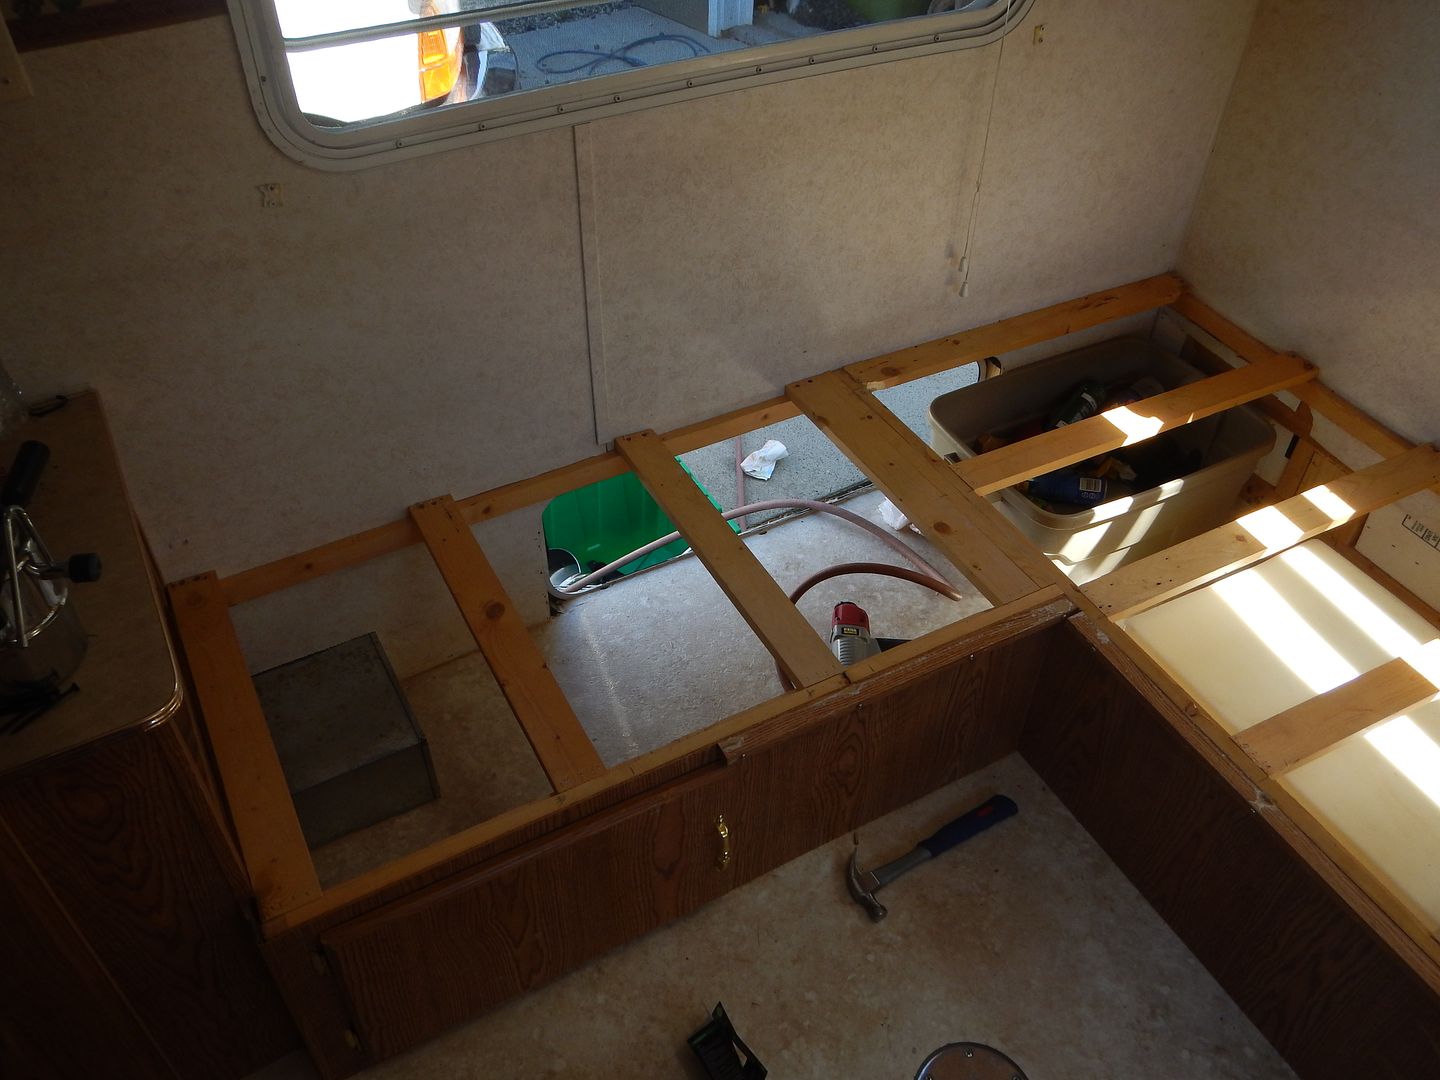
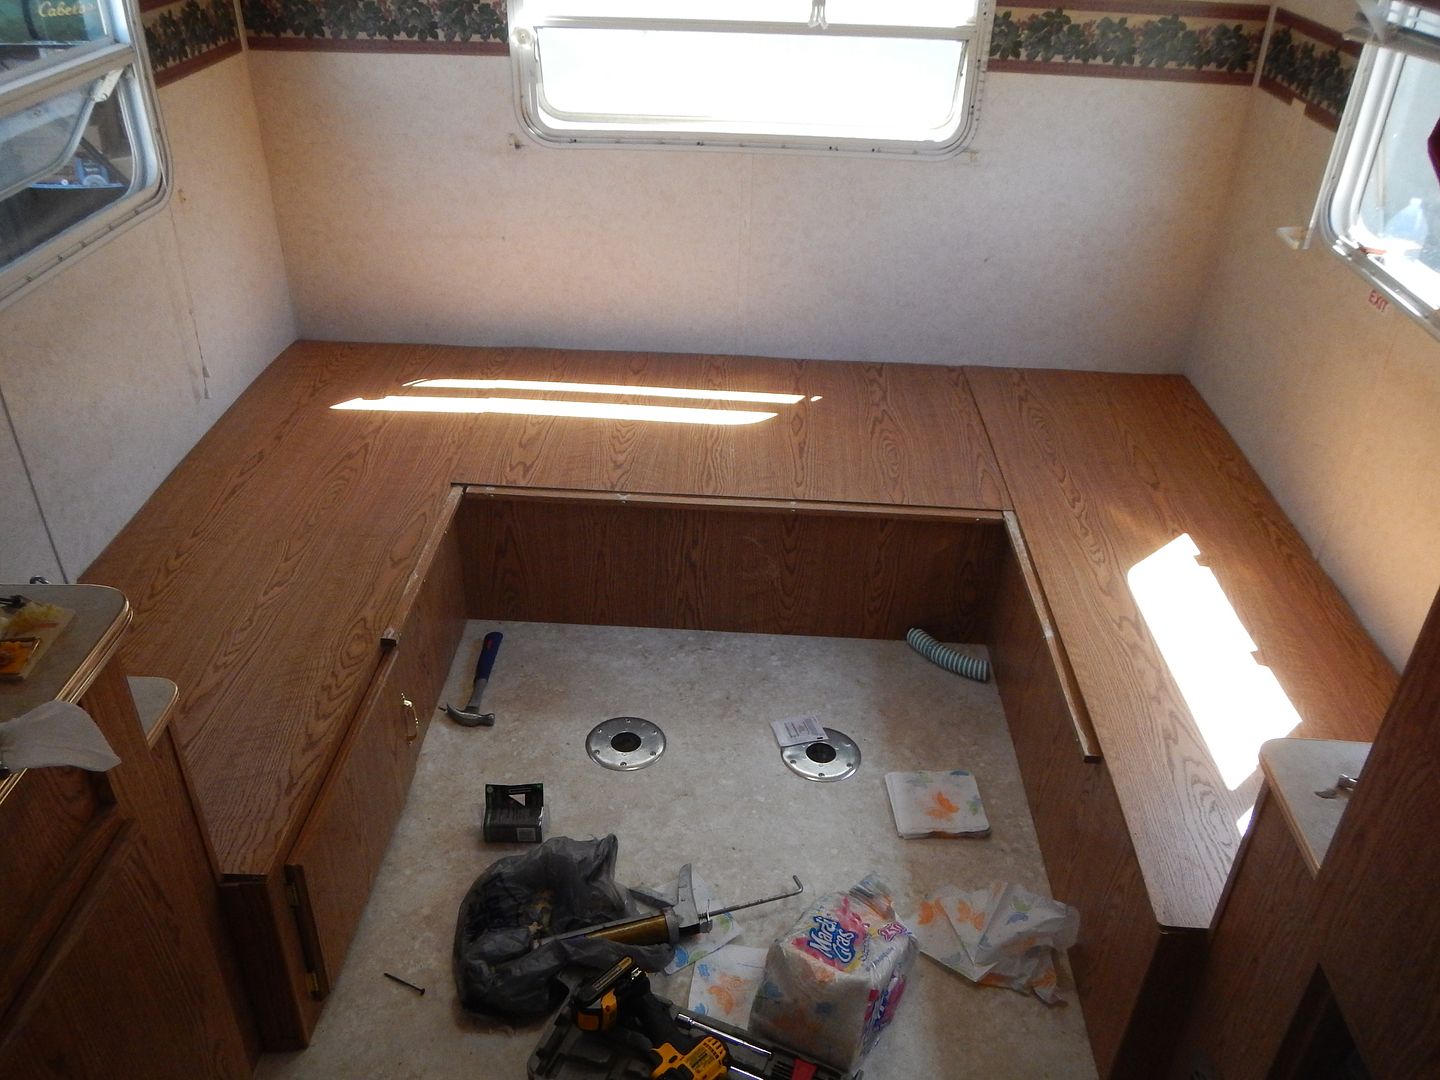
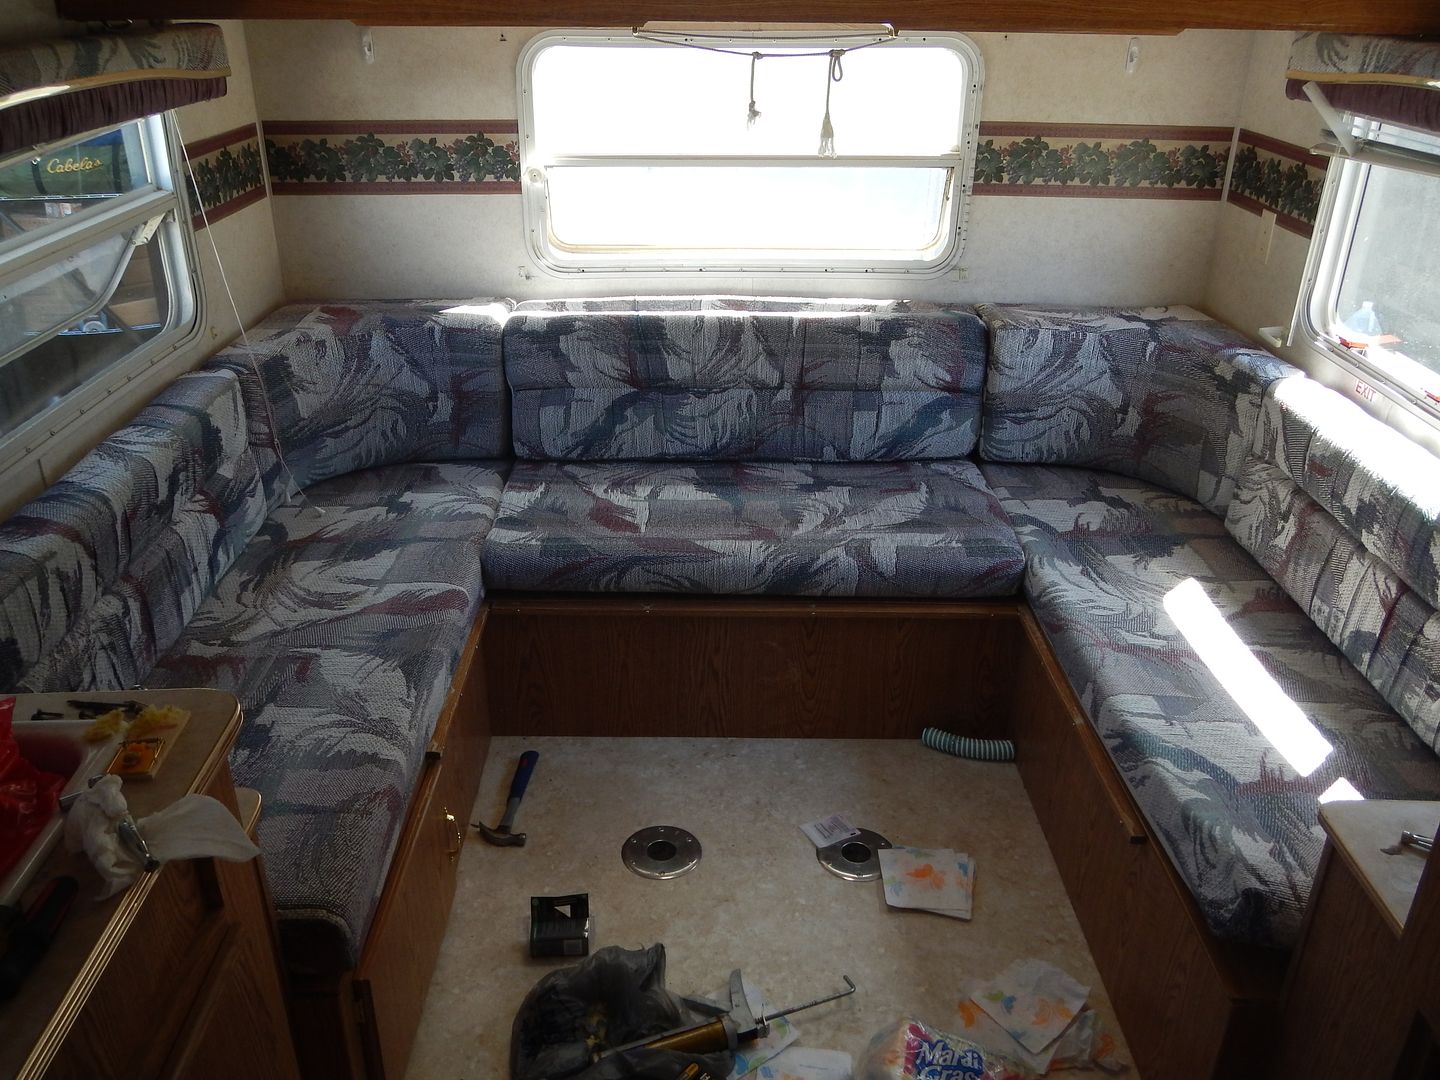
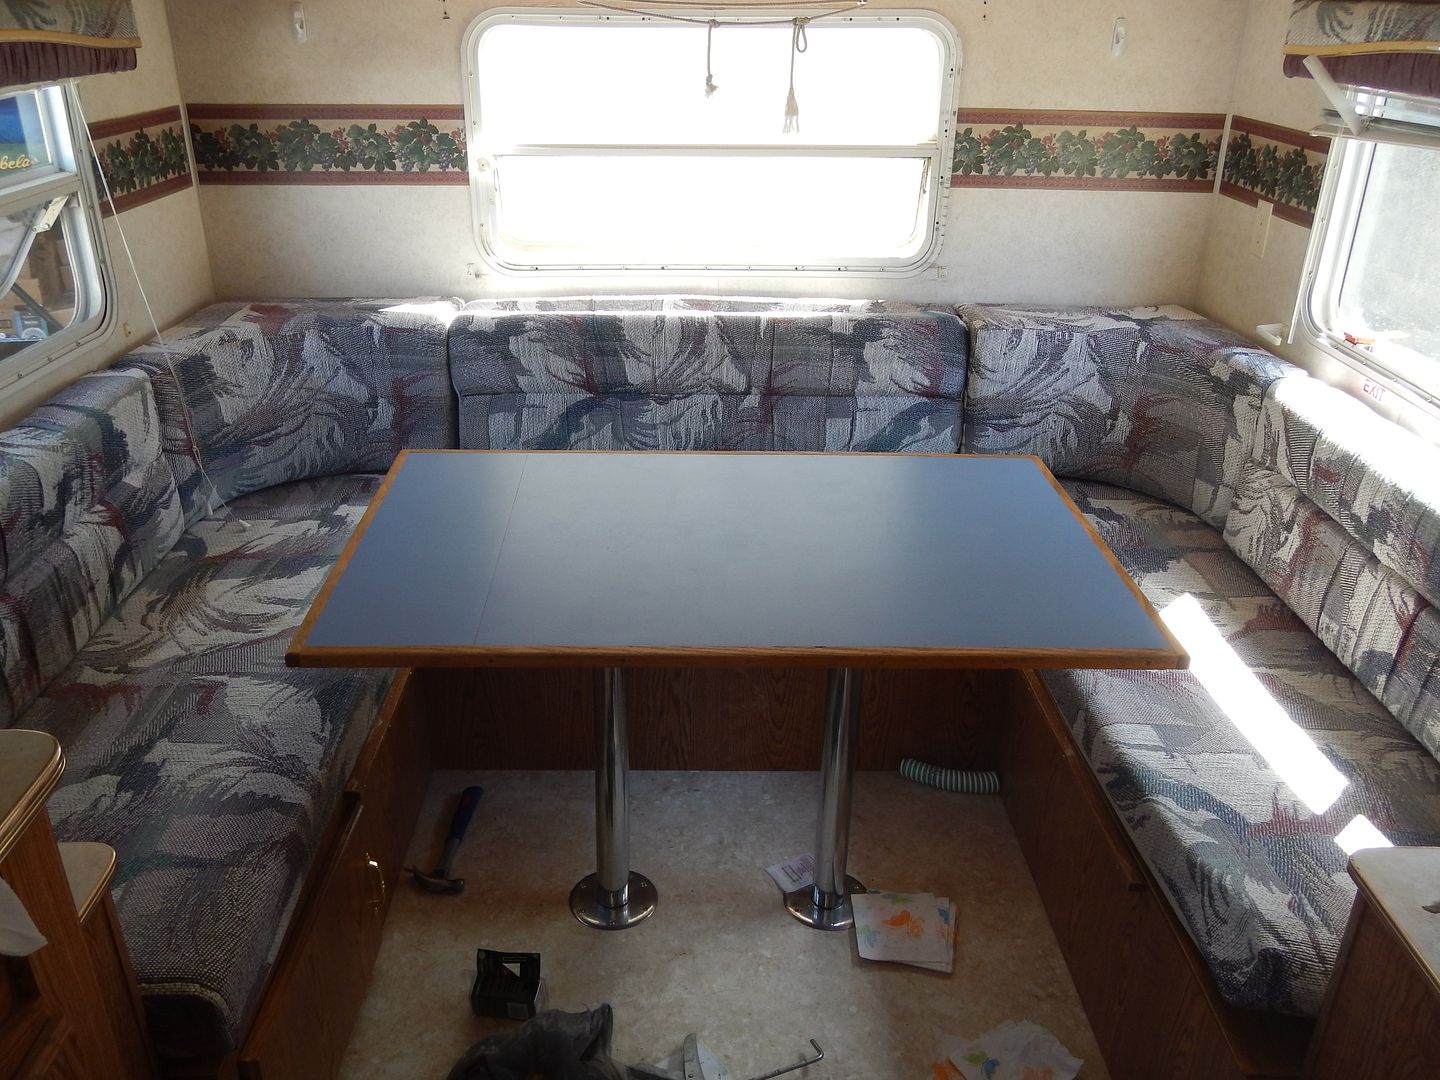
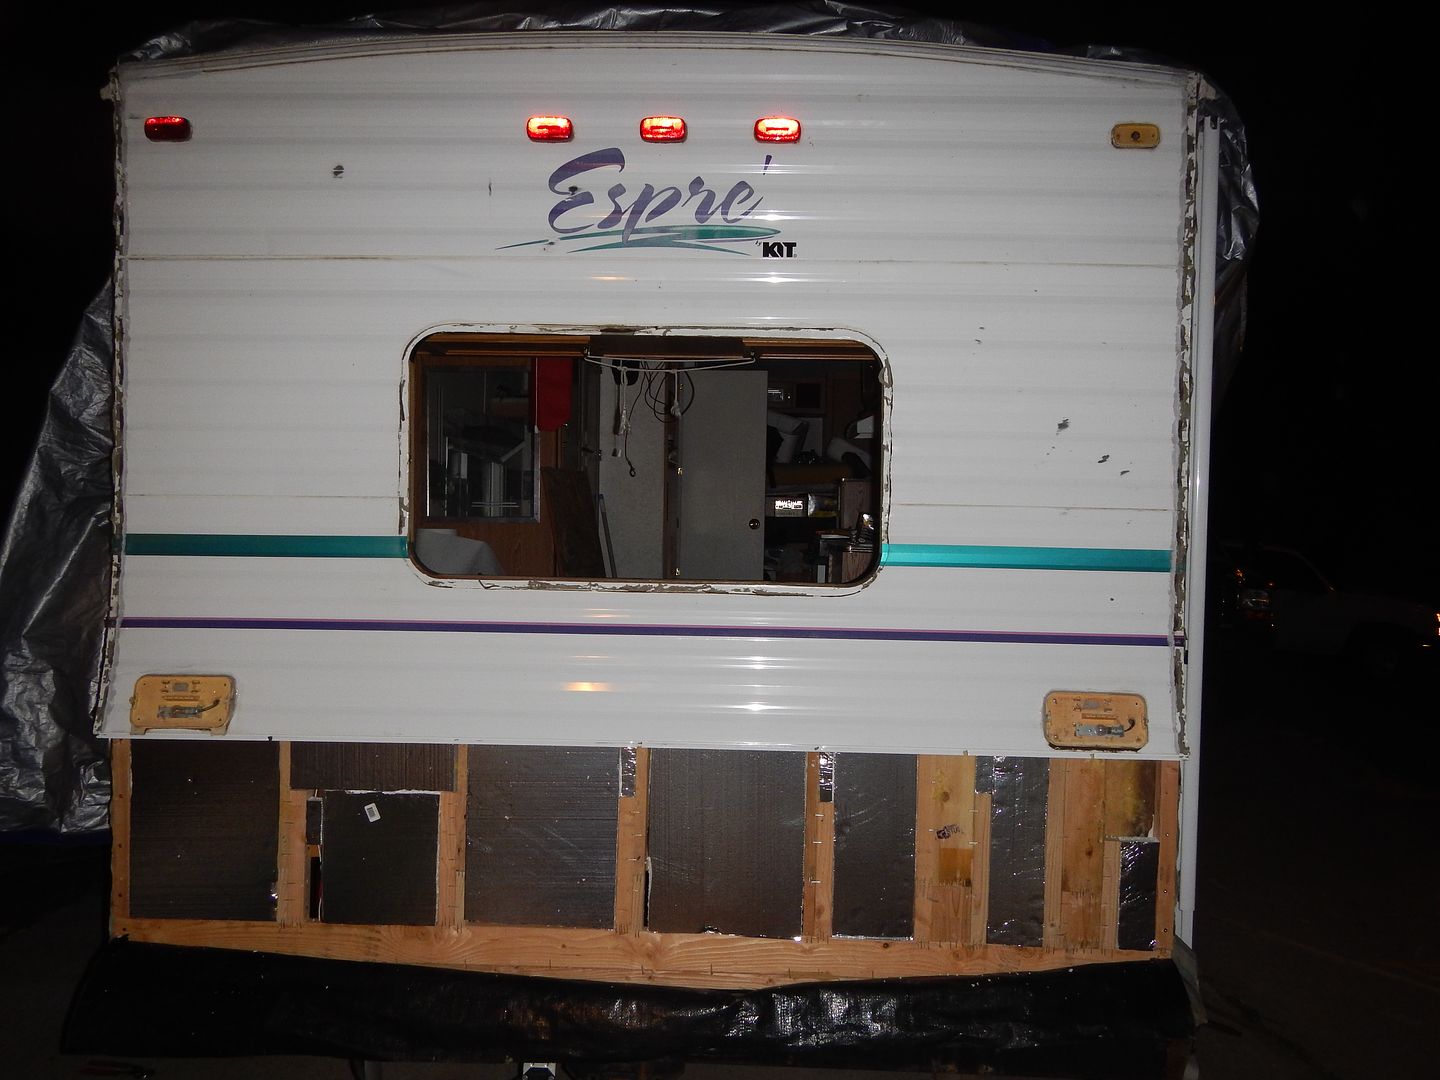
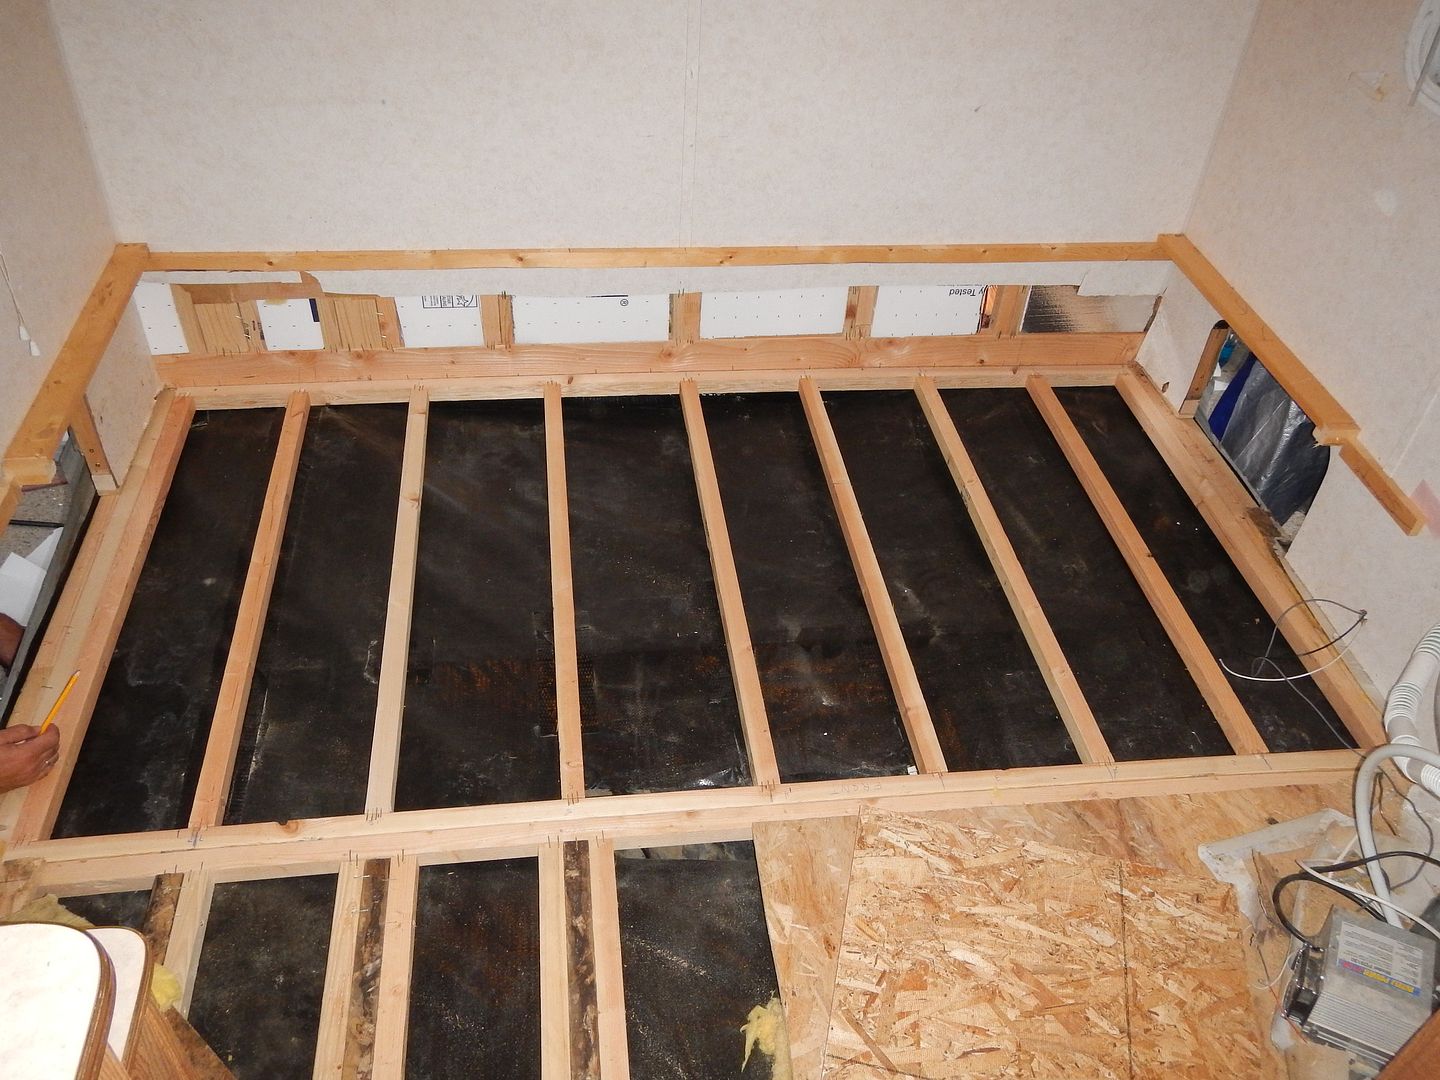
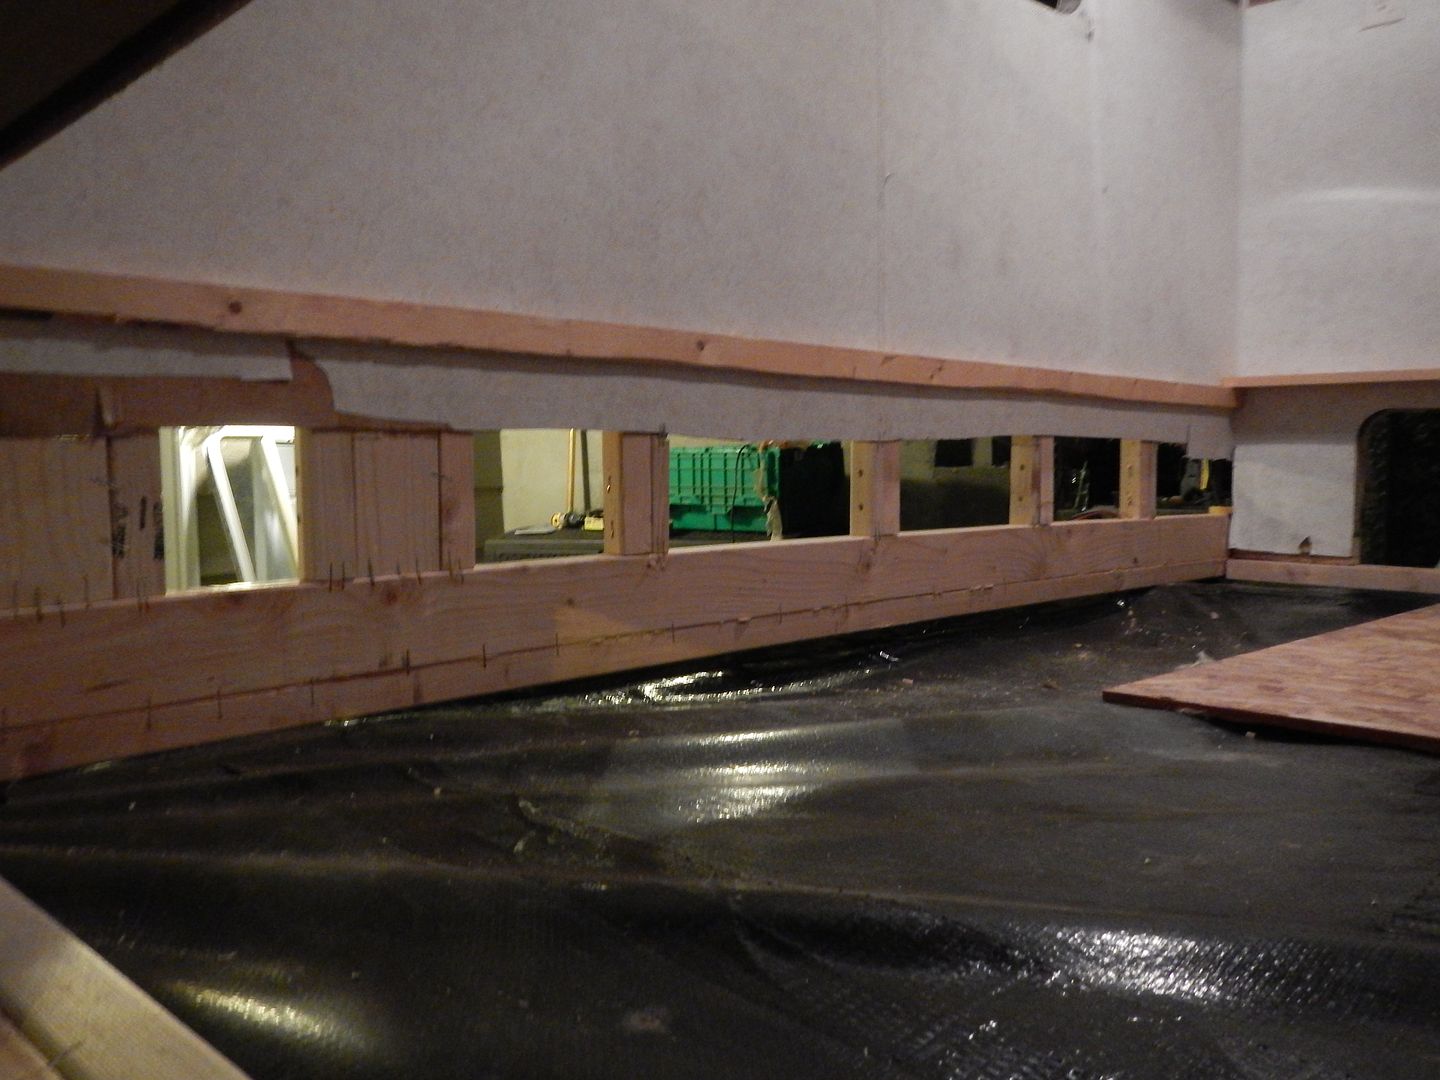
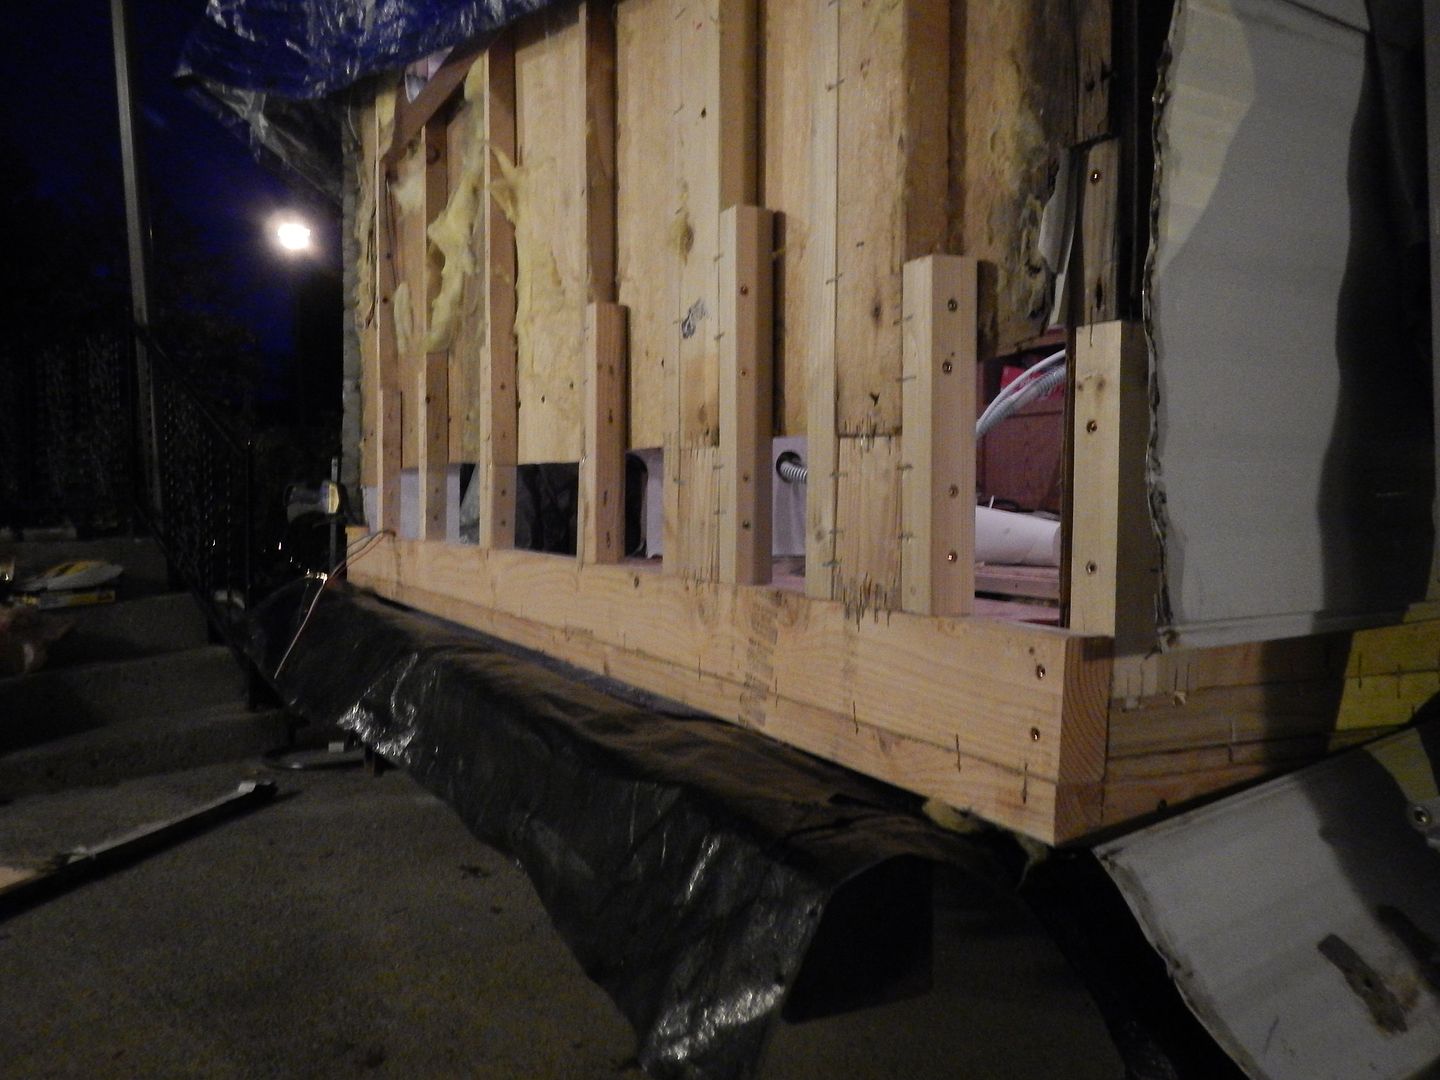
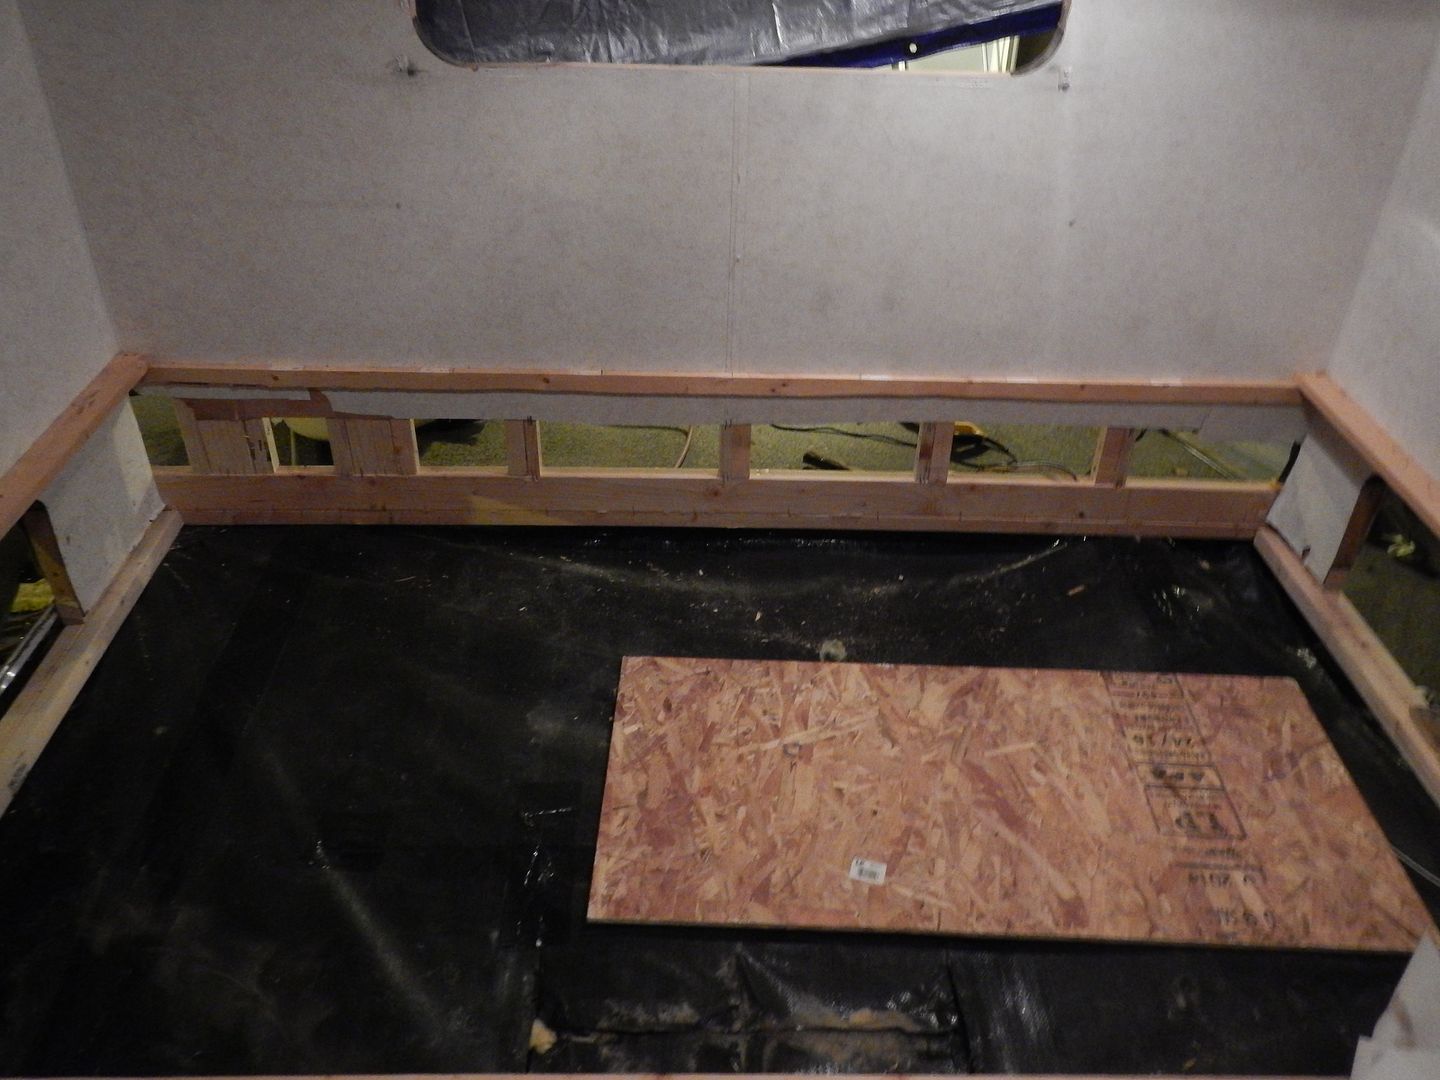
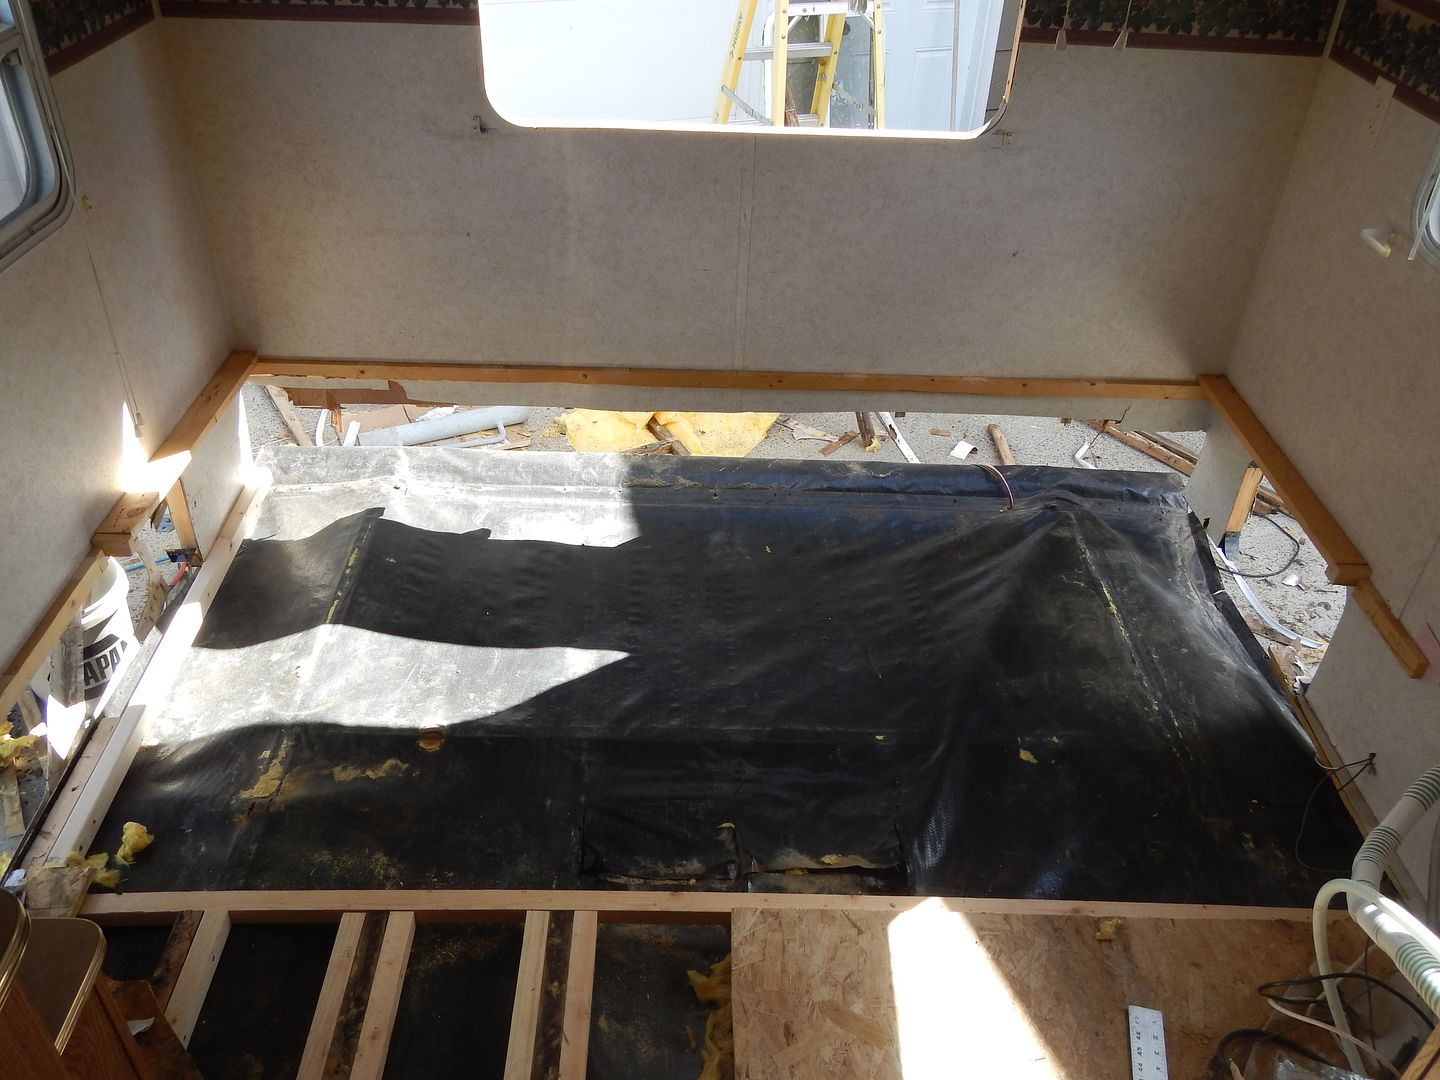
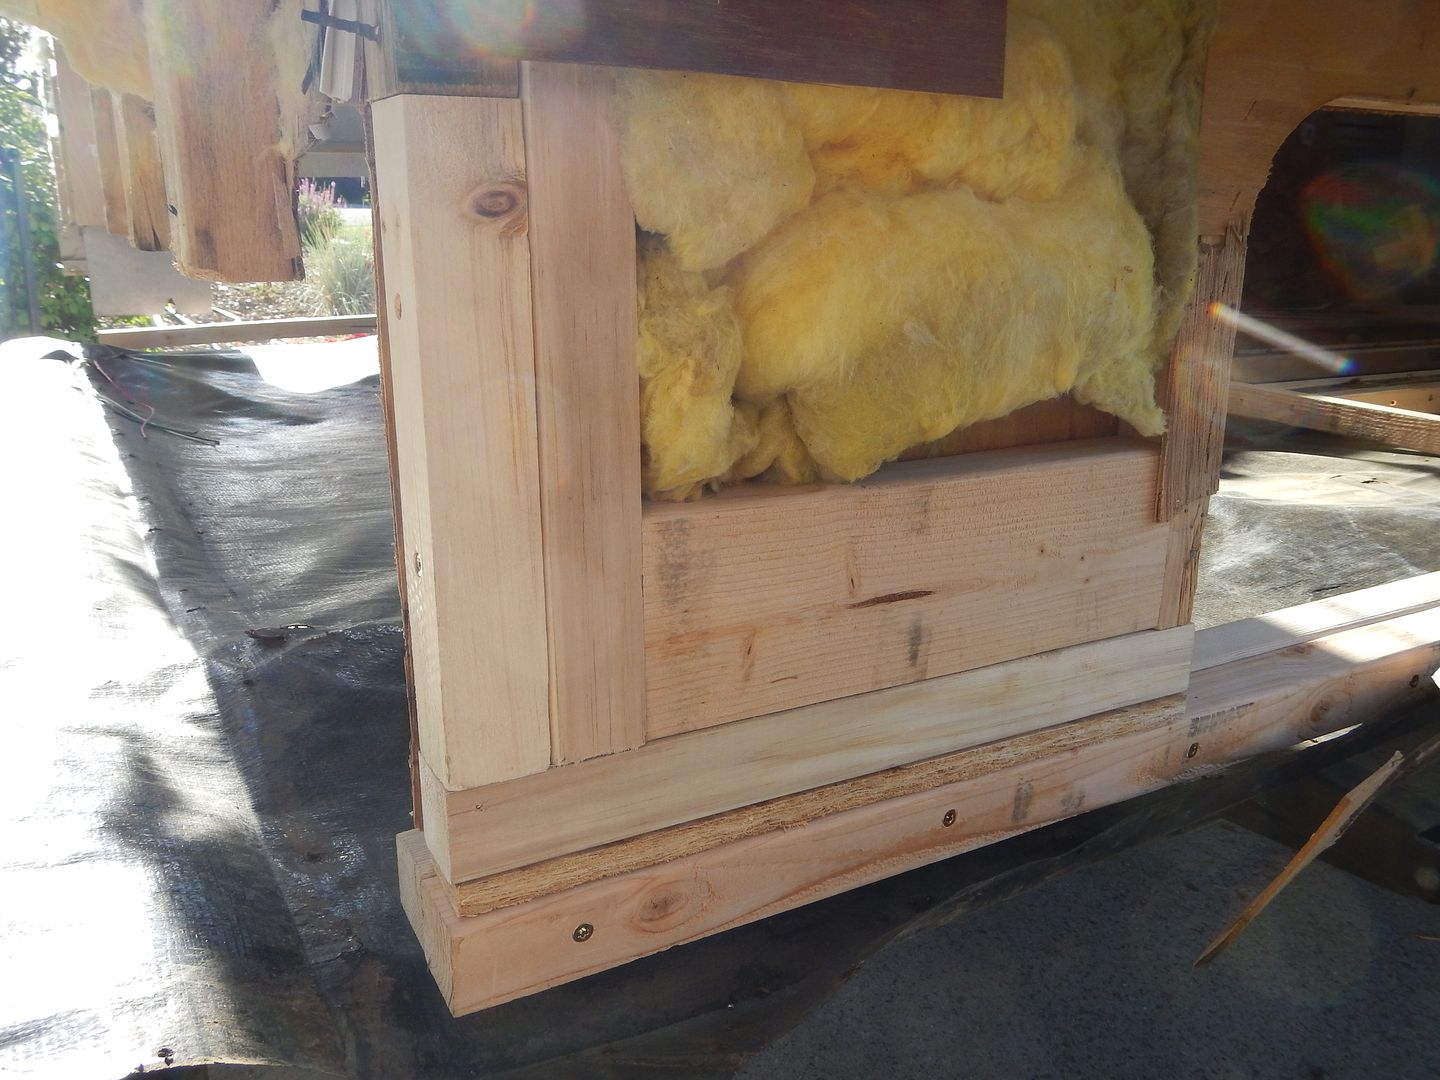
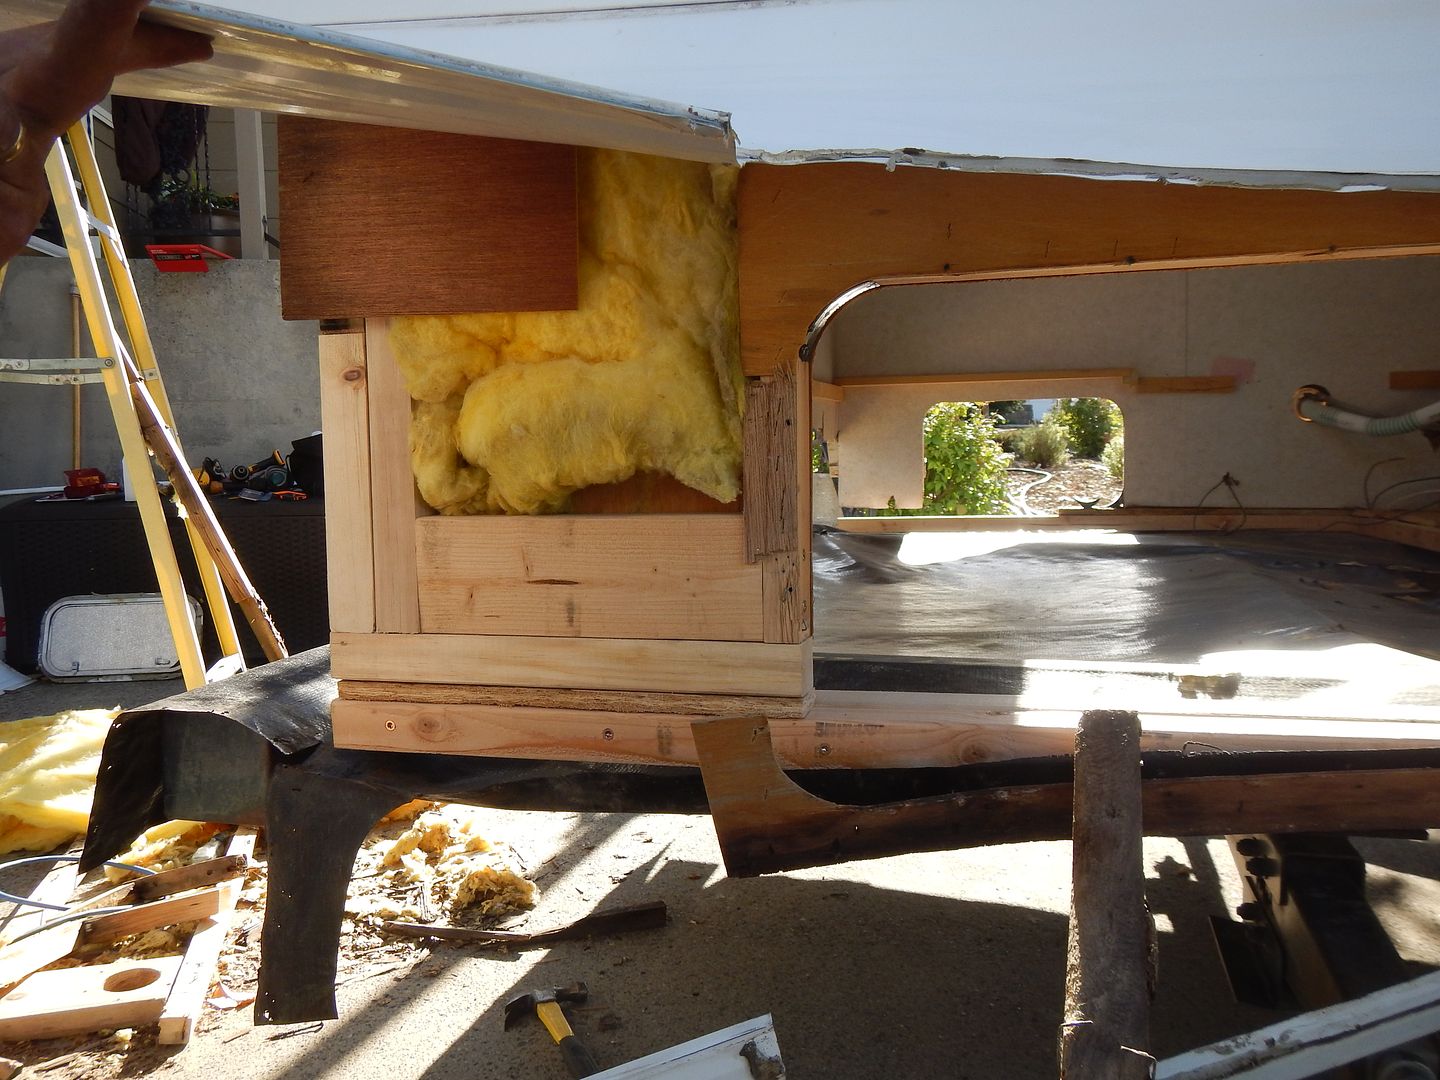
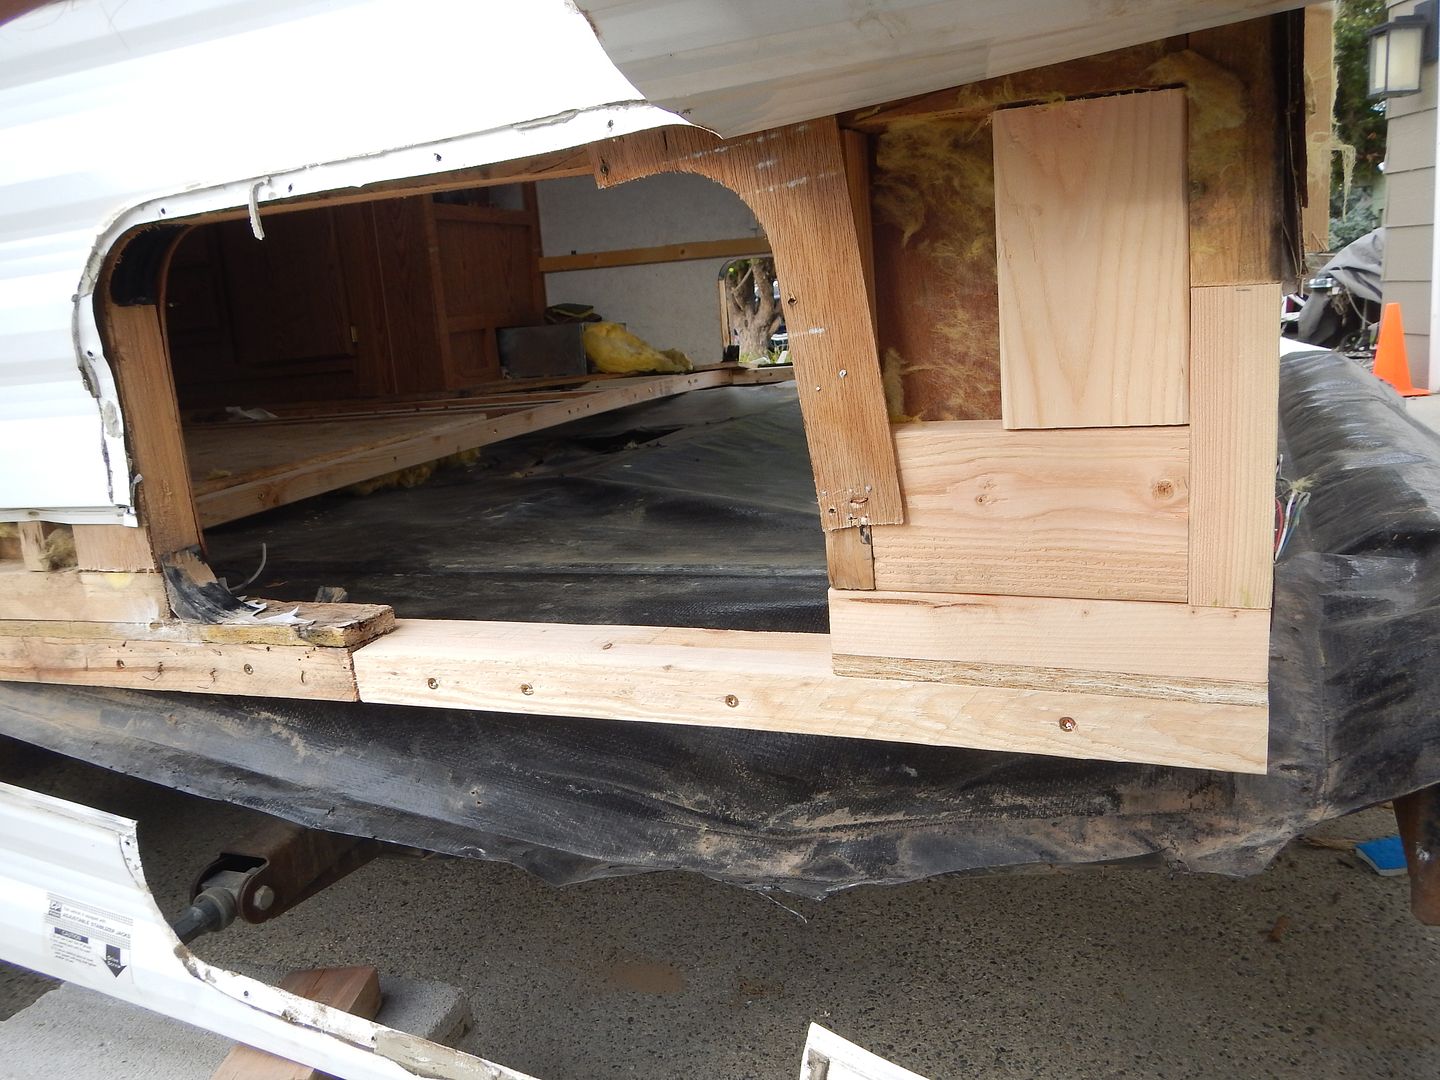
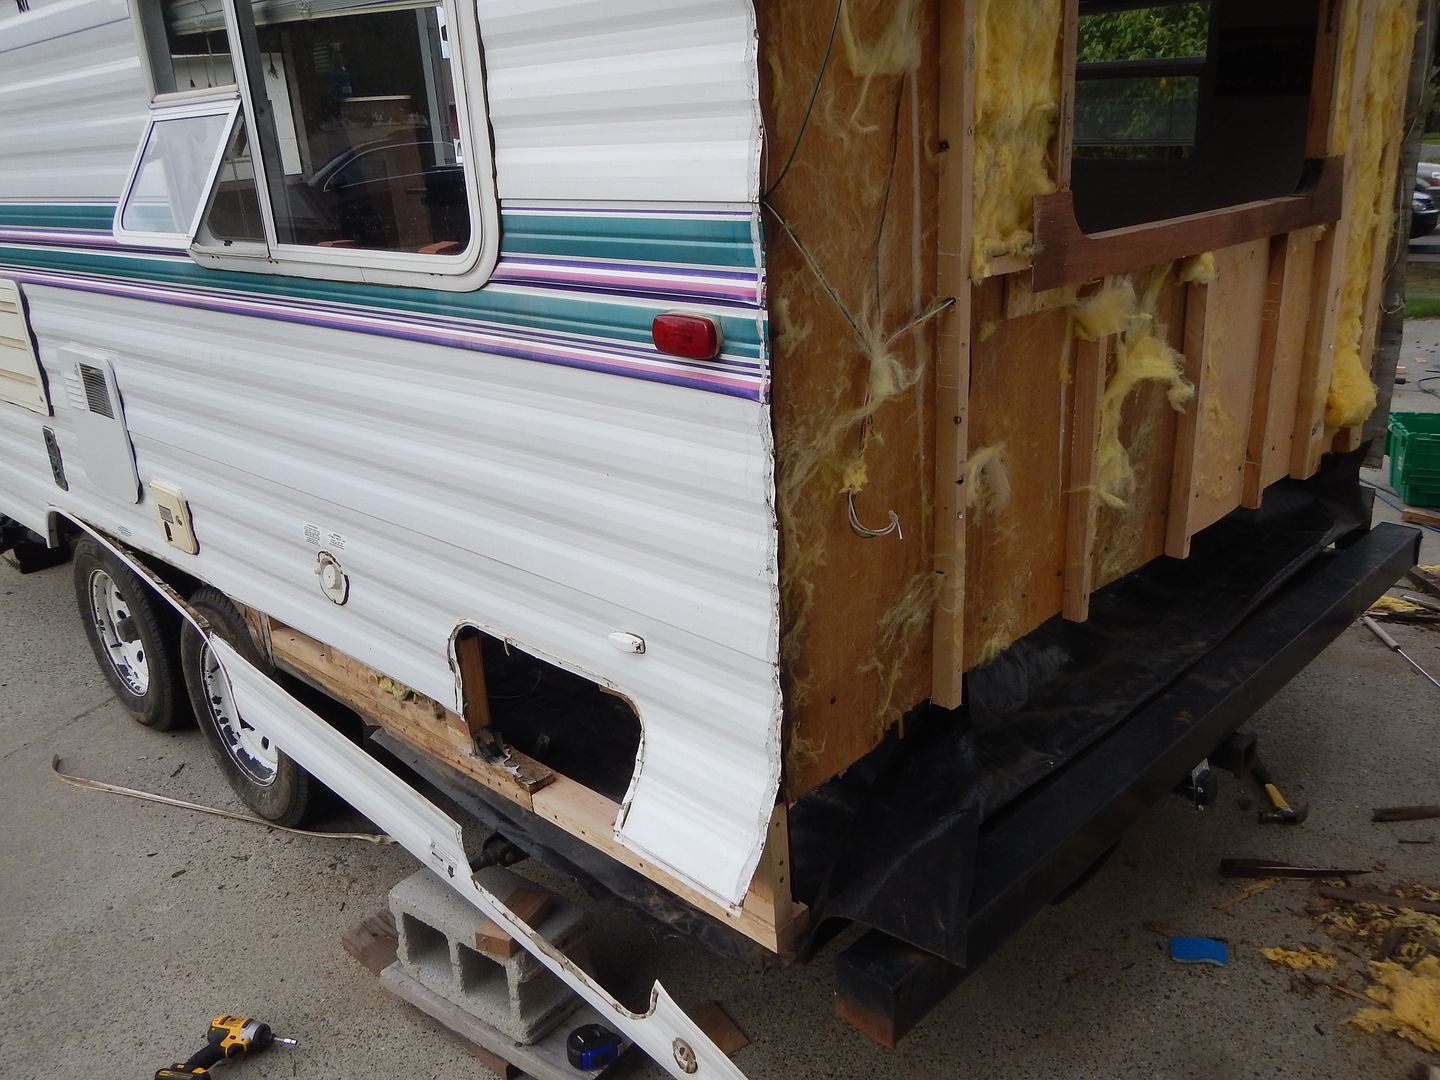
Was just having the "roof conversation" with my wife this evening. I expect I'll end up recovering it as the roof is in good shape currently. I've ordered an ADCO All Weather / Wind cover for it during the winter. I am just looking at it as an extra level of protection. The camper sits next to our garage and out of the wind so hope to get a good life span out of it. Have made considerable progress since the last post and will post a few more pics tomorrow possibly. Floor is framed, bottom membrane is reinforced and patched, corner studs are in and siding is all back in place with windows and hatches installed and sealed. Needed to get it done this weekend as I'm gon all week and rain is in the forecast. The interior is next and I think I can get most of that done next weekend. Will do a thorough "rain / leak" check prior to installing the flooring and will do it at various states of level for the camper. Here's the floor framing. Lucked out and the "deck" I built slipped right in. Found a sheeting stapler (1" crown / 1" coated staples) to be pretty much identical to what the factory used for assembly and what a difference that made.
- Mark as New
- Bookmark
- Subscribe
- Mute
- Subscribe to RSS Feed
- Permalink
- Report Inappropriate Content
Sep-13-2015 10:31 AM
One more thought - get someone who knows about these kinds of roofs to look at it. If the roof is older than 12 years you probably need to think about replacing it or recoating it. It would be ashame to do this amount of work and then have another roof failure within a couple of years. As a salesman told me once - it isn't a case of will the roof leak it is WHEN will the roof leak.
- Mark as New
- Bookmark
- Subscribe
- Mute
- Subscribe to RSS Feed
- Permalink
- Report Inappropriate Content
Sep-09-2015 12:28 AM
- Mark as New
- Bookmark
- Subscribe
- Mute
- Subscribe to RSS Feed
- Permalink
- Report Inappropriate Content
Sep-07-2015 06:20 PM
- Mark as New
- Bookmark
- Subscribe
- Mute
- Subscribe to RSS Feed
- Permalink
- Report Inappropriate Content
Sep-07-2015 05:37 PM
path1 wrote:
(I already posted above and thought of another question.)
Not being noisy, but what is your experience level fixing outside skins and getting roof tucked under on RV's?
I ask because it is important to use right materials. And people might be able to post better replies if they know your level of "RV fixing ability" is.
It's all very simple but very time consuming and fixing it right the first time will save you in long run.
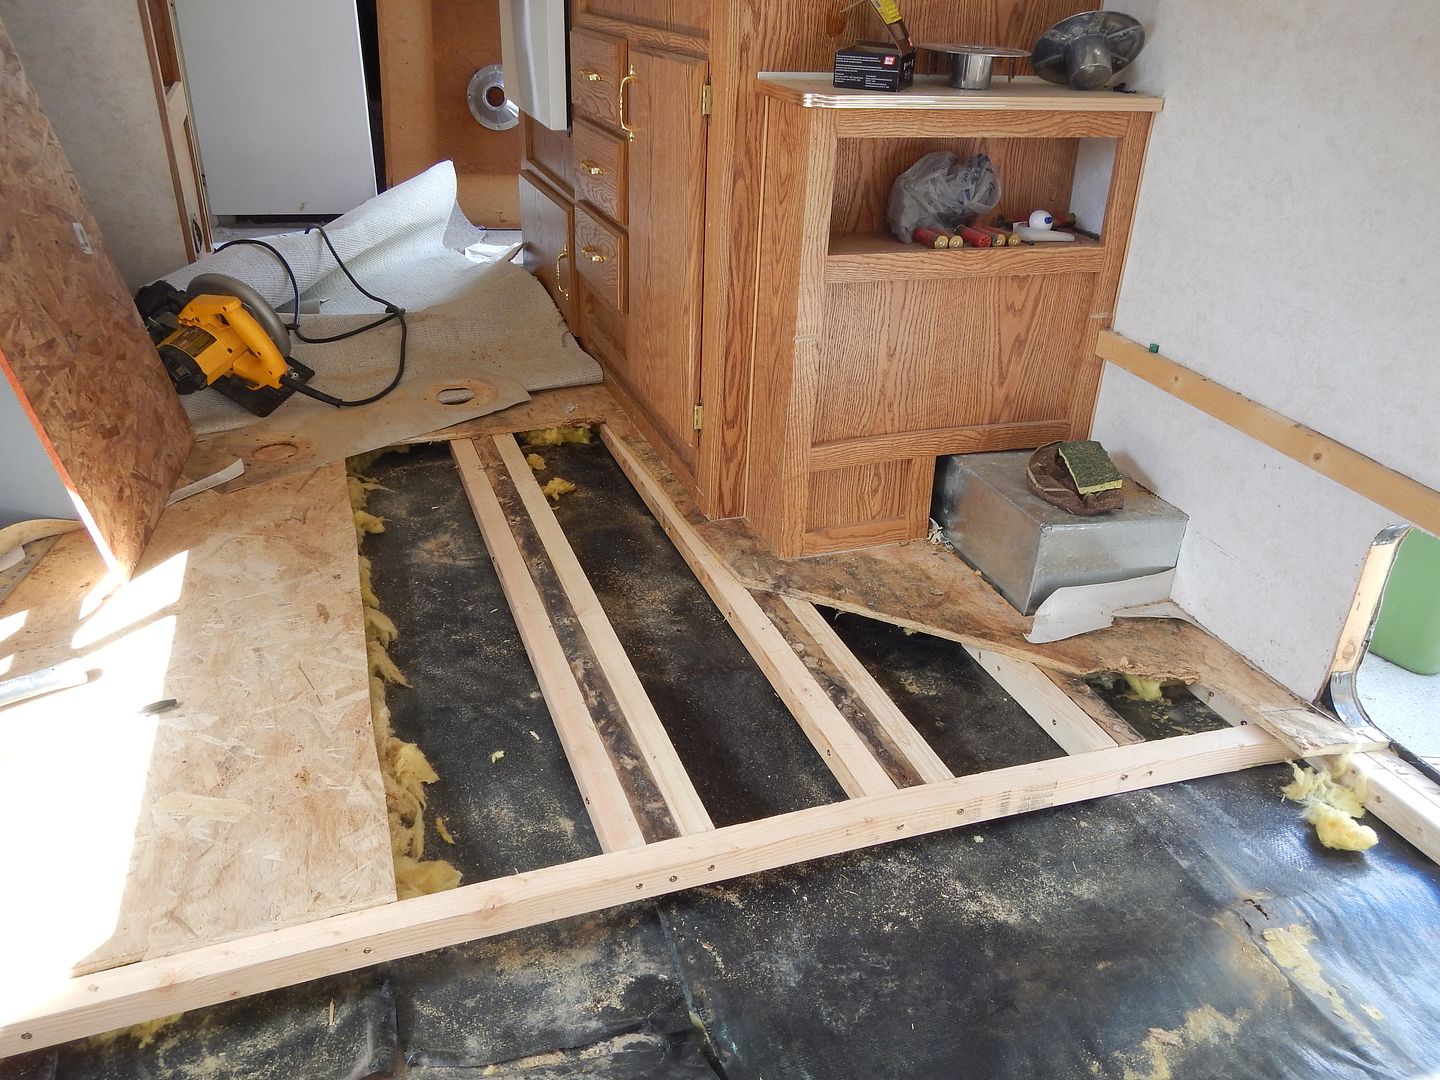
Please...I invite "nosey"...this is my first trip down this road and learning along the way. Fortunate to have a friend a couple thousand miles away who has worked in the RV industry for a dozen years and he's been providing advice. Will post a few pics of the progress from today and am praying that what looks like gray skies that could have moisture in them either is a figment of my imagination or that it misses us. The camper is partially tarped in preparation, but no dount it's gonna get wet if we get a shower. Back to the rain prep...thanks!
- Mark as New
- Bookmark
- Subscribe
- Mute
- Subscribe to RSS Feed
- Permalink
- Report Inappropriate Content
Sep-07-2015 11:36 AM
Not being noisy, but what is your experience level fixing outside skins and getting roof tucked under on RV's?
I ask because it is important to use right materials. And people might be able to post better replies if they know your level of "RV fixing ability" is.
It's all very simple but very time consuming and fixing it right the first time will save you in long run.
2013 Arctic Fox 25W... Wife "doll house" for longer snowbird trips
2001 "The Mighty Dodge"... tow vehicle for "doll house"
- Mark as New
- Bookmark
- Subscribe
- Mute
- Subscribe to RSS Feed
- Permalink
- Report Inappropriate Content
Sep-07-2015 11:06 AM
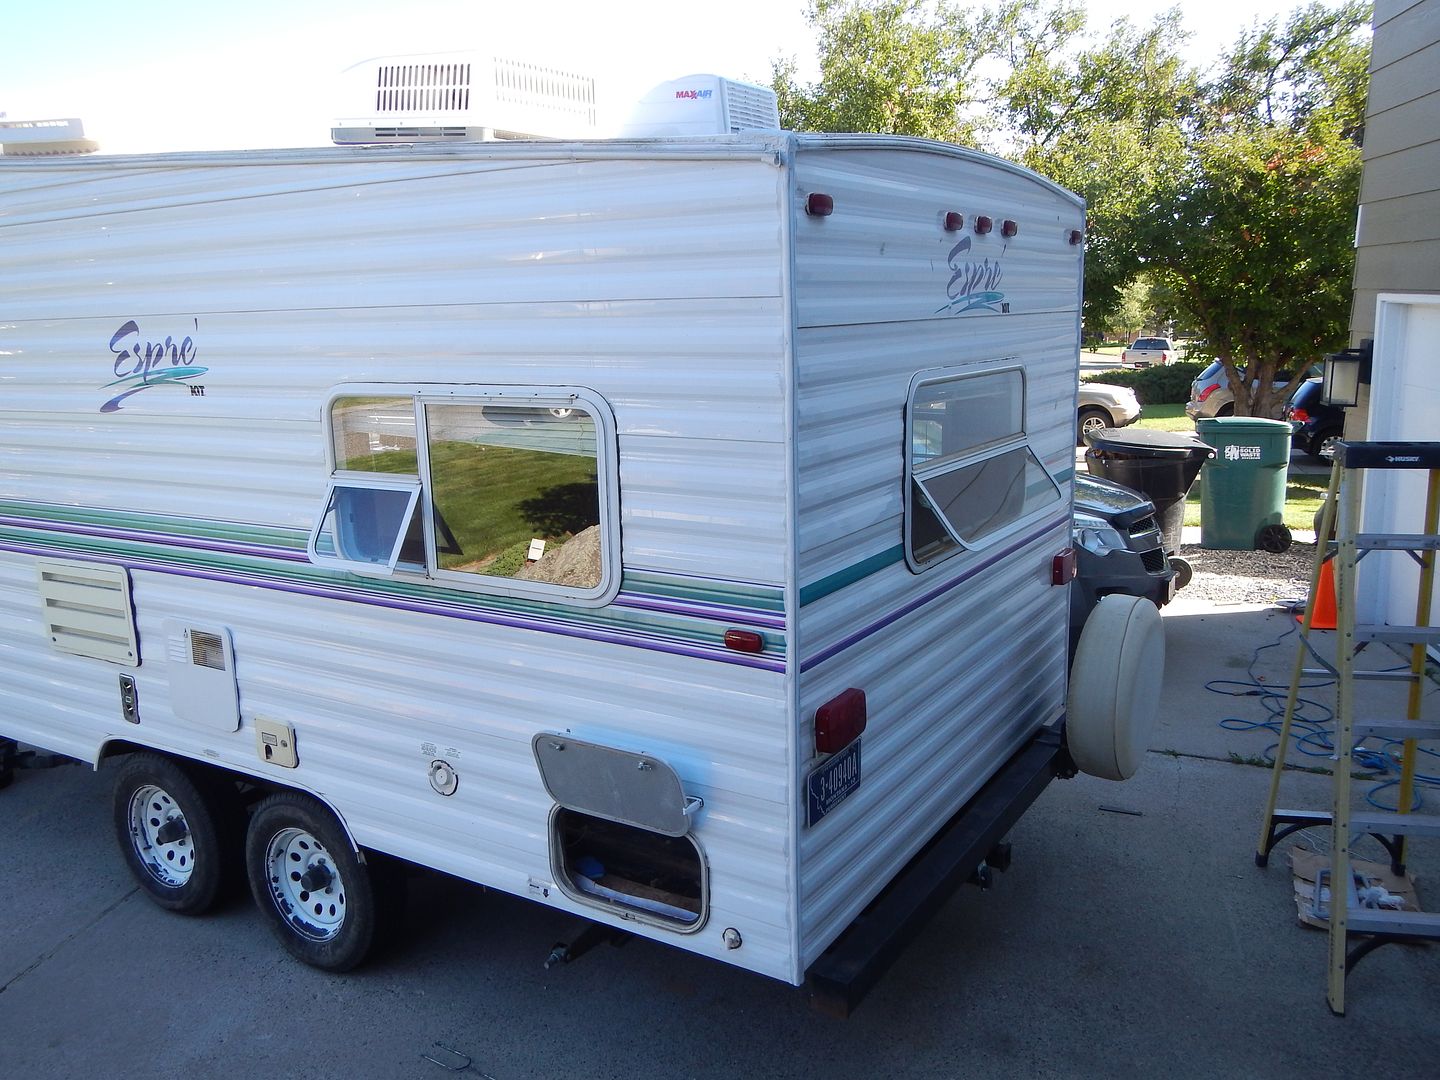
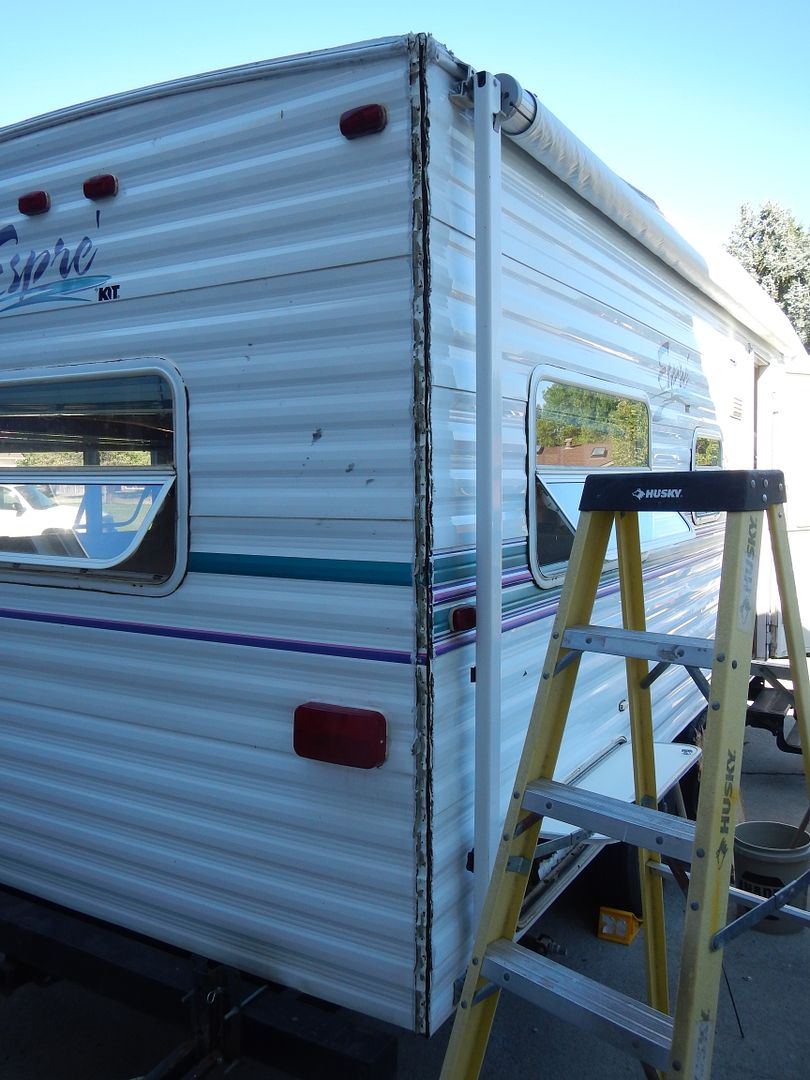
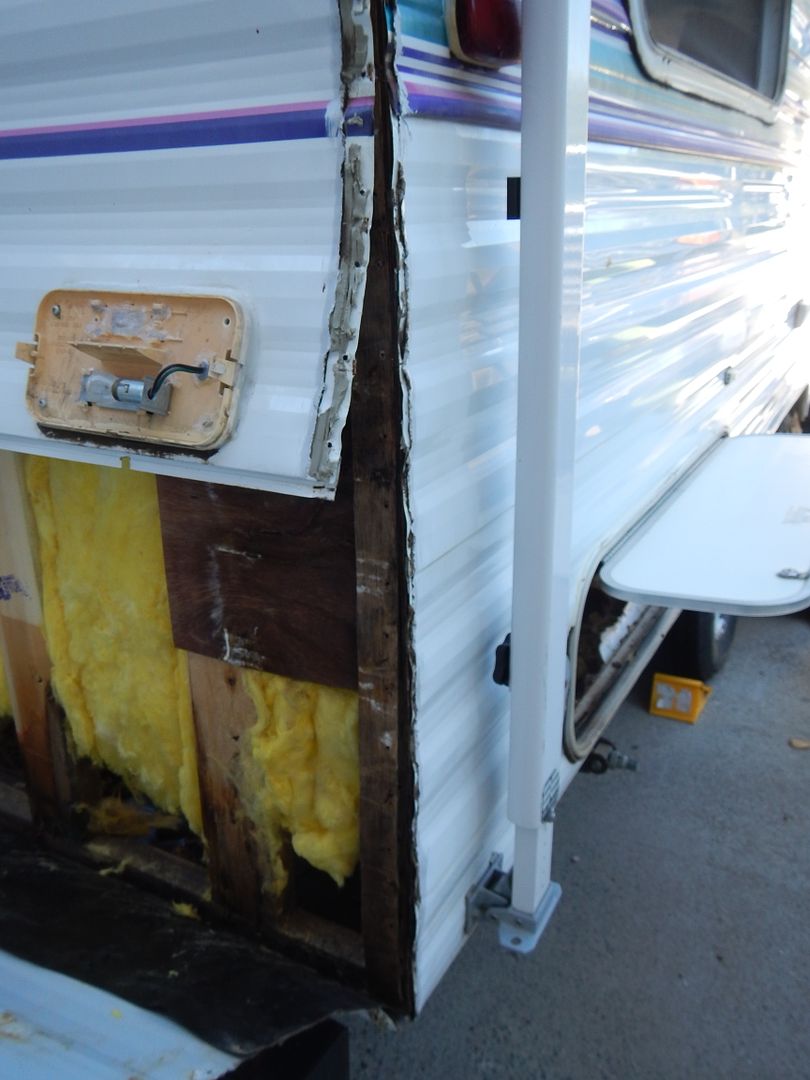
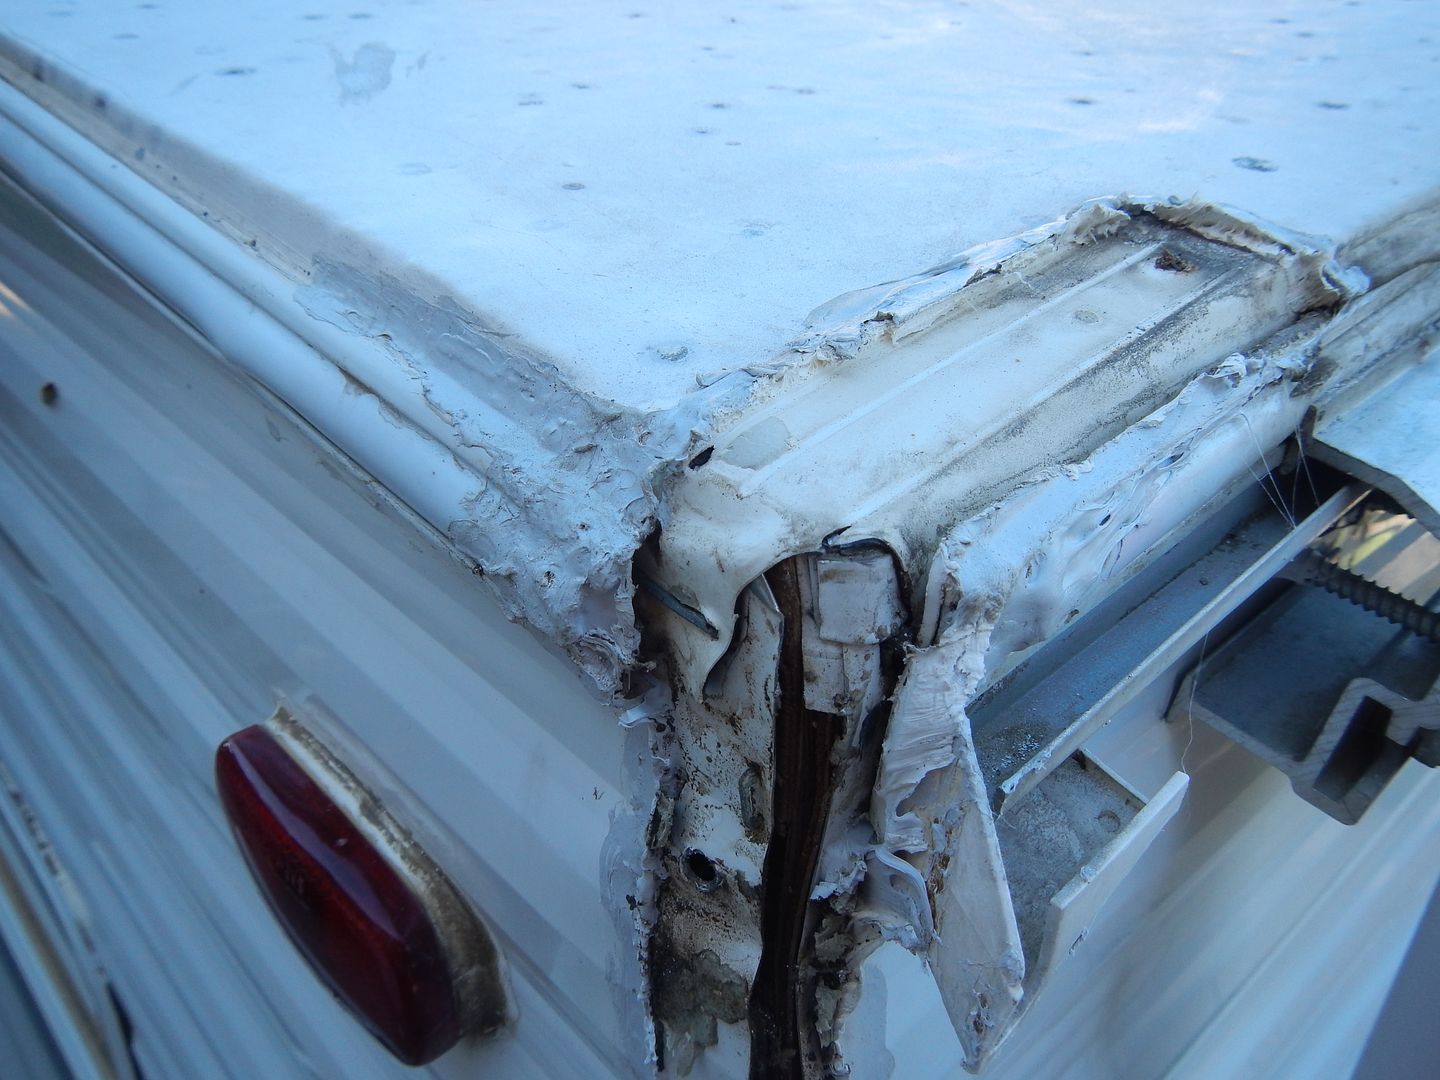
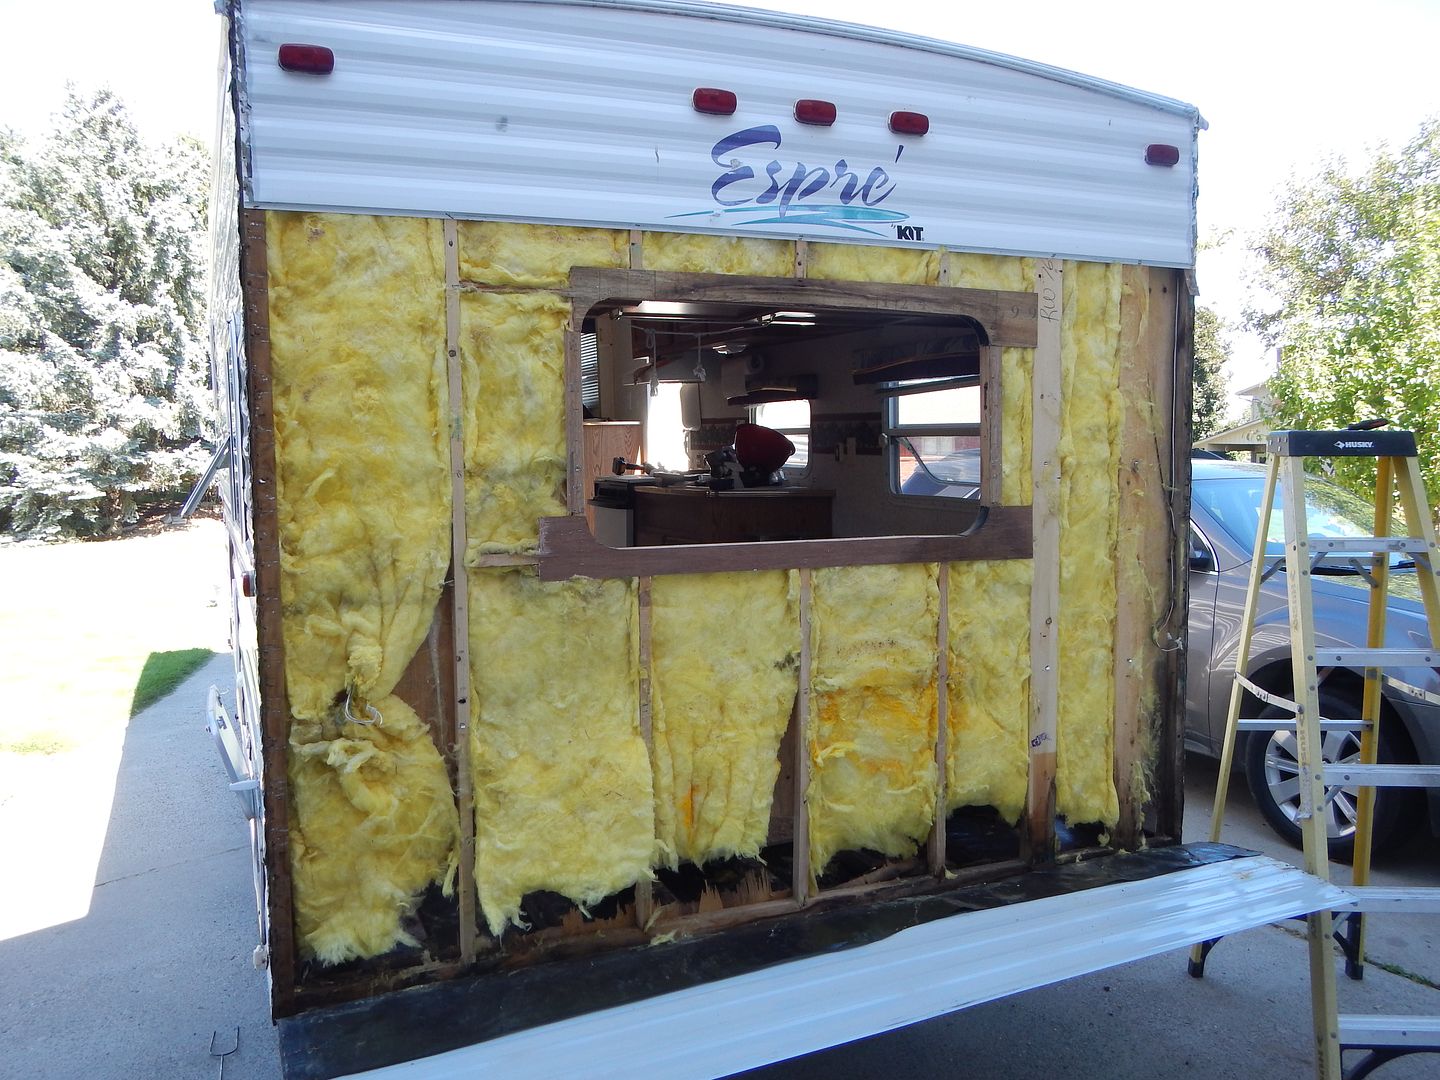
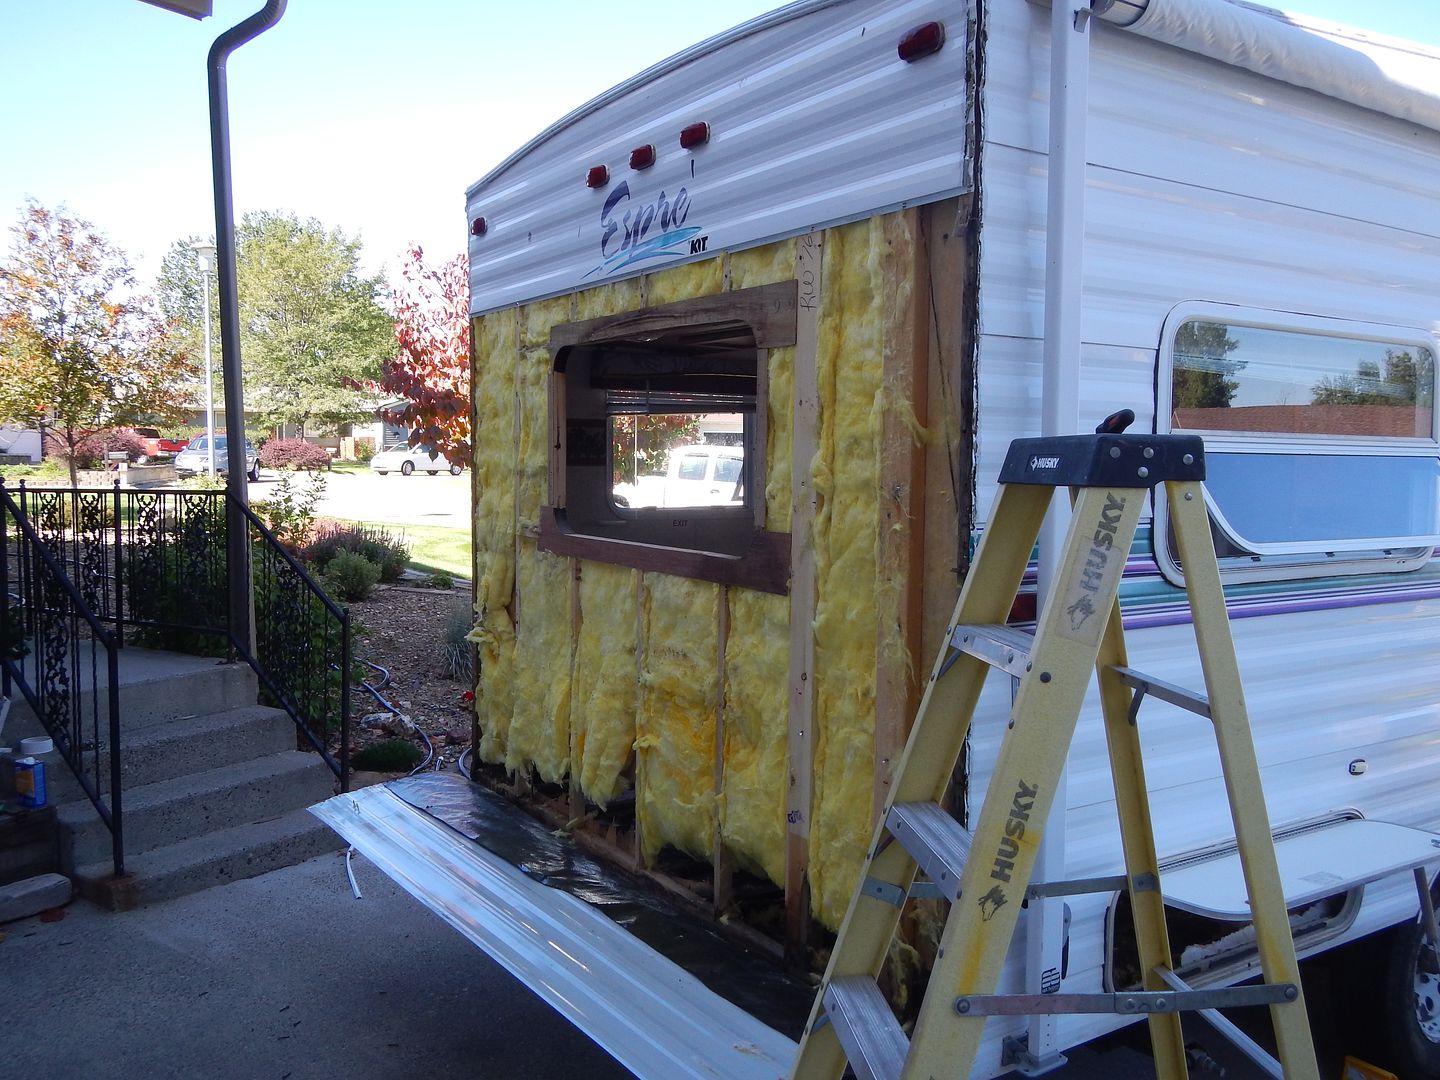
At the top corner, looks like to me that somebody discovered a leak and tried to fix it but they didn't do a very good job. Or didn't use right material to fix. Because you can see new material, (caulking or something) somewhat tooled in place.
I guess you've done a good inspection of entire RV and problem only at rear?
A project like this don't think about your man hours you're putting into it. Think about how you're saving $100.00 per hour over RV shop rates.
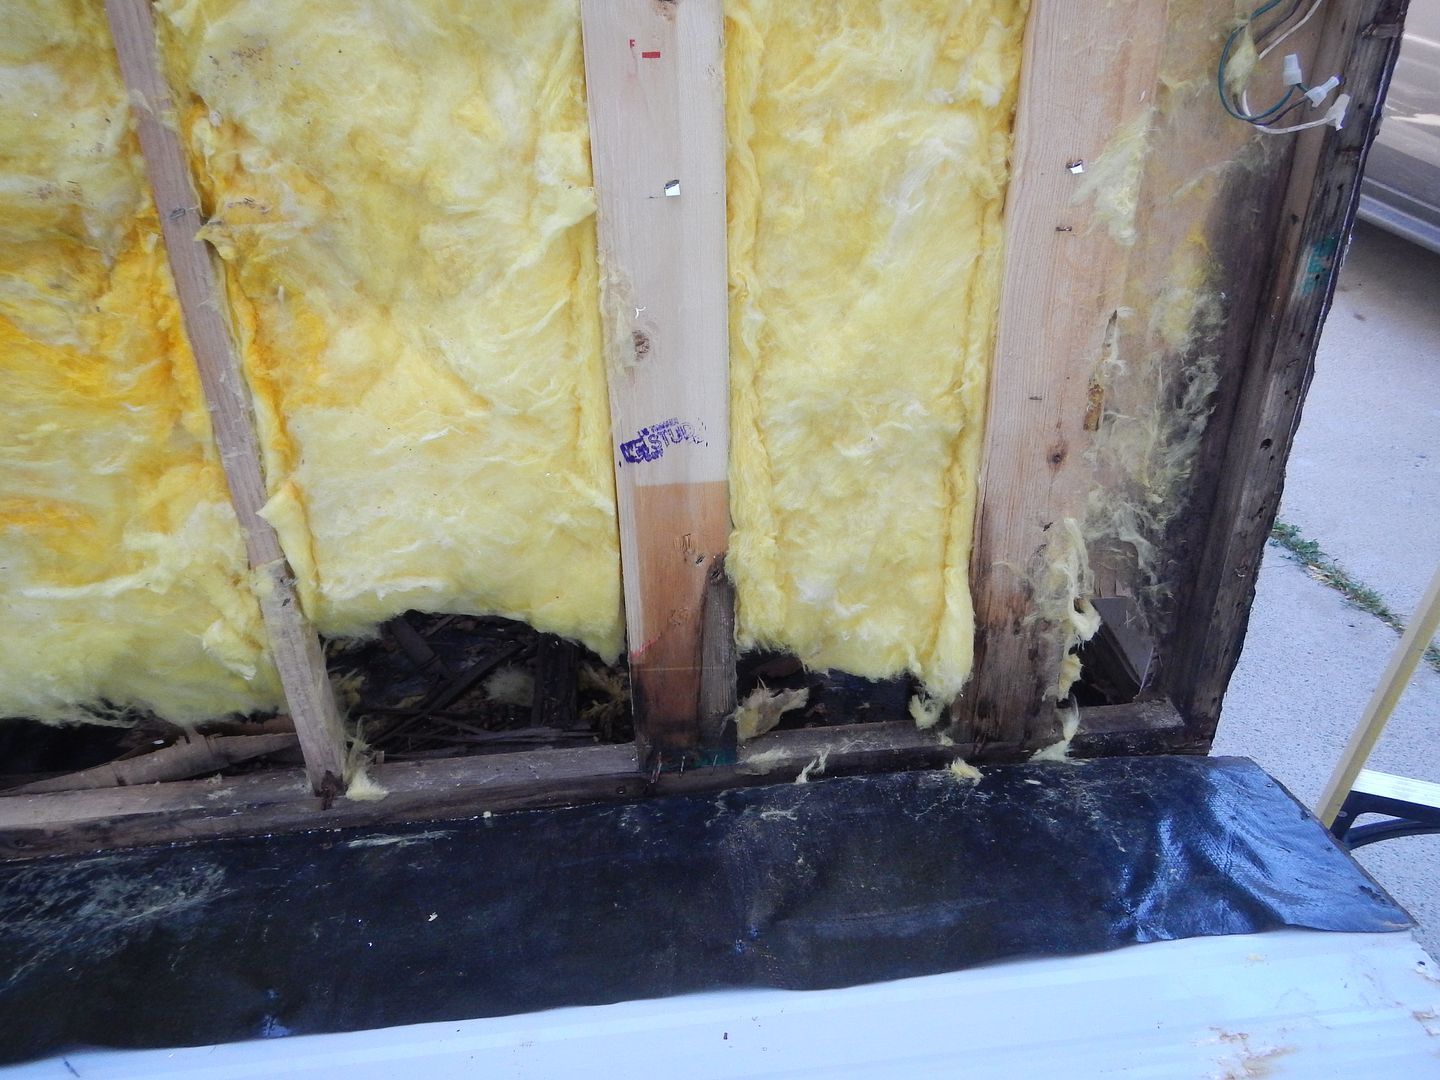
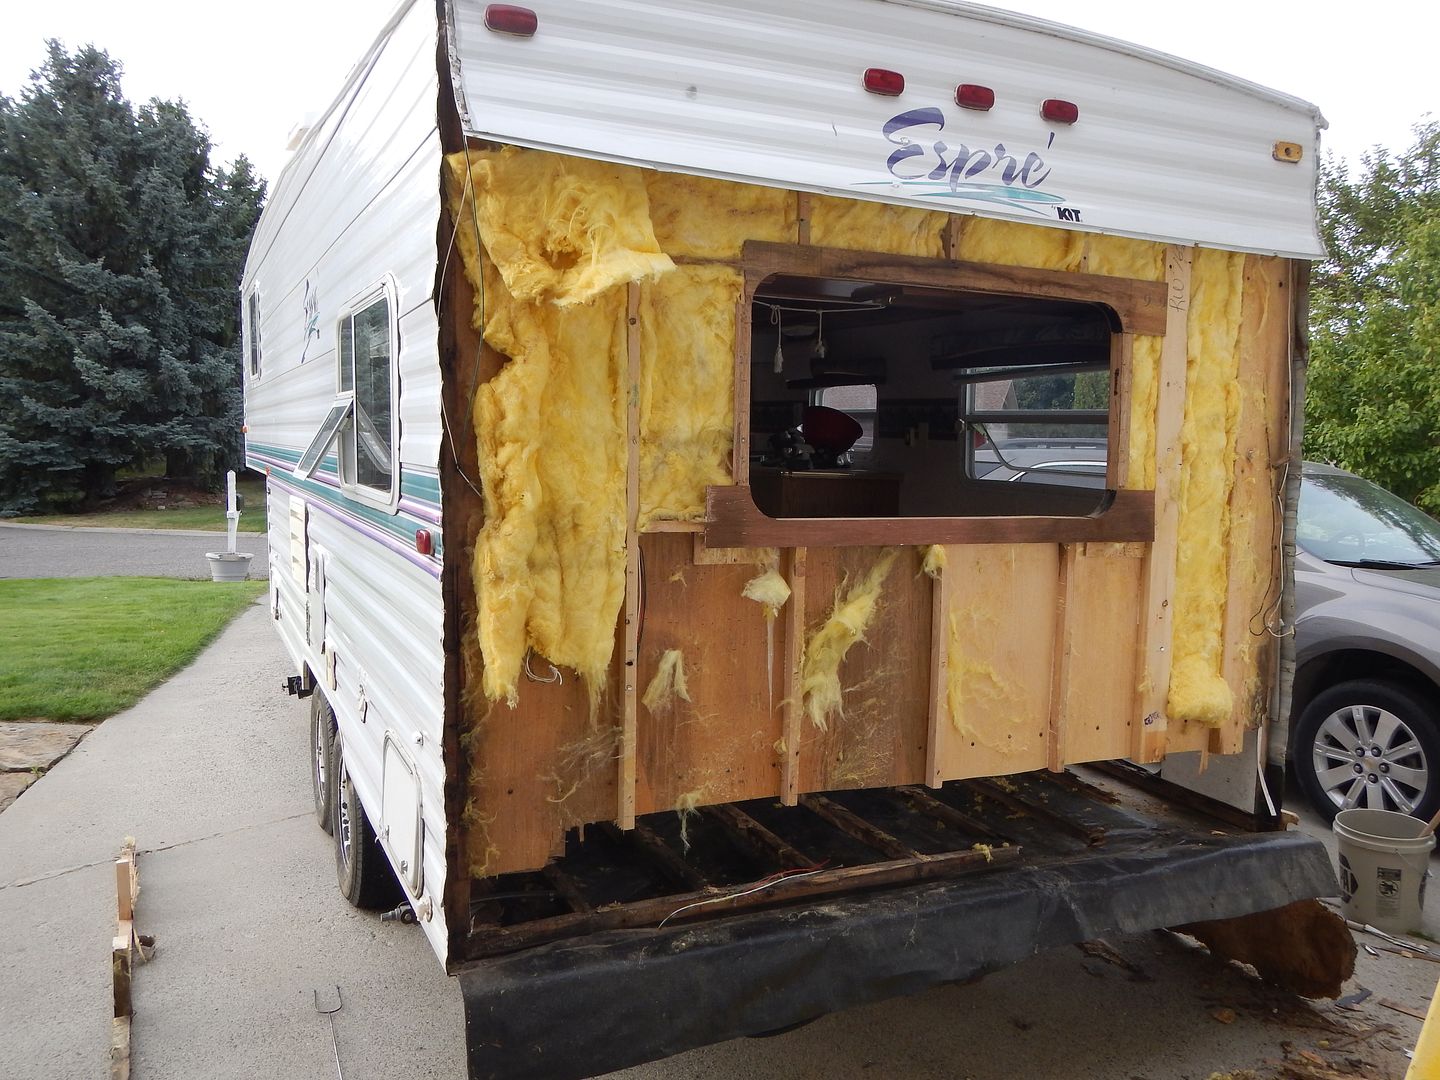
Water damage always looks worse than it really is.
Couple weeks ago at my local Home Depot I saw 2x3's versus 2x4's which would save you some time and $$$ if you have access to one near you.
If you have any questions during your project ask away. Many people on here are helpful.
2013 Arctic Fox 25W... Wife "doll house" for longer snowbird trips
2001 "The Mighty Dodge"... tow vehicle for "doll house"
- Mark as New
- Bookmark
- Subscribe
- Mute
- Subscribe to RSS Feed
- Permalink
- Report Inappropriate Content
Sep-07-2015 08:40 AM
gbopp wrote:
Welcome to the forum.
It looks like you know what you're doing. Please, keep us updated on your project.
I appreciate the vote of confidence...but I'm about a half mile from knowing what I'm doing on this one. Thank God for the internet...and a good weather forecast! Will post more pics as it progresses. Hoping it proves helpful for someone else to see the project as it's how I was able to gather much of the info I needed prior to digging in.
- Mark as New
- Bookmark
- Subscribe
- Mute
- Subscribe to RSS Feed
- Permalink
- Report Inappropriate Content
Sep-07-2015 07:49 AM
- My New Low Restriction Performance Exhaust. A Better Illustration. in Tow Vehicles
- VIDEO: F-250 Enlarging Cold Air Intake Using Existing Parts Cheap And Easy 2000 F250 5.4 Liter in Tow Vehicles
- Norcold 1210 - replace with AC only compressor in DIY Maintenance
- project in DIY Maintenance
- Installing new vinyl trim insert at the roof line in DIY Maintenance


