Turn on suggestions
Auto-suggest helps you quickly narrow down your search results by suggesting possible matches as you type.
Showing results for
- Good Sam Community
- Groups
- Motorhome Group
- Forum
- Remodeling the Cornice fabric
Options
- Subscribe to RSS Feed
- Mark Topic as New
- Mark Topic as Read
- Float this Topic for Current User
- Bookmark
- Subscribe
- Mute
- Printer Friendly Page
Remodeling the Cornice fabric
Options
- Mark as New
- Bookmark
- Subscribe
- Mute
- Subscribe to RSS Feed
- Permalink
- Report Inappropriate Content
Aug-27-2013 11:54 AM
We have a (new to us) 2001 Monaco Windsor and noticed the material that trims out the windows etc .. is faded and old looking (dated if you will). We also noticed it is nothing more than material with a thin piece of foam stapled to sort of thin board (perhaps MDF) and glued onto the wall with some sort of adhesive (black in color).
Does Camper World remodel cornices or sell new ones? Is it something easy to do ourselves?
As an aside, we ordered new custom curtains, from Factory Direct, for the front windshield with pinched pleats and thermal blackout backing. We are excited about getting those. The originals were looking pretty shabby and were made of some very lightweight material.
Labels:
- Labels:
-
Class A
8 REPLIES 8
Options
- Mark as New
- Bookmark
- Subscribe
- Mute
- Subscribe to RSS Feed
- Permalink
- Report Inappropriate Content
Aug-29-2013 11:49 AM
My wife did this on our old 96 holiday rambler. It is easy and looks great. She added side pieces that hang to the bottom which updated the look. She is doing the same to out GeorgieBoy now. We just used foam board to reshape the tops and for the side pieces, as it doesn't hurt to lean on them- unlike the god-awful hooks for the side curtains it came with. Nothing like sitting back from the table and getting a metal bracket to the spine. good luck with your project.
Tom Anderson
2005 GeorgieBoy 35
2005 GeorgieBoy 35
Options
- Mark as New
- Bookmark
- Subscribe
- Mute
- Subscribe to RSS Feed
- Permalink
- Report Inappropriate Content
Aug-28-2013 11:05 AM
Buy some fabric and a staple gun and that is basically all you need. We have redone several window valances and they are about as basic as you can get. Once you take them down, which for us was two bottom screws and a few upper screws and you can see exactly what you have. Taking the old fabric off will pretty much show you what you have to do to install new fabric. Our last one consisted of three different fabrics and probably took about 45 minutes per valance.
Fabric is pretty inexpensive so you can change all of your valances every few years to keep it up to date with your changing tastes.
Fabric is pretty inexpensive so you can change all of your valances every few years to keep it up to date with your changing tastes.
Options
- Mark as New
- Bookmark
- Subscribe
- Mute
- Subscribe to RSS Feed
- Permalink
- Report Inappropriate Content
Aug-28-2013 09:46 AM
Watch a few HGTV or DIY network shows or even online videos. Nothing is easier than doing it yourself. Most of the materials can be purchased at Joann's or other craft stores.
I wanted to redo our valances with a faux leather look, but DH doesn't like the shape of our valances. So we haven't done it yet.
Fabric.com has some great prices for all types of upholstery fabric. I bought some for new curtains, just haven't had the time to measure and sew yet.
I wanted to redo our valances with a faux leather look, but DH doesn't like the shape of our valances. So we haven't done it yet.
Fabric.com has some great prices for all types of upholstery fabric. I bought some for new curtains, just haven't had the time to measure and sew yet.
2014 DRV Mobile Suite Estates 38RSB3....our custom home
2014 Ford F450 KR CC 4x4......his office
2015 Lance 1172 TC.....mobile Motel FOR SALE
Working Fulltimers since 3/2005
"Shoot for the Moon! Even if you miss it, you will land among the Stars."
2014 Ford F450 KR CC 4x4......his office
2015 Lance 1172 TC.....mobile Motel FOR SALE
Working Fulltimers since 3/2005
"Shoot for the Moon! Even if you miss it, you will land among the Stars."
Options
- Mark as New
- Bookmark
- Subscribe
- Mute
- Subscribe to RSS Feed
- Permalink
- Report Inappropriate Content
Aug-27-2013 07:25 PM
I made wood ones 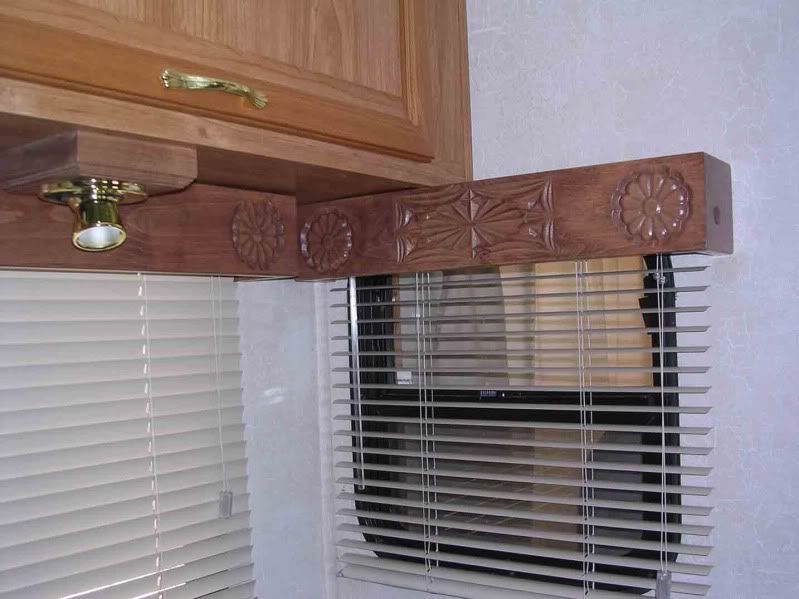
1999 Coachman Mirada 34 ft.V10-F53 chassis
12ft.LR slide-2 gp31 AGM 12V @220AH
12ft.LR slide-2 gp31 AGM 12V @220AH
Options
- Mark as New
- Bookmark
- Subscribe
- Mute
- Subscribe to RSS Feed
- Permalink
- Report Inappropriate Content
Aug-27-2013 04:27 PM
I grew up in family fabric stores. Recovering valances/cornices is an easy project. You can probably order the same fabric you ordered your new drapes in if you want them to match. Coordinating is good, too, though, and you might find some really nice fabrics.
Go to any good fabric store that carries upholstery fabric. Chain fabric stores aren't a good bet - they carry seconds and cheap quality goods made for them. Fabric can suffer from dry rot, too, so choose carefully.
Take down the largest one of the cornices and carefully remove the staples. Determine whether or not you can use the same wood - more than likely you can. You can then evaluate the foam padding. New padding shouldn't cost too much - they use quilt batting for most window treatments. You can get it in packages at WM or another discount fabric place. It's called Mountain Mist and comes in different weights. Get the one with the "puffy" factor that you prefer, or re-use the existing padding. If it's foam rubber, plan on replacing, as it rots over time.
Use the dimensions of the largest cornice fabric piece to determine how many yards you need. Upholstery fabric comes in 54-60" widths, and you want to cut all the fabric on the straight grain. Cutting on the bias will stretch the fabric if you're not careful and makes it hard to get a nice taut finish.
If you don't have one, get a heavy duty stapler with the same size staples as what you took out - probably 3/16". Get spray adhesive, too, if you want the job to be easier. Use the spray adhesive to glue the batting in place. Then cover the cornice, stapling the fabric at the corners first, then the middle of each board, and then working around the edges to attach it all. You can trim some around the corners to get knife sharp edges if you want them.
Re-attach the hanging hardware and you've got a whole new look. It it really an easy project and you'll enjoy the results.
2014 Thor Motor Coach ACE 30.1 (The Mothership)
2013 Honda CR-V (The Pod)
2013 Honda CR-V (The Pod)
Options
- Mark as New
- Bookmark
- Subscribe
- Mute
- Subscribe to RSS Feed
- Permalink
- Report Inappropriate Content
Aug-27-2013 03:27 PM
They can also be replaced with matching wood. I didn't think the wood ones sounded to good until I saw coach that had replaced them all. I was impressed and liked them a lot.
Howard,Connie,& Bella,
One spoiled schnauzer
2007 Newmar KSDP
4dr Jeep Wrangler
One spoiled schnauzer
2007 Newmar KSDP
4dr Jeep Wrangler
Options
- Mark as New
- Bookmark
- Subscribe
- Mute
- Subscribe to RSS Feed
- Permalink
- Report Inappropriate Content
Aug-27-2013 03:08 PM
My brother-in-law removed the valances (attached with brackets on the backs) and took them to an upholstery shop. They went to a fabric store and bought the fabric they wanted and the upholstery shop recovered the valances and b-i-l reinstalled them. Very economical way to do it. Be sure to number them and the window for easy reinstall. They also took out their sofa and took it to an upholstery shop to be recovered. Looks like a new coach! I took my dining chairs to an upholstery shop and she ordered the fabric I selected, recovered the chairs. They look awesome.
Lonny & Diane
2004 Country Coach Allure 33' "Big Blue"
Towing 2008 Chev Colorado 4x4
Semper Fi
2004 Country Coach Allure 33' "Big Blue"
Towing 2008 Chev Colorado 4x4
Semper Fi
Options
- Mark as New
- Bookmark
- Subscribe
- Mute
- Subscribe to RSS Feed
- Permalink
- Report Inappropriate Content
Aug-27-2013 03:04 PM
I think the key words here are "nothing more than". Don't see why you couldn't replace the fabric yourself..doesn't sound like you would even need a sewing machine...just cut (using the original fabric for a pattern), glue or staple. Might consider re-attaching to the wall with decorative screws instead of adhesive. Sounds like a fun project!!


