- Good Sam Community
- Groups
- Truck Camper Group
- Forum
- Avion truck campers - Hundreds of photos
- Subscribe to RSS Feed
- Mark Topic as New
- Mark Topic as Read
- Float this Topic for Current User
- Bookmark
- Subscribe
- Mute
- Printer Friendly Page
Avion truck campers - Hundreds of photos
- Mark as New
- Bookmark
- Subscribe
- Mute
- Subscribe to RSS Feed
- Permalink
- Report Inappropriate Content
May-11-2011 10:33 AM
Our planned trip to Montana in June is called off. heh.
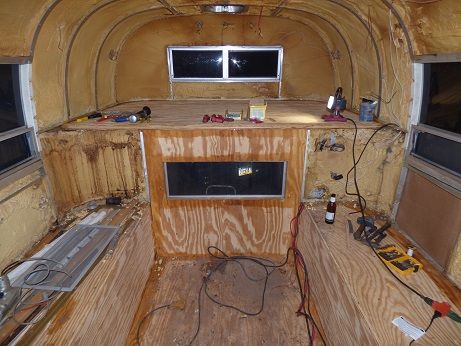
However, I have now convinced my dear Jane that its time to really update the TC. After drying for several days we pulled out the interior. Amazingly the Zolatone paint that I had applied last year is good as new after a cleaning.

Without burdening the TC family overmuch, I'd like to ask some advice other than don't park too near a flood :-).
My DW was overjoyed that I had a plan for the bathroom: a composting toilet developed by Nature's Head http://www.natureshead.net/. Our holding tank was practically unusable and there was no real grey water tank on the 67 Avion. Our plan is to rip out the bathroom and install one of these and converting the blackwater to a greywater tank. Any experience with this?
Finally, the roof. I admit that I have not really done the work I should have. Now, I need to remove the various sealants on the roof and repair it. We are also setting up for a solar installation. Any advice as to this?
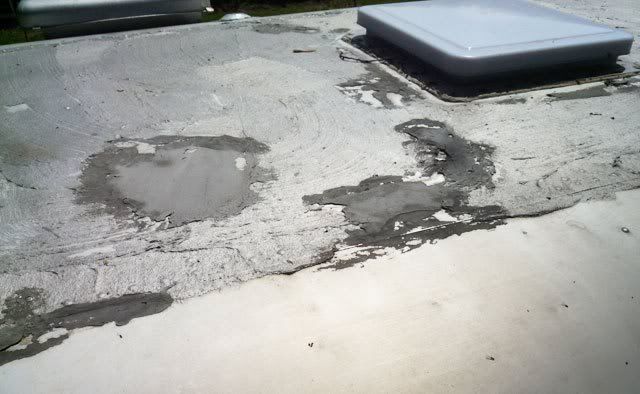
Here's hoping I have posted the pictures correctly. And many thanks in advance for your advice.
- Labels:
-
Truck Campers
- Mark as New
- Bookmark
- Subscribe
- Mute
- Subscribe to RSS Feed
- Permalink
- Report Inappropriate Content
Dec-10-2015 05:01 AM
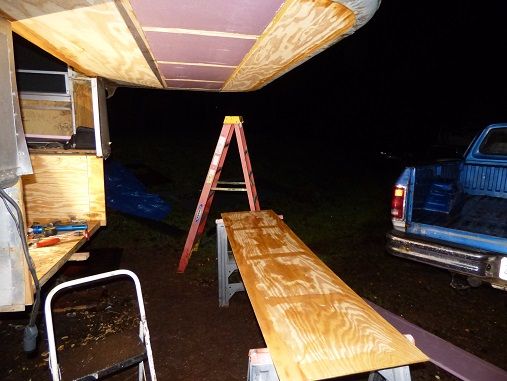
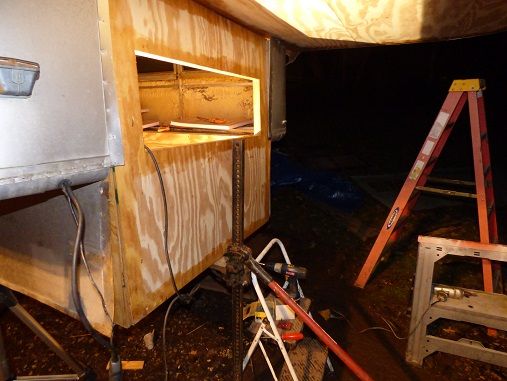

Using the panel to align everything as best as possible.
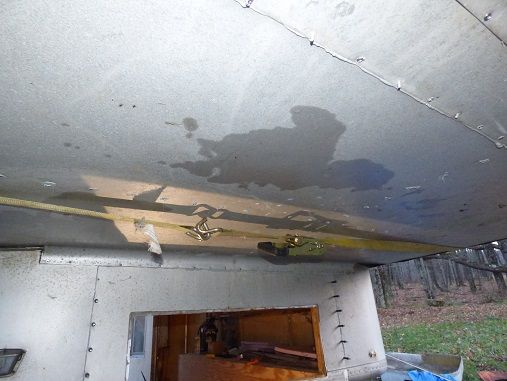
This thing needs a good scrubbing

The original bunk lamination only had the top sheet of plywood extended into the channel unlike the wings. Figured I'd get as much meat into the channel as possible.
1993 Dodge D250 LE Cummins
- Mark as New
- Bookmark
- Subscribe
- Mute
- Subscribe to RSS Feed
- Permalink
- Report Inappropriate Content
Dec-10-2015 04:54 AM
But Im still a ways off from worrying about that...
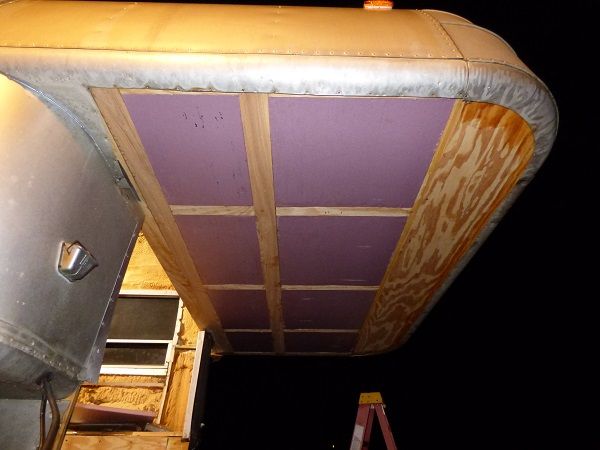
The idea of using lap joints for the frame worked great.
http://i1377.photobucket.com/albums/ah69/syntheticinfinity/P1000597_zpscqccffe3.jpg
http://i1377.photobucket.com/albums/ah69/syntheticinfinity/P1000611_zpsrlg7sphm.jpg
http://i1377.photobucket.com/albums/ah69/syntheticinfinity/P1000625_zpsva1ufes2.jpg
Im using the skin to align everything as best as possible.
1993 Dodge D250 LE Cummins
- Mark as New
- Bookmark
- Subscribe
- Mute
- Subscribe to RSS Feed
- Permalink
- Report Inappropriate Content
Dec-03-2015 11:08 AM


And this is after redoing the doors, and danish-oiling all the new wood to somewhat match the old. You will also notice a different stove and a different cooler and metal counters vice wood. We used the camper for several years as we built and changed to suit our needs. It is still not "done" but it is very functional, and we will continue to make improvements as time goes on.

The two lower doors in this pic are from a C-11, and they had particle board centers with a skin of birch inside and out. I had to cut them down is how I found out...


I hope this helps!
Garry
Wife + 4 kids
Retired Military Family.... Alway's on the move....
2002 F350 CCSB 5.4 6spd 4x4 in AK
1966 Avion C-10 Truck Camper
- Mark as New
- Bookmark
- Subscribe
- Mute
- Subscribe to RSS Feed
- Permalink
- Report Inappropriate Content
Dec-02-2015 08:27 AM
- Mark as New
- Bookmark
- Subscribe
- Mute
- Subscribe to RSS Feed
- Permalink
- Report Inappropriate Content
Dec-02-2015 08:21 AM
I am still searching the web for some color combination ideas,as I am thinking one color for the frame.and another for the doors,
- Mark as New
- Bookmark
- Subscribe
- Mute
- Subscribe to RSS Feed
- Permalink
- Report Inappropriate Content
Dec-02-2015 08:19 AM
Fasterners are certainly the most common source of water intrusion. I don't think I'd go so far as to epoxy core the holes, but caulking each hole with Trempro or the like seems a reasonable precaution. I still think full epoxy coating is the deal, but an oil-based paint might suffice. Or perhaps one of the newer water-based epoxy paints. They are certainly more pleasant to use than oil-based.
Epoxying the edges is a good precaution in any case.
I would observe that because the factory built a C10 or C11 in a particular way doesn't mean that it was the best way. Economics dictated a lot of their material and construction decisions. If I were doing a wood replacement rather than the "full Argo", I'd use a synthetic panel of plastic or fiberglass instead of wood.
Ah, the clarity of hindsight. If we had known what we were getting ourselves into when we first laid eyes upon our Avions...
Onward!
- Mark as New
- Bookmark
- Subscribe
- Mute
- Subscribe to RSS Feed
- Permalink
- Report Inappropriate Content
Dec-02-2015 08:09 AM
Installing the bolts for the jack mounts I will go crazy with sealant. I did use some exterior deck screws to secure the 3/4 wing wood together using sealant there too.
My only concern now is that I also sealed up the aluminium under the bunk area and the wings that if any water gets in I don't think it will be able to find a way out.
- Mark as New
- Bookmark
- Subscribe
- Mute
- Subscribe to RSS Feed
- Permalink
- Report Inappropriate Content
Dec-02-2015 07:31 AM
D1, the epoxy issue has been a major debate in my mind since the start of this restoration. My forum reading leads me to believe there are two schools of thought on this. All agree that despite out best efforts, these campers leak even if we are able to seal them temporarily. School 1 Sealing the entire panel with epoxy will do the best to keep water out of the wood. The argument against is that any water that finds its way in will have no chance of escape. My worry is water intrusion at the fasteners. On my sailboats, I employ the 'Don Casey' method of Oversizing each fastener hole, and filling with epoxy to isolate the fasteners from the core wood. I didn't think this would be too easy with plywood although in hindsight if I had marked each hole before installing the panel, might not have been too bad.
School 2 Leaving the panel raw it is susceptible to moisture but has at least some chance of drying. Avion did not coat the wood in my camper and it lasted 40+ years. I'm 35 so 40 years works for me. I still wanted to do better.
After watching the inside of my camper thru a few rains, I've noticed all my leaks stay to the very outside of the panels. I made the decision to only coat the perimeters and to try to let the unwanted water bypass the panels and drain somehow. This gives me the option of completely coating the panels later if I change my mind(hopefully before the water gets in). It also saves lots of money on epoxy. I use Total Boat 5:1.
When I started, I thought I was just doing wings and the bunk. If I had forseen total wood relpacment, I would have fired up the spool gun and done it .'Argo' style for sure.
1993 Dodge D250 LE Cummins
- Mark as New
- Bookmark
- Subscribe
- Mute
- Subscribe to RSS Feed
- Permalink
- Report Inappropriate Content
Dec-02-2015 06:22 AM
Ticki wrote:
Silver
I am surprised that your cabinets are particle board . The only ones I've seen or heard of are birch veneered plywood . The only particle board I found was the counter top .
If you look back on this long string you can see my work on restoring the cabinets...and using marine hull paint on the lower portions of the bottom cabinets. My cabinets were all wood and finished with veneer. I think the discussion is around 12/12/11....
Trout, what's up with the frame etc and why no photos?
- Mark as New
- Bookmark
- Subscribe
- Mute
- Subscribe to RSS Feed
- Permalink
- Report Inappropriate Content
Dec-02-2015 06:15 AM
1988 Avion Triple Axle Trailer
1969 Avion C-11 Camper
- Mark as New
- Bookmark
- Subscribe
- Mute
- Subscribe to RSS Feed
- Permalink
- Report Inappropriate Content
Dec-02-2015 06:08 AM
I am surprised that your cabinets are particle board . The only ones I've seen or heard of are birch veneered plywood . The only particle board I found was the counter top .
'02 GMC DRW D/A flatbed
- Mark as New
- Bookmark
- Subscribe
- Mute
- Subscribe to RSS Feed
- Permalink
- Report Inappropriate Content
Dec-02-2015 06:05 AM
Dick
- Mark as New
- Bookmark
- Subscribe
- Mute
- Subscribe to RSS Feed
- Permalink
- Report Inappropriate Content
Dec-02-2015 06:01 AM
Garry
Wife + 4 kids
Retired Military Family.... Alway's on the move....
2002 F350 CCSB 5.4 6spd 4x4 in AK
1966 Avion C-10 Truck Camper
- Mark as New
- Bookmark
- Subscribe
- Mute
- Subscribe to RSS Feed
- Permalink
- Report Inappropriate Content
Dec-02-2015 05:55 AM
Looking at your very nice repairs, I'd urge you to consider completely epoxy coating all the wood. The problem with the breathing idea is that water will get in. There will be leaks and the water will take a very long time to get out. I'd be guided by the notion of building a boat - no raw wood anywhere. Nothing will waterproof as well as epoxy. I'd also caulk each fastener hole you make into wood as you insert the fastener.
Rastaman, regarding water heaters, I'm mounting a small demand heater on the wall above the sink. I'm not planning to exhaust it through the roof. I reckon it won't be on long enough each use to make carbon monoxide an issue. Rather like using the stove, I will open a window or ceiling vent.
I'm mounting the truck frame again today, in anticipation of permanently attaching Argo to the truck. The all-aluminum frame flexed too much when loaded so we've replaced the bottom cross members with steel ones. Pics as I move forward...
Dick
- Mark as New
- Bookmark
- Subscribe
- Mute
- Subscribe to RSS Feed
- Permalink
- Report Inappropriate Content
Dec-02-2015 05:51 AM
As for weather it's worth the trouble, that's up to you, I'd give it a go personally.
1993 Dodge D250 LE Cummins


