- Good Sam Community
- Everything RV
- DIY Maintenance
- Improving Air Flow in Roof A/C vents.
- Subscribe to RSS Feed
- Mark Topic as New
- Mark Topic as Read
- Float this Topic for Current User
- Bookmark
- Subscribe
- Mute
- Printer Friendly Page
Improving Air Flow in Roof A/C vents.
- Mark as New
- Bookmark
- Subscribe
- Mute
- Subscribe to RSS Feed
- Permalink
- Report Inappropriate Content
Jul-12-2016 04:27 PM
I found a post, somewhere, on the subject that mentioned checking the divider inside the a/c that separates the return air and the cold air coming from the squirrel cage fan. I was not surprised to find that the divider in my a/c was indeed improperly installed by Thor. The divider had a misalignment of approximately 3/4". I repaired this and taped the divider into place, using aluminum tape, and completely separated the air return from the cold air from the squirrel cage fan.
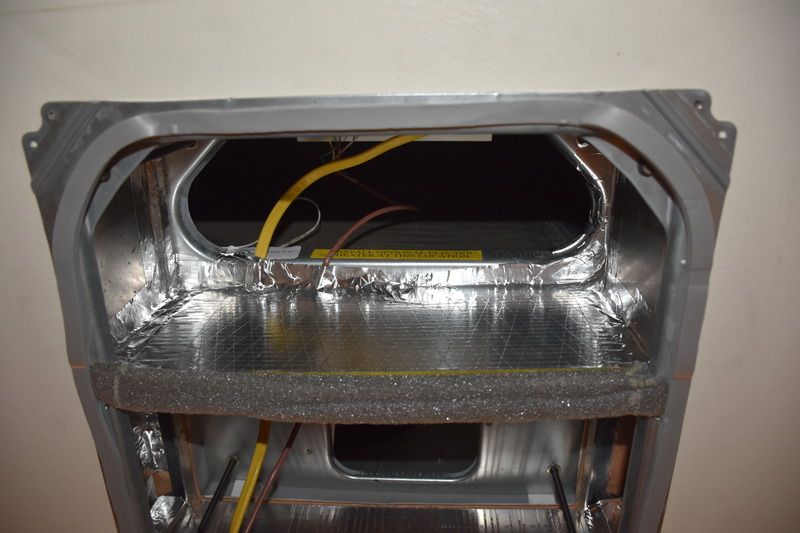
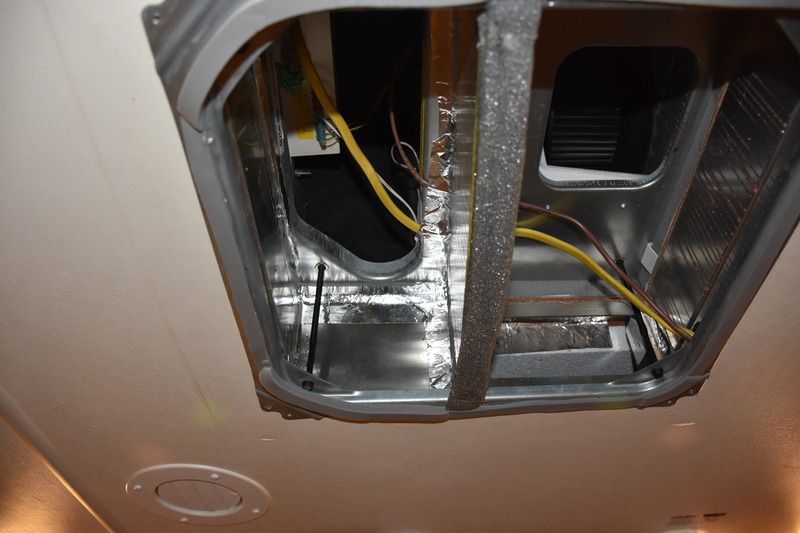
I failed to check the air flow prior to this initial repair. I did check the air flow after the repair by way of my rifle kit's Kestrel 2500 Wind Meter.
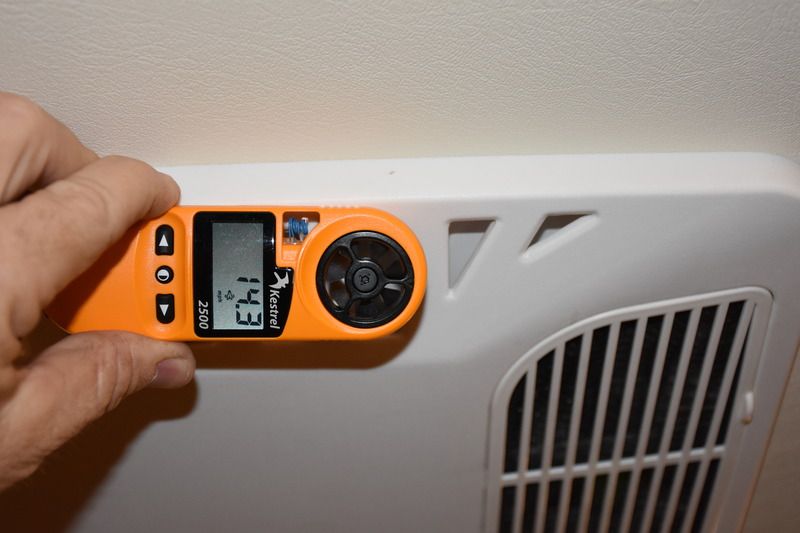
Starting on the driver's side of the RV, closest to the front of the cab left to right, and working my way back checking each vent. I checked the vents with all of the remaining vents in the closed position. I would check the air flow, close the vent, move to the next one. I also made sure the quick cool vents were closed on the a/c unit itself.
Vent 1
10.3 mph
Vent 2
11.5 mph
Vent 3
9.8 mph
Vent 4
12.7 mph
Vent 5
9.9 mph
Vent 6
13.5 mph
Vent 7
11.4 mph
Vent 8
9.2 mph
Vent 9
10.5 mph
Vent 10
11.0 mph
Vent 11
11.4 mph
Vent 12
11.4 mph
Just the front vent of the quick cool setting.
14.3 mph
Just the rear vent of the quick cool setting.
13.5 mph
Next I wanted to work on smoothing the air flow into the duct work inside the ceiling. The transition inside the a/c unit was very abrupt and I felt that I could smooth the air flow as it entered the ducting on either side of the a/c unit.
As you can see in the following photo, the company made plenty of room in the sides of the metal casing to streamline the air flow but that is as far as they went. The a/c was simply installed into the ceiling by Thor and no effort was made to alleviate the 90* turn the air was suppose to make prior to entering the ductwork.
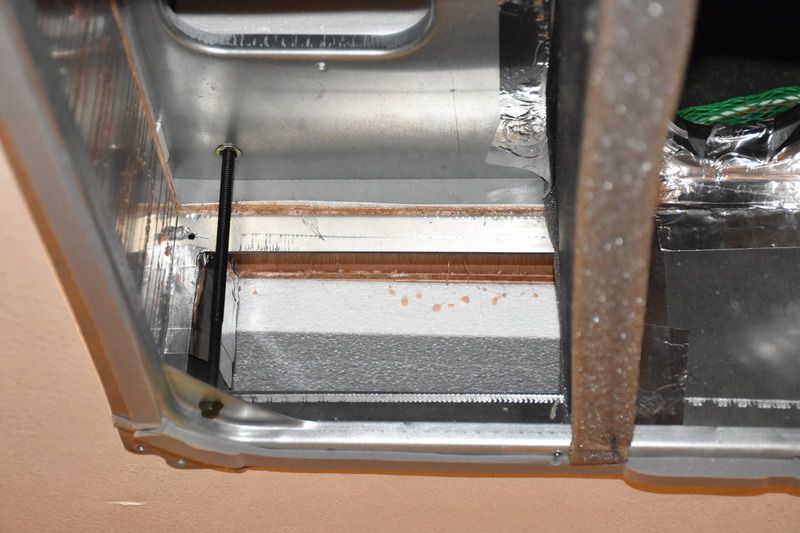
I proceeded to use the same aluminum tape I used to fix the initial issue to try and smooth the passageway that the air would travel as it entered the ducting.
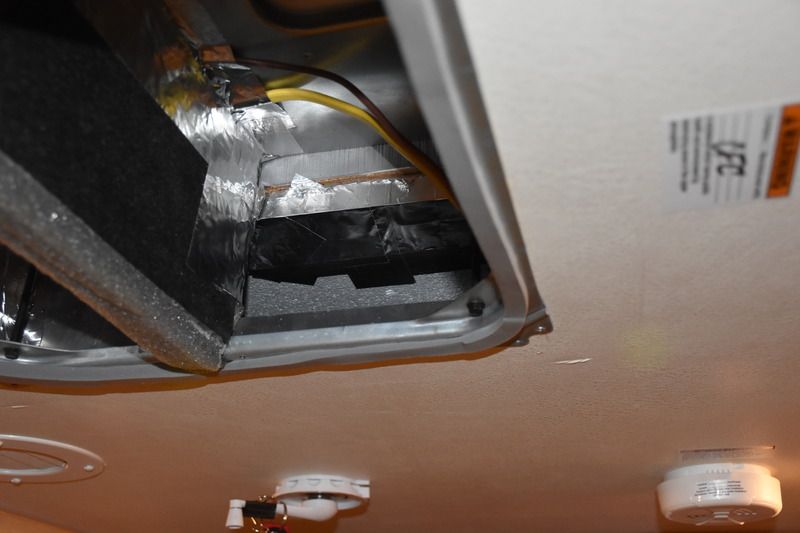
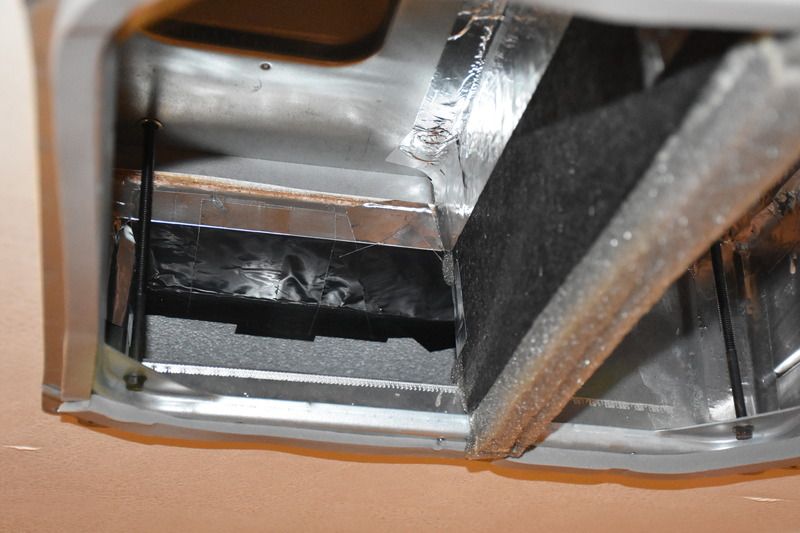
Next I cut flat metal ducting material in an effort to insert them into the ducting to help direct the air from the a/c unit. I measured the space between the upper and lower levels of the duct work and cut the metal to fit.
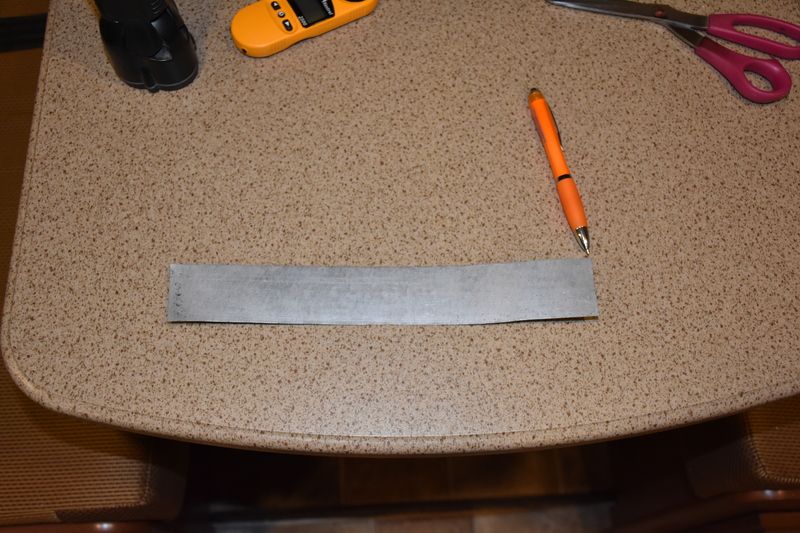
Next I shaped it into a splitter to help the air flow to the front and the rear of the RV. I made one of these for each side of the a/c ductwork.
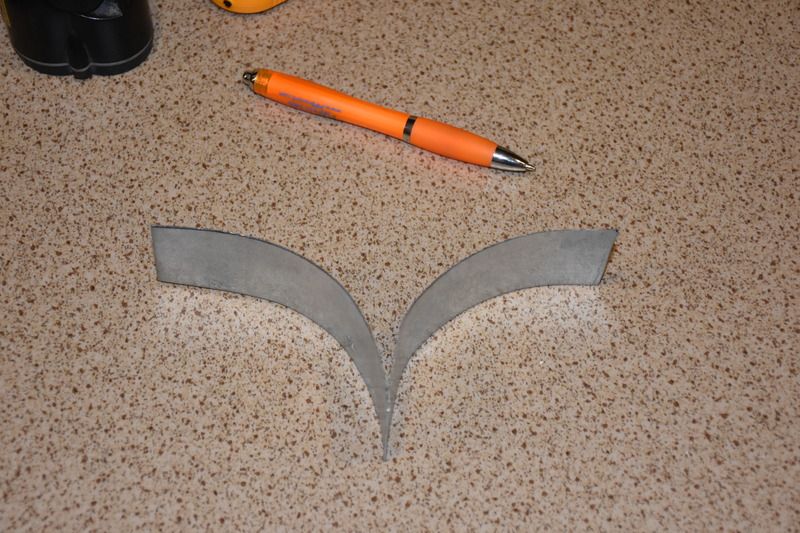
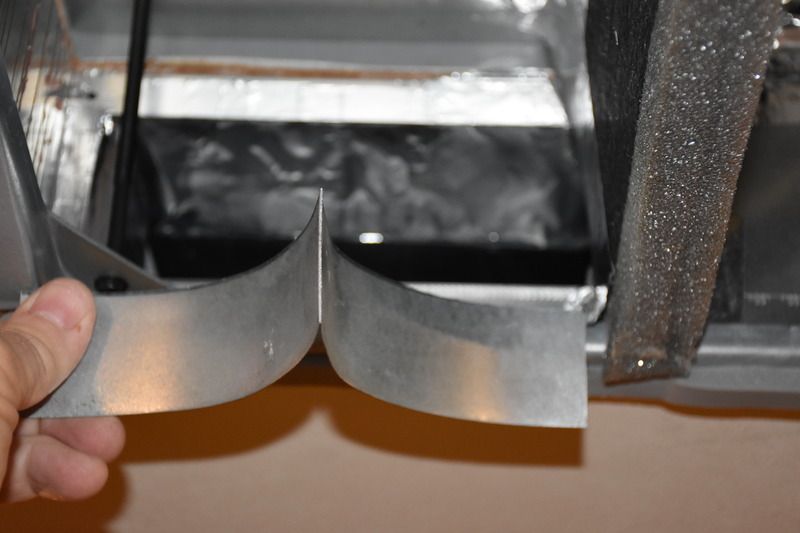
I taped these two diverters into place inside the ductwork on each side. Now, instead of the air exiting the a/c and entering the duct at a 90* angle, it would be directed forward and aft.
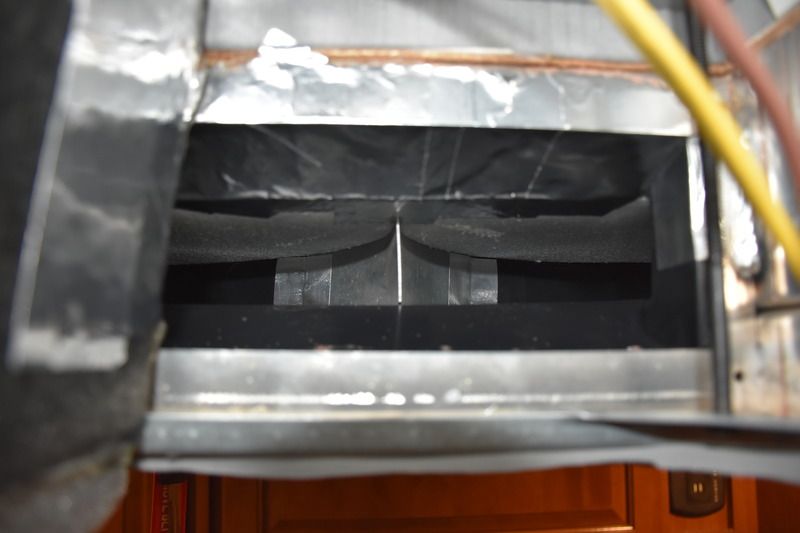
I reassembled the unit cover and rechecked my air flow at each vent as described earlier. The results are listed next.
Vent 1
11.0 mph INCREASE OF 6.79%
Vent 2 INCREASE OF 6.08%
12.2 mph
Vent 3 INCREASE OF 8.16%
10.6 mph
Vent 4 INCREASE OF 7.08%
13.6 mph
Vent 5 INCREASE OF 3.03%
10.2 mph
Vent 6 INCREASE OF 5.18%
14.2 mph
Vent 7 STAYED THE SAME
11.4 mph
Vent 8 INCREASE OF 19.56%
11.0 mph
Vent 9 DECREASE OF 2.85%
10.1 mph
Vent 10 INCREASE OF 0.90
11.1 mph
Vent 11 DECREASE OF 5.26%
10.8 mph
Vent 12 INCREASE OF 2.63%
11.7 mph
Nearly every vent picked up air speed, with an average improvement of 4.27% added air flow at each vent.
Next I wanted to try a splitter at the squirrel cage exit to smooth the transition from the a/c unit into the duct work. I measured the dimensions of the interior of the a/c unit and cut a piece of metal ducting to fit. Then folded it in an effort to help smooth out the air flow.
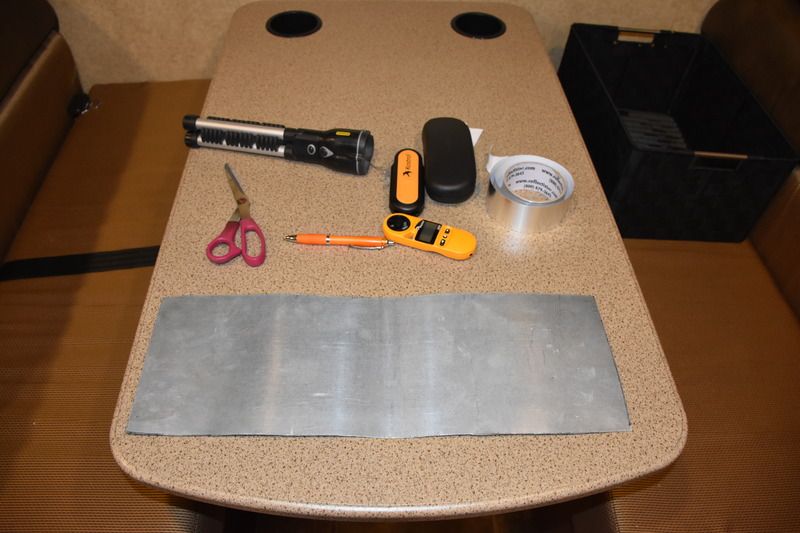
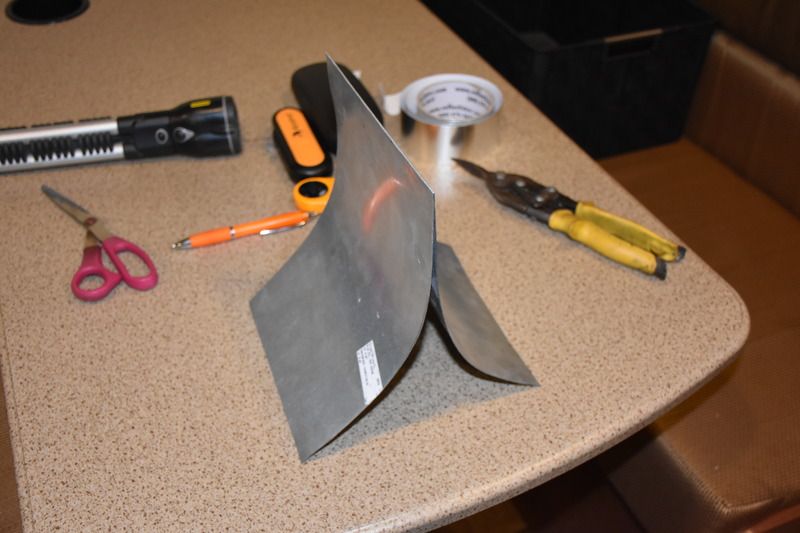
This was inserted at the squirrel cage fan exit and temporarily installed to split the cold air into the right and left ceiling ducts.
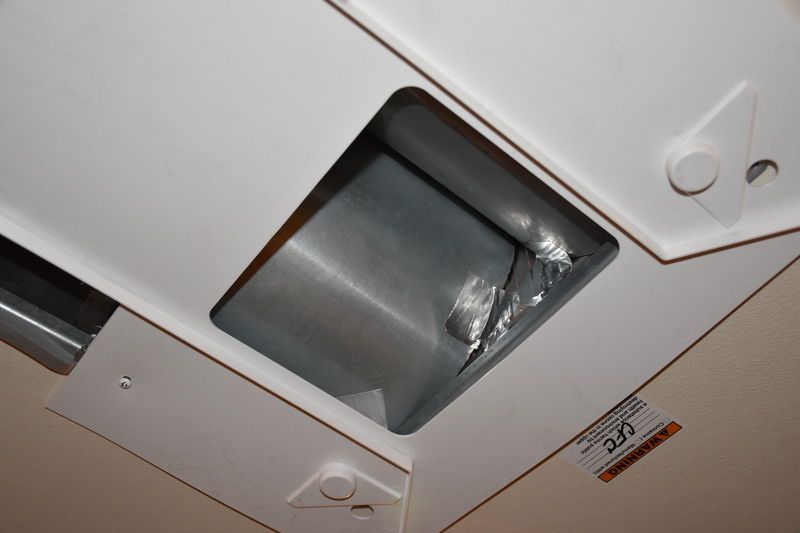
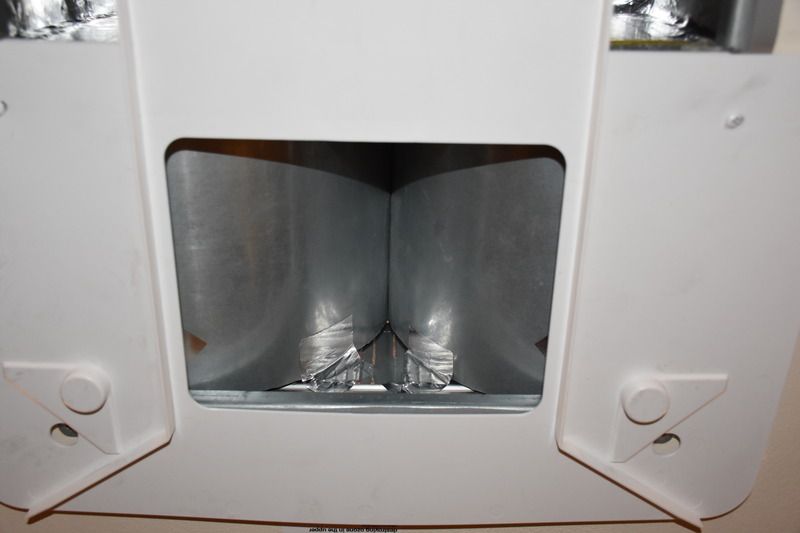
This addition provided an average of 1.10% increase in air flow at each vent.
It should be noted that this addition nearly deleted all the air flow at the front and rear vents of the quick cool feature of the a/c unit.
This last air diverter, inside the actual a/c unit, was removed as its benefits were negligible and actually made the a/c unit less efficient.
I have ordered and will be installing these 110V cooling fans inside the actual holes cut into the ceiling. The factory holes are 5" and these cooling fans are 127mm. I will remove the 'ears' from one side of the fan so that it will slide into the opening where the current vents are located. I may or may not remove all the ears so that the entire fan will fit into the ceiling openings and put the current vent cover in place to conceal the electric fan.

The ceiling duct will provide ample room to run the wiring back to the a/c unit to provide power. Each fan will have its own micro switch to turn on/off depending on the efficiency of this latest project.
I will update this thread or start a new one with the results of the install.
Moderator edit to re-size pictures to forum recommended limit of 640px maximum width.
- Mark as New
- Bookmark
- Subscribe
- Mute
- Subscribe to RSS Feed
- Permalink
- Report Inappropriate Content
Jul-14-2016 09:05 PM
2021 Coachmen Spirit 1943RB
- Mark as New
- Bookmark
- Subscribe
- Mute
- Subscribe to RSS Feed
- Permalink
- Report Inappropriate Content
Jul-14-2016 10:26 AM
https://www.rv.net/forum/index.cfm/fuseaction/thread/tid/28957464.cfm
- Mark as New
- Bookmark
- Subscribe
- Mute
- Subscribe to RSS Feed
- Permalink
- Report Inappropriate Content
Jul-14-2016 09:42 AM
Old Duck wrote:
Nice work and great details. What make is your 15k A/C

- Mark as New
- Bookmark
- Subscribe
- Mute
- Subscribe to RSS Feed
- Permalink
- Report Inappropriate Content
Jul-14-2016 08:27 AM
My next project is to improve the filtration system. The OEM system is terrible with gaps and the flimsy (washable) material wanting to suck up into the unit. And the quick cool grill wants to leak air out between the roof and the trim panel.
2011 F150 Ecoboost SCREW 145" 4x4
Firestone Ride-Rite Air Springs/Air Lift Wireless Controller
2006 Sportsmen by KZ 2604P (30')
Hensley Arrow
- Mark as New
- Bookmark
- Subscribe
- Mute
- Subscribe to RSS Feed
- Permalink
- Report Inappropriate Content
Jul-14-2016 06:48 AM
2021 Coachmen Spirit 1943RB
- Mark as New
- Bookmark
- Subscribe
- Mute
- Subscribe to RSS Feed
- Permalink
- Report Inappropriate Content
Jul-13-2016 08:29 PM
Marc, Jake, Kirsten and fur kids Dexter and Bernie
2017 KZ Venom 4114TK Toy Hauler
2015 GMC Acadia
15 Silverado 3500 SRW quad 6.6 Duramax
11 Silverado 3500 SRW quad 6.6 Duramax
- Mark as New
- Bookmark
- Subscribe
- Mute
- Subscribe to RSS Feed
- Permalink
- Report Inappropriate Content
Jul-13-2016 11:34 AM
JWRoberts wrote:
Thanks for all the detailed photos and details. Mine is in the shop now because of poor cooling.
You're welcome.
Paul D. wrote:
Please update us on how booster fans work out as your testing progresses.
They just arrived and I will update.
mudmaker wrote:
I'm gonna go out and check a few things on mine now. Thanks.
mudmaker wrote:
Hey I discovered mine has the same leaky areas. Guess I'll do a little taping in the morning.
Hope this helped.
wrgrs50s wrote:
Thanks for posting with pictures !! Your info is very helpful for many of us who have been looking for tips on our AC units. Looking forward to updates.
You're are welcome and I will update with any new info I find.
profdant139 wrote:
Well done! I really like the use of the Kestrel to measure air flow -- very creative.
It's all I had but it at least shows me where I am making improvements to my situation.
93Cobra2771 wrote:
I had already done the sealing and such but haven't had time to study at improving efficiency very much. Your homework is saving me from doing the same homework. 🙂
Will be watching this for sure.
I hope this helps you out. Just trying to show there is room for improvement, but it may trial and error.
BarneyS wrote:
Excellent post! Welcome to the forums! 🙂 Hope you post often and get a lot of enjoyment out of this site.
What make/model of air conditioner is that?
Barney
Thank you. I don't know what a/c I have but will look at my paperwork and let you know.
Chris Bryant wrote:
Very nice job- though I would not really recommend the booster blowers- rather look closely at the duct work itself, make sure the ends are capped off past the last register and note how the registers are sealed.
I am surprised the vane under the outlet didn't help more.
Yep, even though the air can't go anywhere past the last registers, it is less air that the a/c has to cool. I did verify that the ducts end at the last vent forward/aft.
smthbros wrote:
While I applaud your tenacity in improving the airflow from your AC, I recommend you measure the volume of air flowing (cfm) rather than velocity (mph). When putting a thumb over the end of a garden hose, the velocity of water is increased, however the volume is decreased. CFM is what counts. Also, when turning air thru a duct, the inside radius of the bend is what is critical. Inside radius should be at least half the duct height. Not easy to do in most rv duct systems.
Unfortunately my cfm-o-meter is in the shop. I was just trying to have a record of any improvements in air flow. MPH was tested at the same location on each vent for each test. Therefore the tests were accurate in showing an improvement in air flow. Before, I couldn't hardly feel the air exiting some of the vents… now I can.
- Mark as New
- Bookmark
- Subscribe
- Mute
- Subscribe to RSS Feed
- Permalink
- Report Inappropriate Content
Jul-13-2016 10:54 AM
- Mark as New
- Bookmark
- Subscribe
- Mute
- Subscribe to RSS Feed
- Permalink
- Report Inappropriate Content
Jul-13-2016 08:40 AM
I am surprised the vane under the outlet didn't help more.
- Mark as New
- Bookmark
- Subscribe
- Mute
- Subscribe to RSS Feed
- Permalink
- Report Inappropriate Content
Jul-13-2016 08:06 AM
What make/model of air conditioner is that?
Barney
Hensley "Arrow" 1400# hitch (Sold)
Not towing now.
Former tow vehicles were 2016 Ram 2500 CTD, 2002 Ford F250, 7.3 PSD, 1997 Ram 2500 5.9 gas engine
- Mark as New
- Bookmark
- Subscribe
- Mute
- Subscribe to RSS Feed
- Permalink
- Report Inappropriate Content
Jul-13-2016 08:05 AM
Will be watching this for sure.
2011 F150 Ecoboost SCREW 145" 4x4
Firestone Ride-Rite Air Springs/Air Lift Wireless Controller
2006 Sportsmen by KZ 2604P (30')
Hensley Arrow
- Mark as New
- Bookmark
- Subscribe
- Mute
- Subscribe to RSS Feed
- Permalink
- Report Inappropriate Content
Jul-13-2016 02:11 AM
2013 Toyota Tacoma Off-Road (semi-beefy tires and components)
Our trips -- pix and text
About our trailer
"A journey of a thousand miles begins with a single list."
- Mark as New
- Bookmark
- Subscribe
- Mute
- Subscribe to RSS Feed
- Permalink
- Report Inappropriate Content
Jul-12-2016 07:47 PM
Marc, Jake, Kirsten and fur kids Dexter and Bernie
2017 KZ Venom 4114TK Toy Hauler
2015 GMC Acadia
15 Silverado 3500 SRW quad 6.6 Duramax
11 Silverado 3500 SRW quad 6.6 Duramax
- Mark as New
- Bookmark
- Subscribe
- Mute
- Subscribe to RSS Feed
- Permalink
- Report Inappropriate Content
Jul-12-2016 07:03 PM
2012 Sundance 277RL
TV 2006 Silverado 2500 6.0


