Turn on suggestions
Auto-suggest helps you quickly narrow down your search results by suggesting possible matches as you type.
Showing results for
- Good Sam Community
- Everything RV
- DIY Maintenance
- Tileing our kitchen backsplash
Options
- Subscribe to RSS Feed
- Mark Topic as New
- Mark Topic as Read
- Float this Topic for Current User
- Bookmark
- Subscribe
- Mute
- Printer Friendly Page
Tileing our kitchen backsplash
Options
- Mark as New
- Bookmark
- Subscribe
- Mute
- Subscribe to RSS Feed
- Permalink
- Report Inappropriate Content
Mar-06-2014 03:19 PM
There were several posts about a year ago regarding installing tile backsplashes. The use of a very simple(someone else’s words)method of adhering the tiles to the thin wall material used in RVs. I suggested it to my DW and she immediately found several tiles she liked and brought samples back to the storage yard for me to look at. Well I finally got around to installing the tiles, 1” X 1” on 12” square mats and using Simple Mat. The simple mat is a double side sheet of about 9” by 18” and each box of mats will cover 10 square feet.
I did measure and layout the area to be tiled on butcher paper and then cut the tile sheet for the best coverage. It also allowed me to stack the pieces in the order of installation.
Well as I found out, it’s simple in a kind of rudimentary way. I found it to be very hard to cut with scissors and pretty easy to cut with a utility knife. I learned that you should trim the edges down to a point that the tile adhesive is right to the edge of the mat. The side that goes against the wall is edge to edge like tape, the tile side is little lines of adhesive and may be ½” short of the edge. I had a full row of the 1” tile come loose and had to use contact cement on them because the little lines were too far from the edge to hold the tile.
My two biggest problems were difficulty in getting enough light to see in the narrow space between the exhaust hood and the counter top and not enough space to work easily. Wearing trifocals doesn’t help either.
All in all, the job was kinda/sorta easy and fast but hard on my back because for two and a half days I was bent over. Because I couldn’t see, not all the tile are lined up and some of the 12” squares, WEREN”T. Amazing how a tenth of an inch can multiply when working with little squares. So would I do it again?, yes in a heartbeat. The DW is so happy with her new tile and to be rid of the old Plexiglas panels that always fell off during a very stressful point in a drive and scared the bejesus out of us and the colors match better than the old vinyl walls. I would however make my work area a large and well lit as possible, even going so far as to remove the vent hood and maybe even the MW cabinet. I would also hand select the tile and measure to make sure they were all the same size sheets. I would also trip the simple mats to insure adhesive right to the edge and move my big self healing cutting board out to the dinette table.
There are some parts I hate because I didn’t match every tile seam but I’ve included pictures that show all my mistakes. It is a great project.
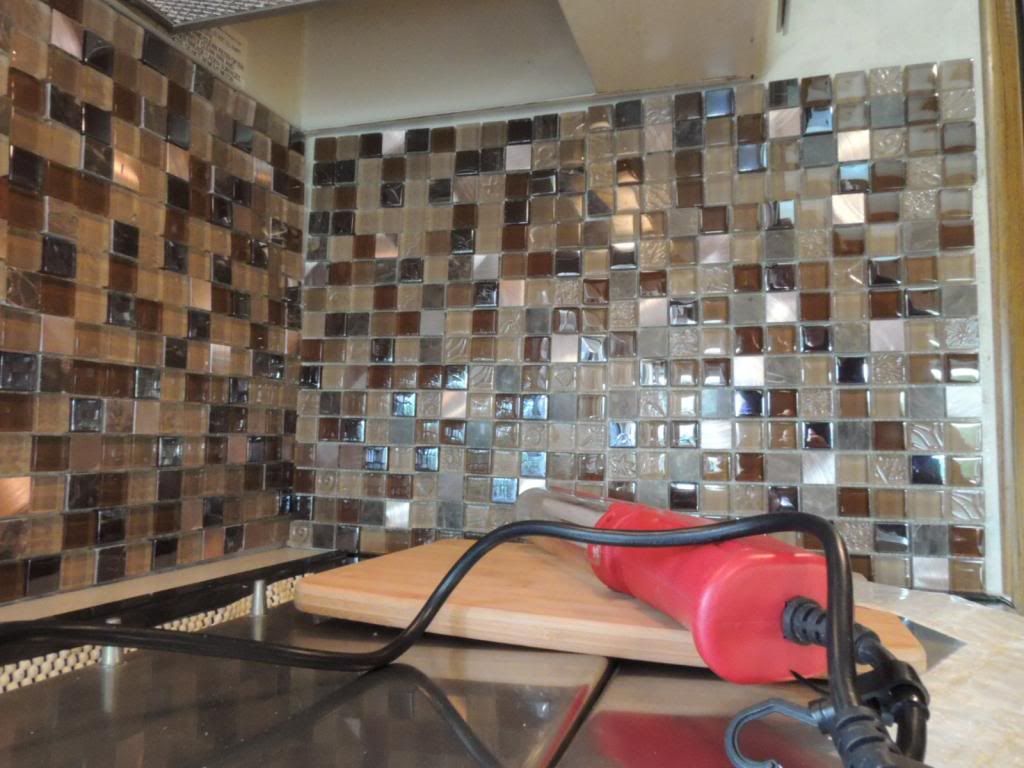
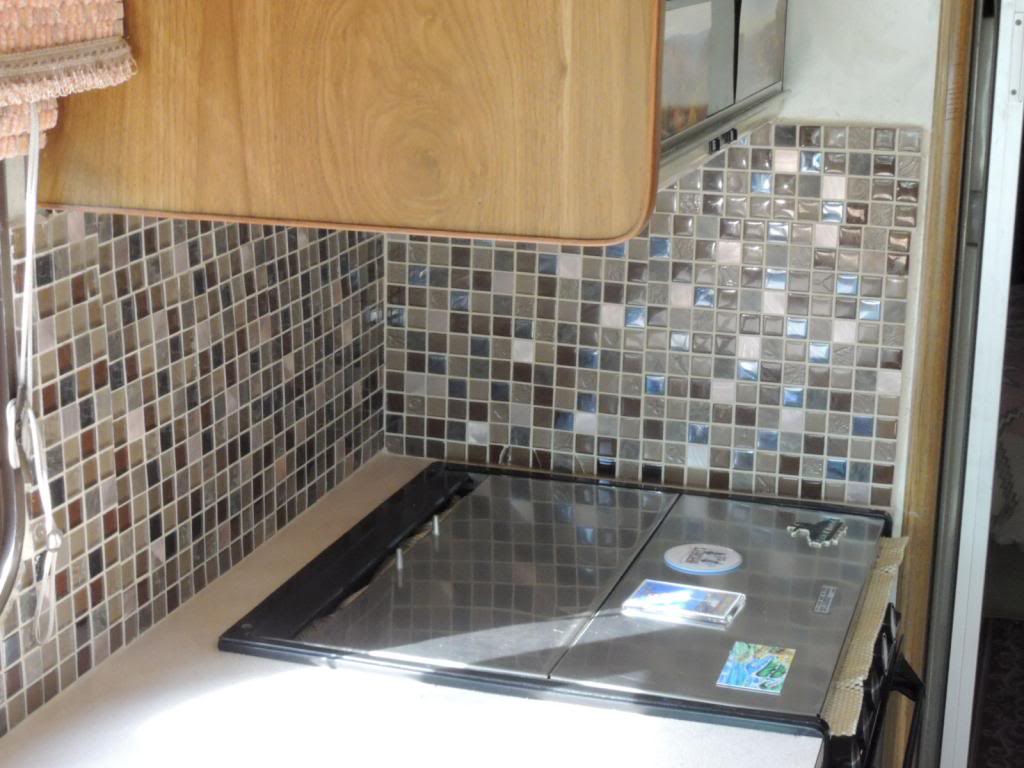
Side and back of stovetop.
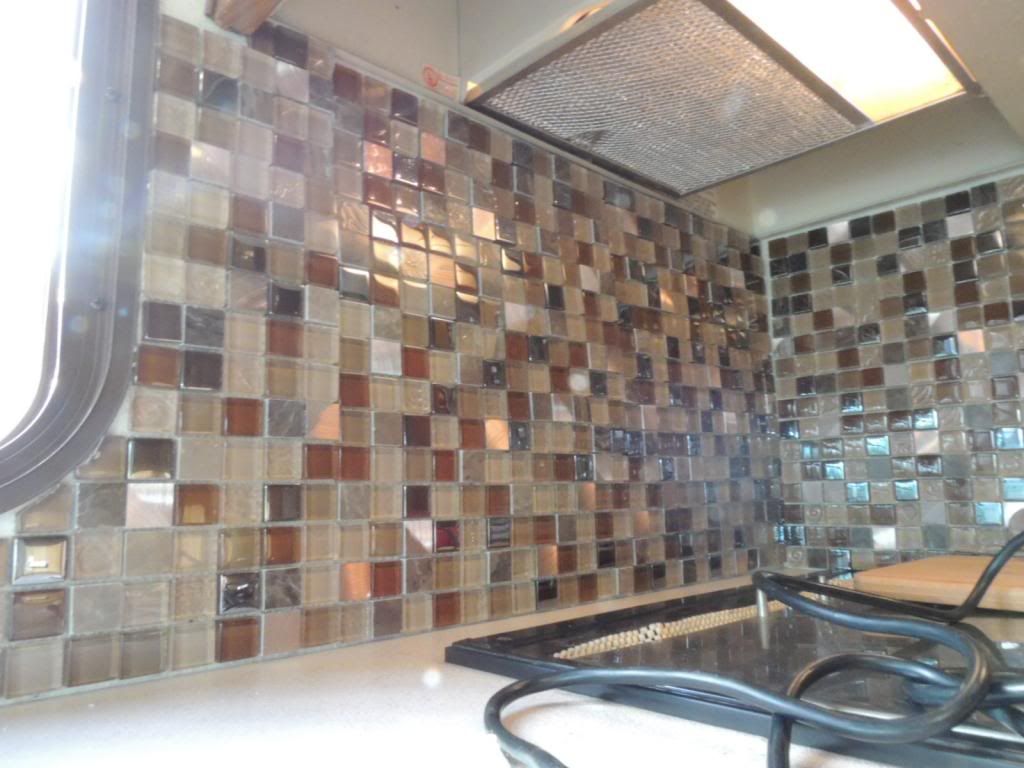
Same as previous.
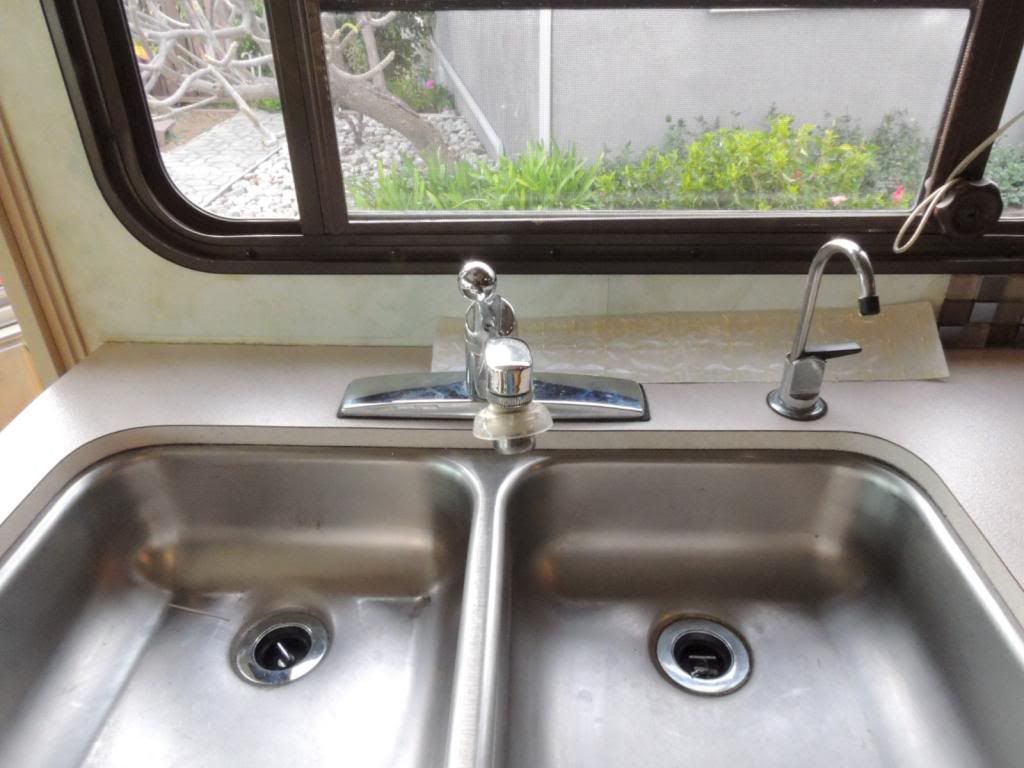
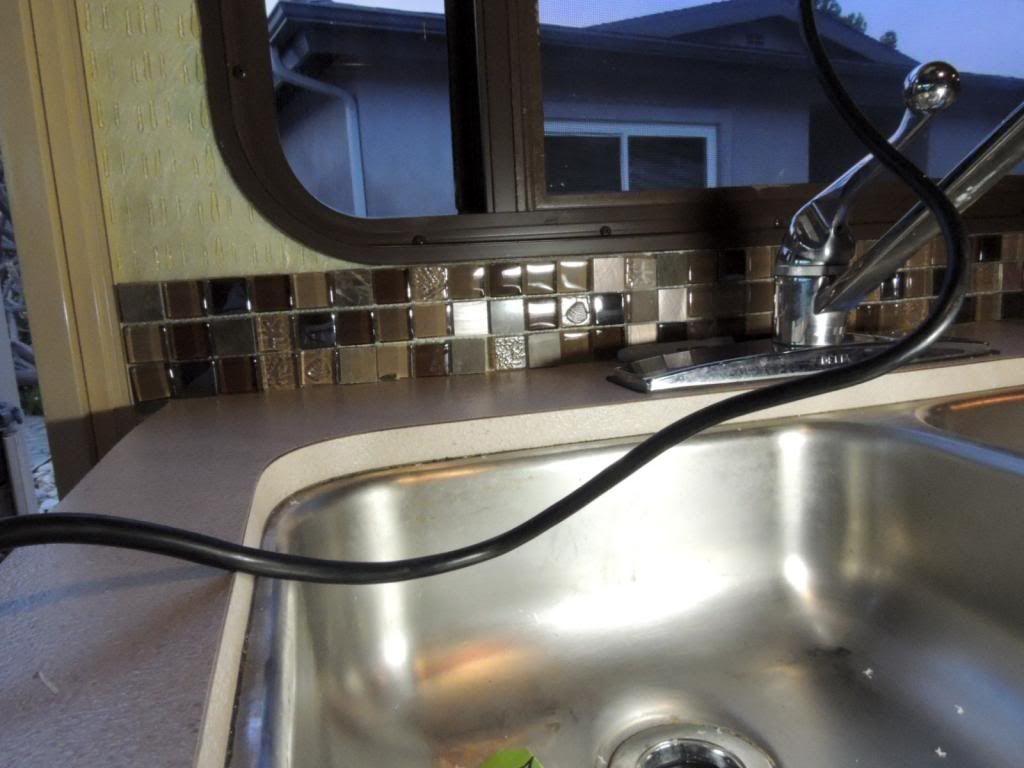
Two of behind faucets before tile and with the simple mat laying there.
Before doing side of window
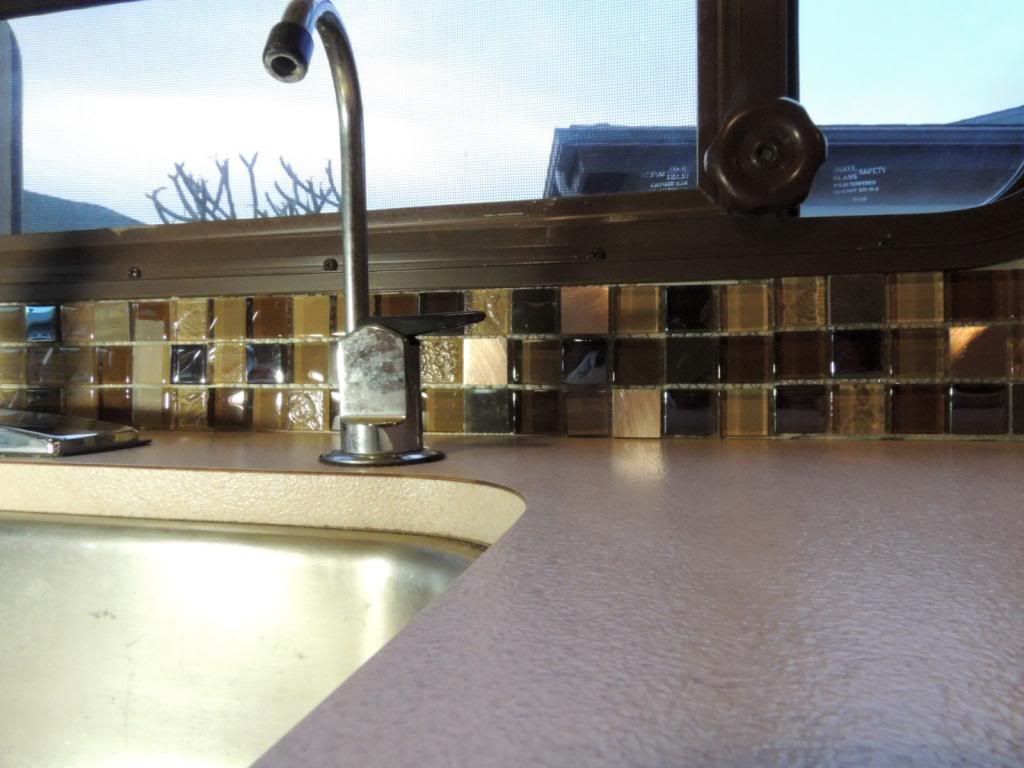
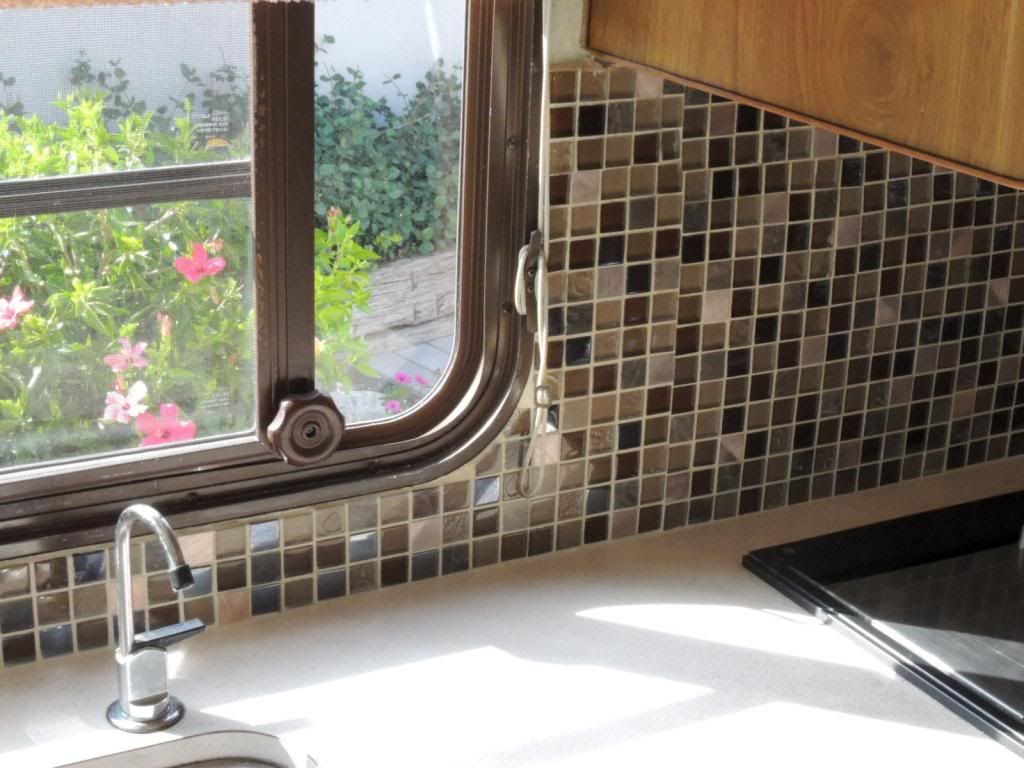
Behind faucets.
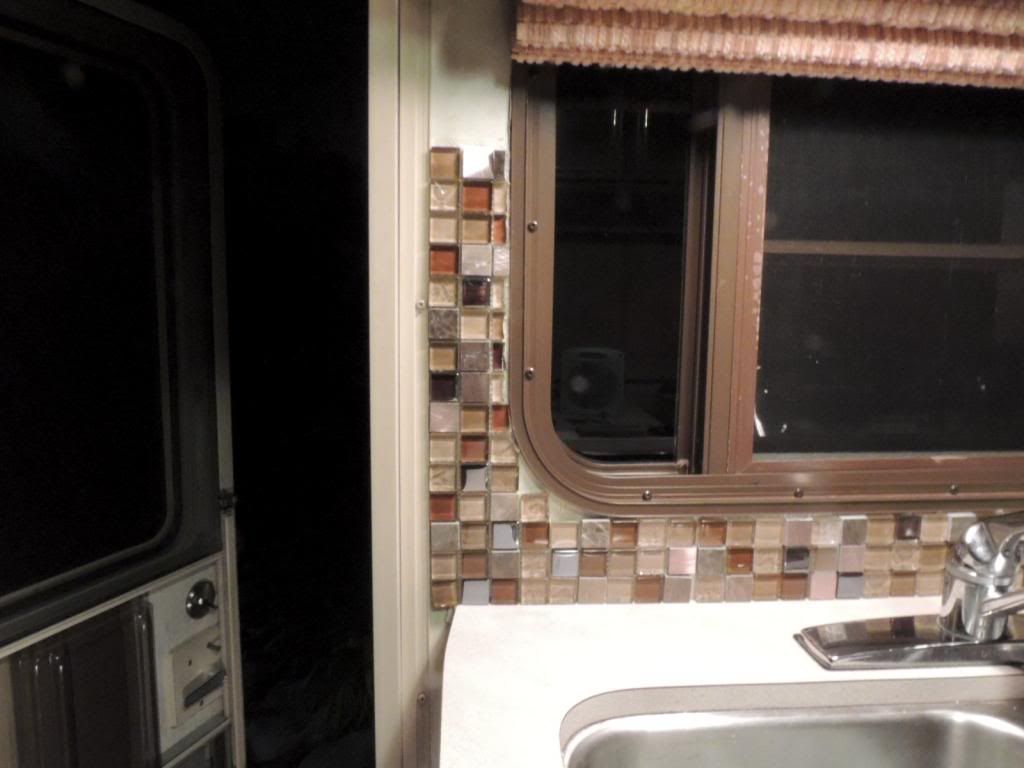
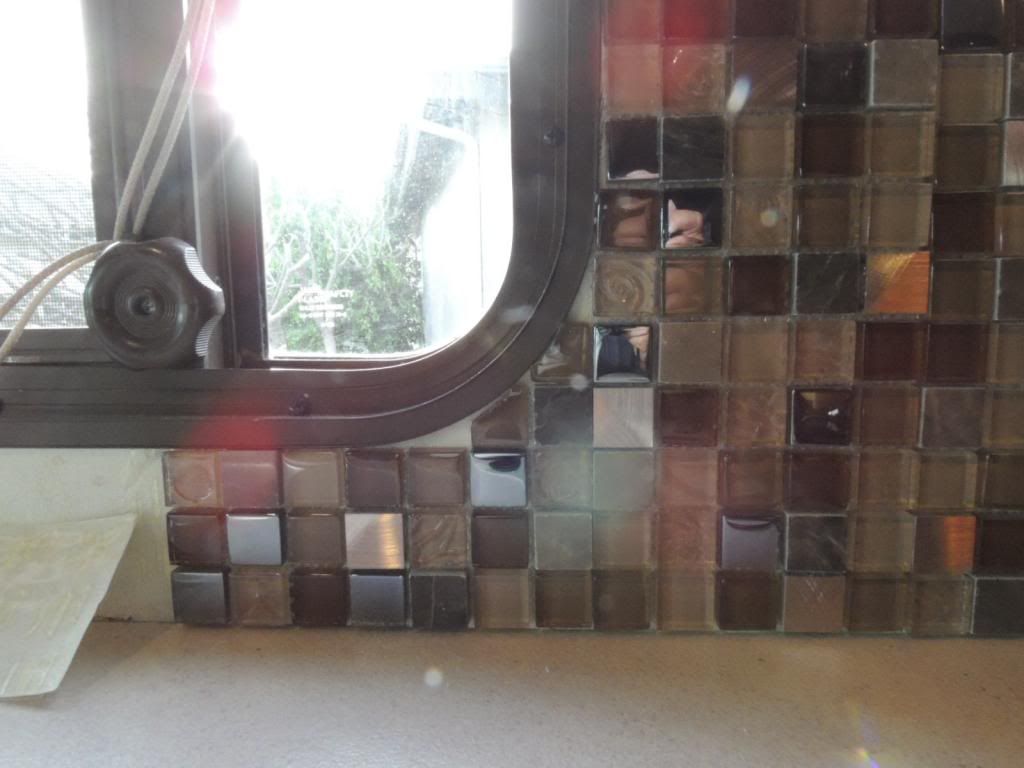
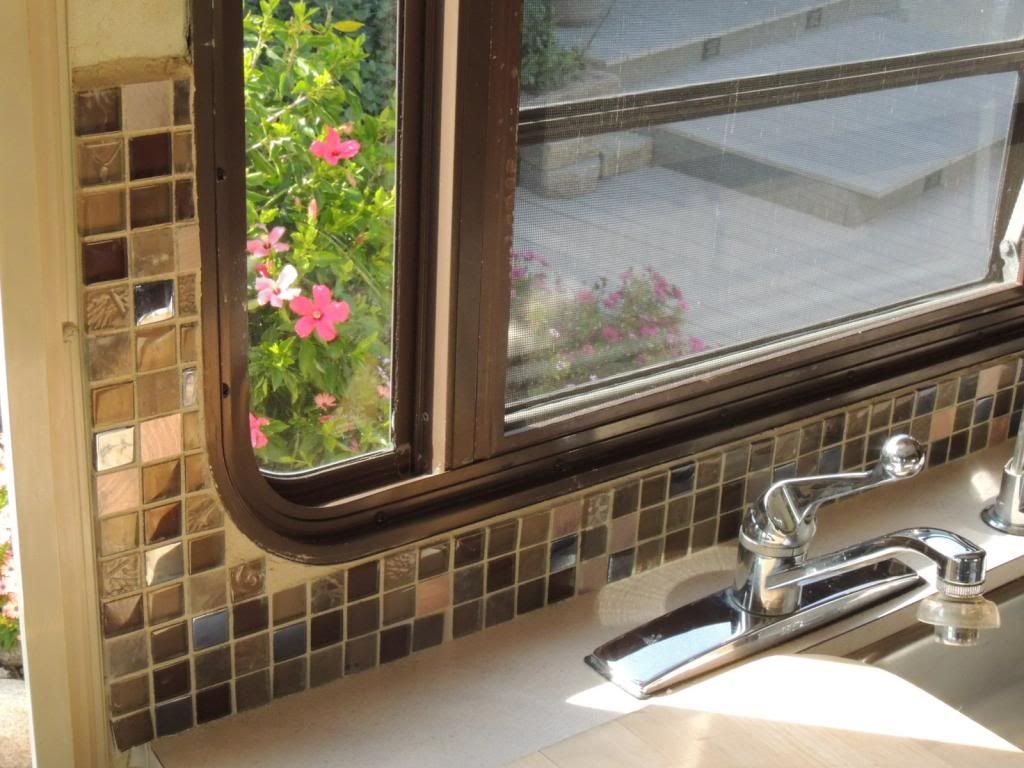
Left side of kitchen window
This and the next two are finished grout.
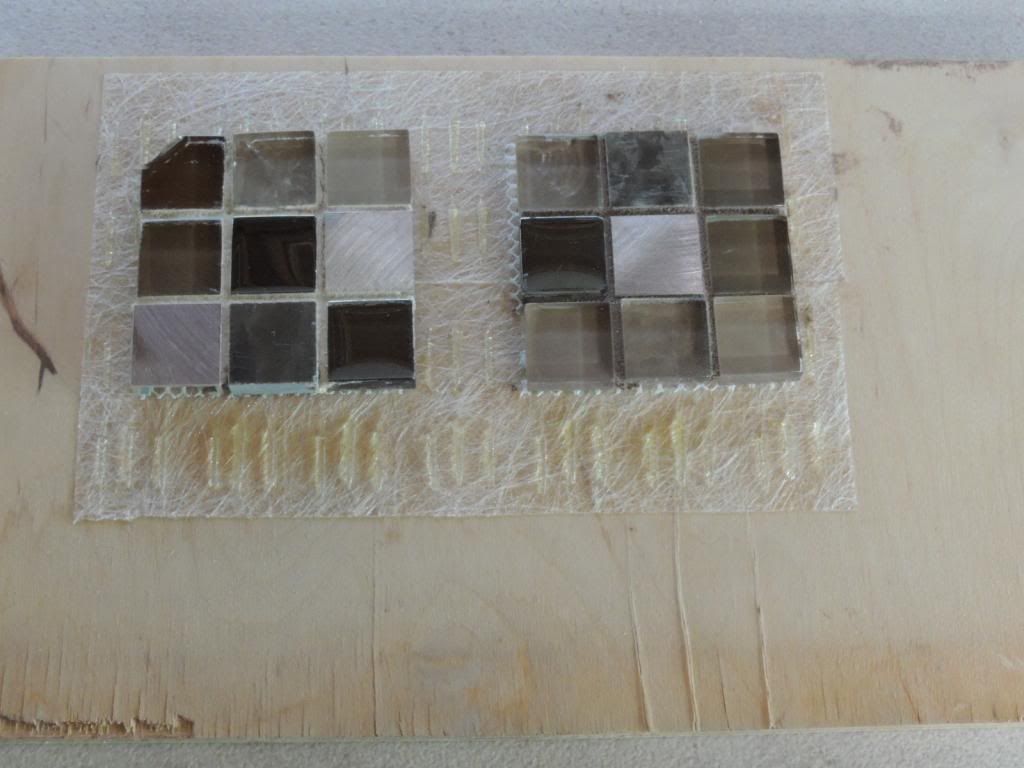
This is a piece of scrap birch ply that I put some of the Simple Mat and tile on so DW could see effect of two different grout colors.
I did measure and layout the area to be tiled on butcher paper and then cut the tile sheet for the best coverage. It also allowed me to stack the pieces in the order of installation.
Well as I found out, it’s simple in a kind of rudimentary way. I found it to be very hard to cut with scissors and pretty easy to cut with a utility knife. I learned that you should trim the edges down to a point that the tile adhesive is right to the edge of the mat. The side that goes against the wall is edge to edge like tape, the tile side is little lines of adhesive and may be ½” short of the edge. I had a full row of the 1” tile come loose and had to use contact cement on them because the little lines were too far from the edge to hold the tile.
My two biggest problems were difficulty in getting enough light to see in the narrow space between the exhaust hood and the counter top and not enough space to work easily. Wearing trifocals doesn’t help either.
All in all, the job was kinda/sorta easy and fast but hard on my back because for two and a half days I was bent over. Because I couldn’t see, not all the tile are lined up and some of the 12” squares, WEREN”T. Amazing how a tenth of an inch can multiply when working with little squares. So would I do it again?, yes in a heartbeat. The DW is so happy with her new tile and to be rid of the old Plexiglas panels that always fell off during a very stressful point in a drive and scared the bejesus out of us and the colors match better than the old vinyl walls. I would however make my work area a large and well lit as possible, even going so far as to remove the vent hood and maybe even the MW cabinet. I would also hand select the tile and measure to make sure they were all the same size sheets. I would also trip the simple mats to insure adhesive right to the edge and move my big self healing cutting board out to the dinette table.
There are some parts I hate because I didn’t match every tile seam but I’ve included pictures that show all my mistakes. It is a great project.
Side and back of stovetop.
Same as previous.
Two of behind faucets before tile and with the simple mat laying there.
Before doing side of window
Behind faucets.
Left side of kitchen window
This and the next two are finished grout.
This is a piece of scrap birch ply that I put some of the Simple Mat and tile on so DW could see effect of two different grout colors.
"I travel not to go anywhere, but to go. I travel for travel's sake. The great affair is to go". R. L. Stevenson
David Bishop
2002 Winnebago Adventurer 32V
2009 GMC Canyon
Roadmaster 5000
BrakeBuddy Classic II
David Bishop
2002 Winnebago Adventurer 32V
2009 GMC Canyon
Roadmaster 5000
BrakeBuddy Classic II
14 REPLIES 14
Options
- Mark as New
- Bookmark
- Subscribe
- Mute
- Subscribe to RSS Feed
- Permalink
- Report Inappropriate Content
Mar-08-2014 04:51 PM
How did you cut the little square in the middle if you need it?I install the Smart tile with the almost same results but they was easier to cut.
2017 Ford F350 DRW,2005 Kountry Star 35ft,16750 lb weight on SAILUN tire,6 points LIPPERD Level-up.New Mor/ryde IS suspension install.Full body paint 2022.RV flex roof 2023
Options
- Mark as New
- Bookmark
- Subscribe
- Mute
- Subscribe to RSS Feed
- Permalink
- Report Inappropriate Content
Mar-07-2014 05:39 AM
Nice. 🙂
Bob and Sharon
2006 Winnebago Sightseer 29R Ford F53. Roadmaster Eagle 8000. 2001 Ford F150 7700 4x4. Still shopping for toad brakes. FMCA F286179
2006 Winnebago Sightseer 29R Ford F53. Roadmaster Eagle 8000. 2001 Ford F150 7700 4x4. Still shopping for toad brakes. FMCA F286179
Options
- Mark as New
- Bookmark
- Subscribe
- Mute
- Subscribe to RSS Feed
- Permalink
- Report Inappropriate Content
Mar-07-2014 05:18 AM
jfkmk wrote:
Looks good. My only question would be regarding durability. I wonder how well tile holds up in a moving vehicle over incredibly thin walls v what they are designed for - rationale thicker rigid surface that doesn't flex.
As I stated earlier, there was a loooong post some time ago regarding tiling using the Simple Mat instead of thinset or some other mortar. The consensus was with the very adhesive simple mat that the thin wall and flexibility weren't a problem. Those that had done the mod said no problems. I am a little concerned about the grout but I have extra so I'll repair if necessary. Another thing that I considered was that my rig is 25 years old and the vinyl covered wall was showing its age.
We're taking off this spring for however long it takes, 4 to six weeks and I'm sure I'll have a report on the durability when we return. This will probably be our last long trip before we upgrade. The DW wants to keep our mountain home until the end of summer and then sell and upgrade the RV.
"I travel not to go anywhere, but to go. I travel for travel's sake. The great affair is to go". R. L. Stevenson
David Bishop
2002 Winnebago Adventurer 32V
2009 GMC Canyon
Roadmaster 5000
BrakeBuddy Classic II
David Bishop
2002 Winnebago Adventurer 32V
2009 GMC Canyon
Roadmaster 5000
BrakeBuddy Classic II
Options
- Mark as New
- Bookmark
- Subscribe
- Mute
- Subscribe to RSS Feed
- Permalink
- Report Inappropriate Content
Mar-07-2014 04:46 AM
Looks good. My only question would be regarding durability. I wonder how well tile holds up in a moving vehicle over incredibly thin walls v what they are designed for - rationale thicker rigid surface that doesn't flex.
Options
- Mark as New
- Bookmark
- Subscribe
- Mute
- Subscribe to RSS Feed
- Permalink
- Report Inappropriate Content
Mar-07-2014 04:14 AM
Excellent job.
2016 6.7 CTD 2500 BIG HORN MEGA CAB
2013 Forest River 3001W Windjammer
Equilizer Hitch
Honda EU2000
"I have this plan to live forever; so far my plan is working"
2013 Forest River 3001W Windjammer
Equilizer Hitch
Honda EU2000
"I have this plan to live forever; so far my plan is working"
Options
- Mark as New
- Bookmark
- Subscribe
- Mute
- Subscribe to RSS Feed
- Permalink
- Report Inappropriate Content
Mar-07-2014 01:40 AM
Great job!! I just used plain ole granite tiles for mine.
cpaulsen
Options
- Mark as New
- Bookmark
- Subscribe
- Mute
- Subscribe to RSS Feed
- Permalink
- Report Inappropriate Content
Mar-06-2014 09:07 PM
Nice work!
2006 Ram 3500
2014 Open Range
"I don't trust my own advise!"
2014 Open Range
"I don't trust my own advise!"
Options
- Mark as New
- Bookmark
- Subscribe
- Mute
- Subscribe to RSS Feed
- Permalink
- Report Inappropriate Content
Mar-06-2014 07:48 PM
I like it!
Options
- Mark as New
- Bookmark
- Subscribe
- Mute
- Subscribe to RSS Feed
- Permalink
- Report Inappropriate Content
Mar-06-2014 07:41 PM
To ScottG,
I used a quart and about three tablespoons of premixed grout. Very fine sand in the grout.
I used a quart and about three tablespoons of premixed grout. Very fine sand in the grout.
"I travel not to go anywhere, but to go. I travel for travel's sake. The great affair is to go". R. L. Stevenson
David Bishop
2002 Winnebago Adventurer 32V
2009 GMC Canyon
Roadmaster 5000
BrakeBuddy Classic II
David Bishop
2002 Winnebago Adventurer 32V
2009 GMC Canyon
Roadmaster 5000
BrakeBuddy Classic II
Options
- Mark as New
- Bookmark
- Subscribe
- Mute
- Subscribe to RSS Feed
- Permalink
- Report Inappropriate Content
Mar-06-2014 05:53 PM
Easiest way I have found to keep tile lines lined up and straight is to use the edge of a metal level. When tile is mounted on the wall and before thin set hardens, push the edge of the level into the tile lines at a 45' angle, across the whole line, working from top to bottom. A torpedo level works to line up the vertical lines.
1999 Winnebego Chieftain
Wayne & Leila and Teddi (the Kid in the brown fuzzy pyjamas)
Sometimes I think the surest sign that intelligent life exists elsewhere in the universe is that none of it has tried to contact us.
Wayne & Leila and Teddi (the Kid in the brown fuzzy pyjamas)
Sometimes I think the surest sign that intelligent life exists elsewhere in the universe is that none of it has tried to contact us.
Options
- Mark as New
- Bookmark
- Subscribe
- Mute
- Subscribe to RSS Feed
- Permalink
- Report Inappropriate Content
Mar-06-2014 05:34 PM
Nice work
This member is not responsible for opinions that are inaccurate due to faulty information provided by the original poster. Use them at your own discretion.
09 SuperDuty Crew Cab 6.8L/4.10(The Black Pearl)
06 Keystone Hornet 29 RLS/(The Cracker Cabana)
09 SuperDuty Crew Cab 6.8L/4.10(The Black Pearl)
06 Keystone Hornet 29 RLS/(The Cracker Cabana)
Options
- Mark as New
- Bookmark
- Subscribe
- Mute
- Subscribe to RSS Feed
- Permalink
- Report Inappropriate Content
Mar-06-2014 04:15 PM
Nice work and great write-up - thanks.
I've been thinking of doing the same thing but I'm wondering if it uses normal grout?
Thx,
Scott
I've been thinking of doing the same thing but I'm wondering if it uses normal grout?
Thx,
Scott
Options
- Mark as New
- Bookmark
- Subscribe
- Mute
- Subscribe to RSS Feed
- Permalink
- Report Inappropriate Content
Mar-06-2014 03:55 PM
Great job...
Semper Fi
2004 National Tropi Cal T370
2004 National Tropi Cal T370
Options
- Mark as New
- Bookmark
- Subscribe
- Mute
- Subscribe to RSS Feed
- Permalink
- Report Inappropriate Content
Mar-06-2014 03:53 PM
Looks good, and also nice job on posting picutures! 🙂 Thank you.
Barney
Barney
2004 Sunnybrook Titan 30FKS TT
Hensley "Arrow" 1400# hitch (Sold)
Not towing now.
Former tow vehicles were 2016 Ram 2500 CTD, 2002 Ford F250, 7.3 PSD, 1997 Ram 2500 5.9 gas engine
Hensley "Arrow" 1400# hitch (Sold)
Not towing now.
Former tow vehicles were 2016 Ram 2500 CTD, 2002 Ford F250, 7.3 PSD, 1997 Ram 2500 5.9 gas engine


