Turn on suggestions
Auto-suggest helps you quickly narrow down your search results by suggesting possible matches as you type.
Showing results for
- Good Sam Community
- Groups
- Fifth Wheel Group
- Forum
- Re: Featherlite Project - Ideas & Opinions Welcome...
Options
- Subscribe to RSS Feed
- Mark Topic as New
- Mark Topic as Read
- Float this Topic for Current User
- Bookmark
- Subscribe
- Mute
- Printer Friendly Page
Featherlite Project - Ideas & Opinions Welcome!!
Options
- Mark as New
- Bookmark
- Subscribe
- Mute
- Subscribe to RSS Feed
- Permalink
- Report Inappropriate Content
Sep-13-2013 01:09 PM
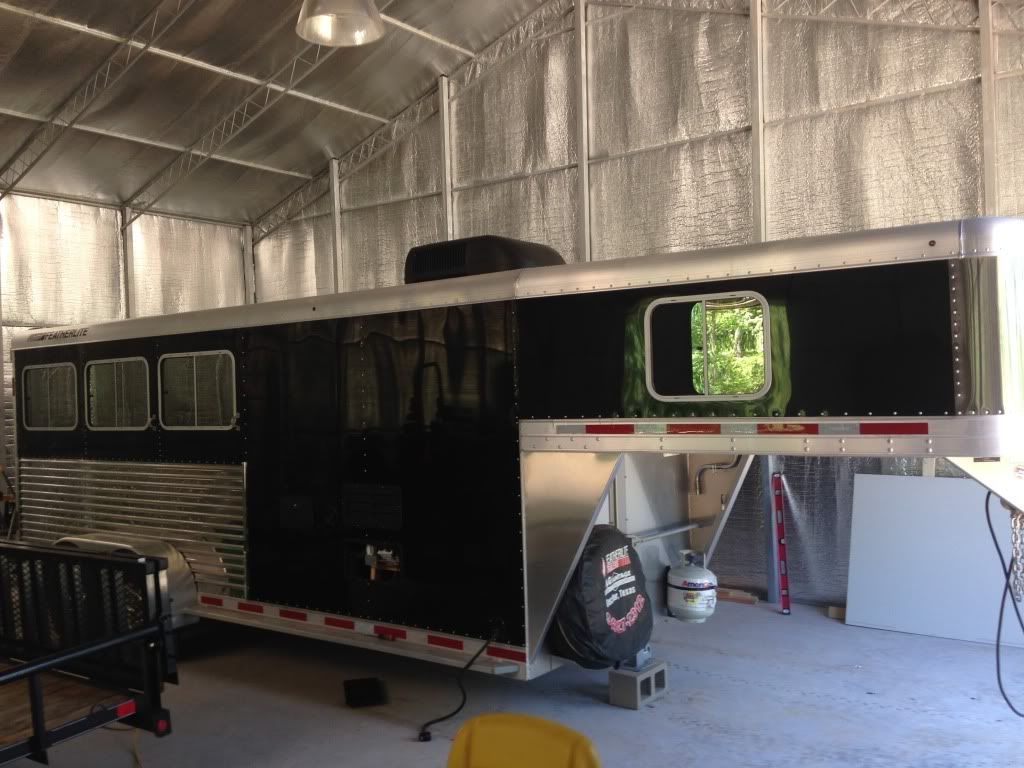
So a few months ago I bought my newest project... a 2011 Featherlite Horse trailer with a shell of a LQ in the front. I needed something to haul the 4-legged toys as well as the 4-wheeled toys and I've had something like this in mind for quite some time now.
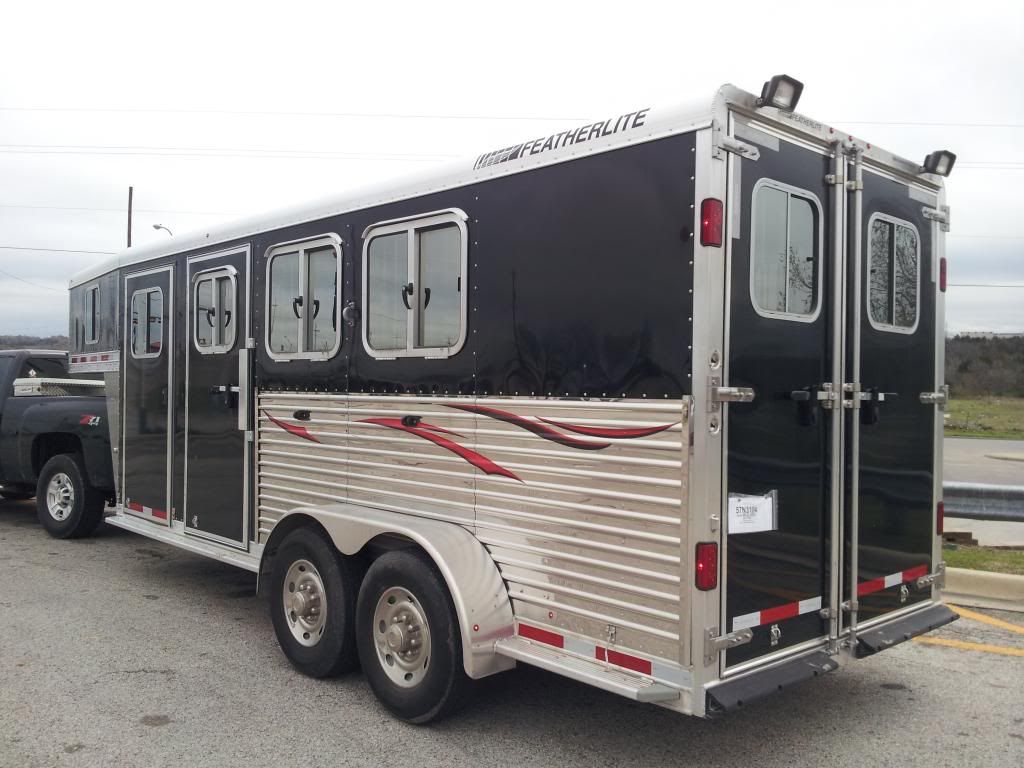
I've started on it a couple months ago working on it as work permits, and I'm finally starting to make some headway. So far on the outside I've only removed the rear decals.
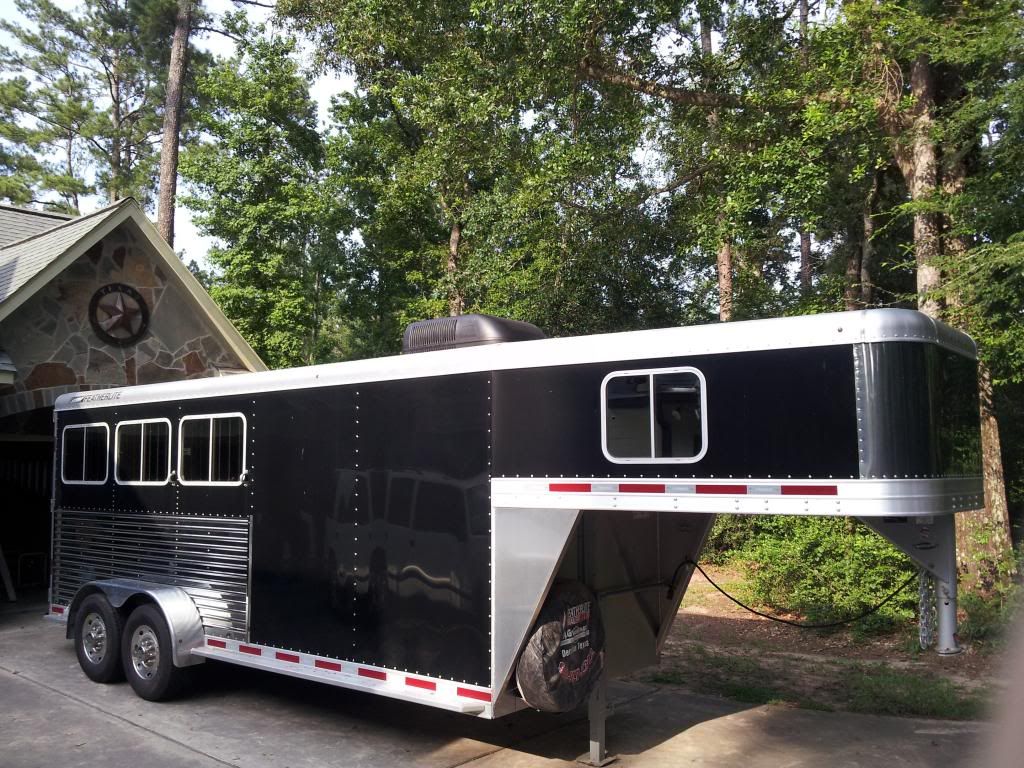
The look I am going for is very similar to this pop-up camper I did a couple of years ago:

Here are a few more pictures if any of you are interested:
http://s27.photobucket.com/user/blackhighrider/library/Camper?sort=3&page=1
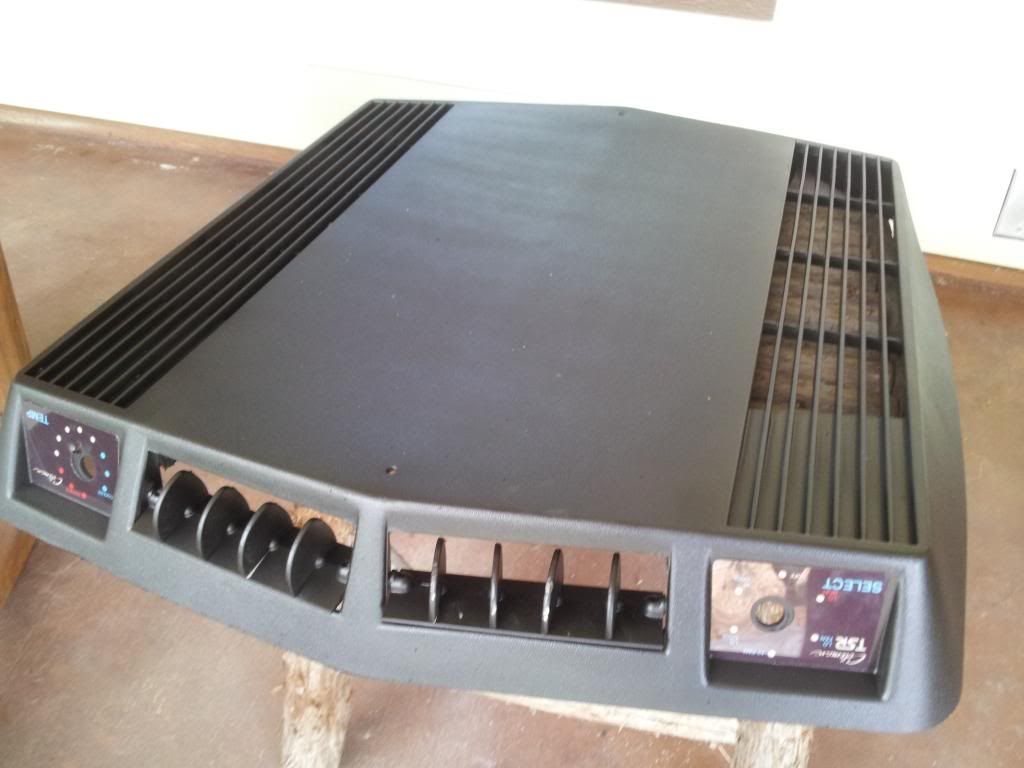
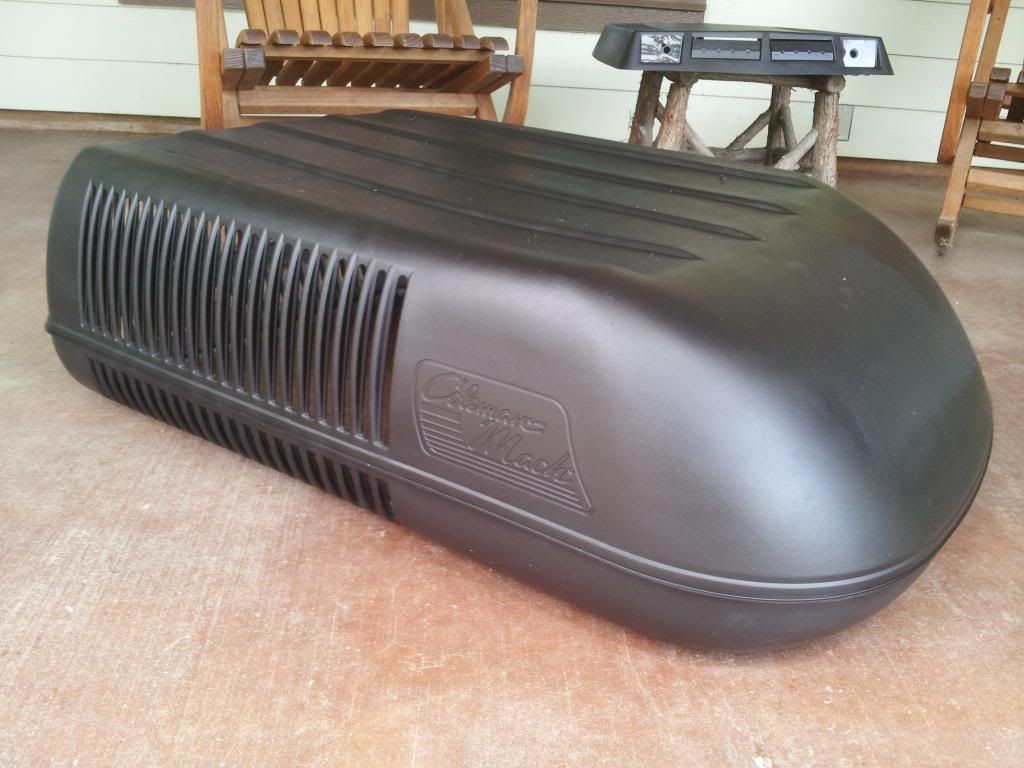
So far I've got the AC unit on (plasti-dipped the shroud black to match).
I've started on it a couple months ago working on it as work permits, and I'm finally starting to make some headway. So far on the outside I've only removed the rear decals.
The look I am going for is very similar to this pop-up camper I did a couple of years ago:
Here are a few more pictures if any of you are interested:
http://s27.photobucket.com/user/blackhighrider/library/Camper?sort=3&page=1
So far I've got the AC unit on (plasti-dipped the shroud black to match).
Labels:
- Labels:
-
Toy Haulers
24 REPLIES 24
Options
- Mark as New
- Bookmark
- Subscribe
- Mute
- Subscribe to RSS Feed
- Permalink
- Report Inappropriate Content
Oct-27-2014 02:14 PM
fly-boy wrote:
Outstanding! Really looks great!
Did you give any thought to insulation? Also, I added a hay pod/rack to my LQ and installed a 40 gallon water tank. It made a world of difference in how long we could dry camp.
Wish I had the time and know how to undertake a project like this- I really admire your effort and ability.
Sorry for the slow reply! Since I pulled it in the shop and waxed it - I honestly haven't touched it since! Just haven't had time to lately. Now that the weather has cooled off I plan on getting it out soon.
I've insulated them in the past with foam insulation, it's fairly easy. With this, though, I figured since the LQ was fairly small that I wouldn't worry about it too much. The AC unit is easily capable of freezing that little area. If I do camp in it in the winter, a space heater should do the job along with the heat strip in the roof unit... But I doubt it'll see much cold weather camping.
A considered a hay rack but as little as I would use it I just couldn't justify the money on one at the moment. I would eventually love to have one! I'd build an enclosure for the generator and some extra H20 storage!
Options
- Mark as New
- Bookmark
- Subscribe
- Mute
- Subscribe to RSS Feed
- Permalink
- Report Inappropriate Content
Aug-06-2014 01:09 PM
Outstanding! Really looks great!
Did you give any thought to insulation? Also, I added a hay pod/rack to my LQ and installed a 40 gallon water tank. It made a world of difference in how long we could dry camp.
Wish I had the time and know how to undertake a project like this- I really admire your effort and ability.
Did you give any thought to insulation? Also, I added a hay pod/rack to my LQ and installed a 40 gallon water tank. It made a world of difference in how long we could dry camp.
Wish I had the time and know how to undertake a project like this- I really admire your effort and ability.
2016 Chevy LTZ
2009 WW HKD
A few toys...
2009 WW HKD
A few toys...
Options
- Mark as New
- Bookmark
- Subscribe
- Mute
- Subscribe to RSS Feed
- Permalink
- Report Inappropriate Content
Aug-06-2014 09:10 AM
Haven't updated this in a while... Pretty much tied up the loose ends with the camper.
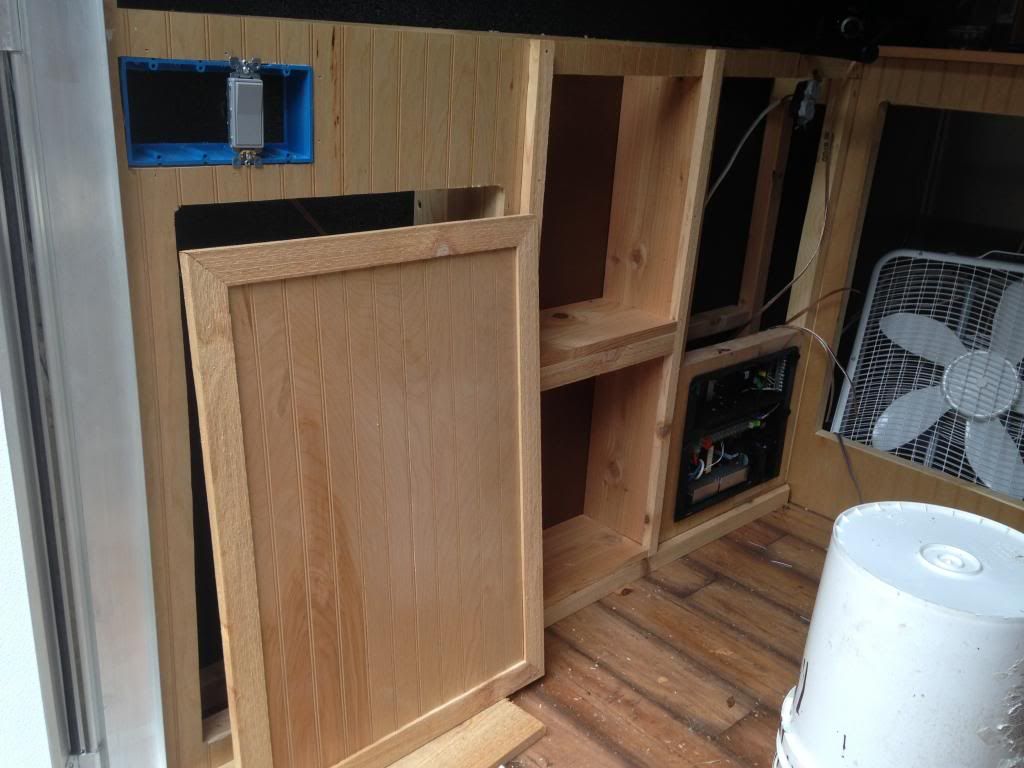
Got the vents installed for the refrigerator finally. I was really hesitant to cut through one of the wall supports for this, but went ahead anyway. I figured I'd be having something welded around the vent to make it solid - but so far it doesn't appear to be too bad. I may have a frame welded in sometime in the future though.
Washed it, pulled it into the shop and put 2 coats of wax over the entire thing with a polisher. 🙂 Sometime soon when it cools off I'm going to polish all of the aluminum.
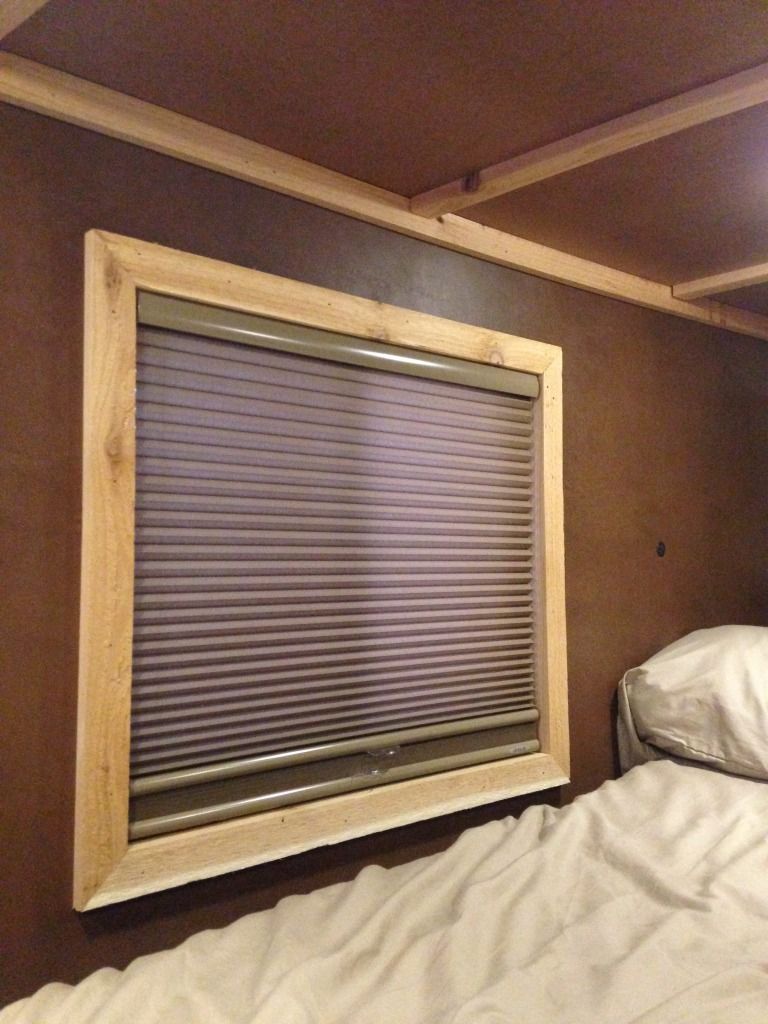
Ordered some blinds from Lowe's last month and put them in. They're 2 layer shades - one of them nearly blacks out the window, the other lets some light through. Good Lord they were not cheap.
I plan on pulling it out of the shop this weekend - maybe even taking it camping for the first time! That is if I have a little help... I broke fingers on both of my hands so I can't do much but stand around with splints on my fingers looking like Edward Scissorhands. 😞
Got the vents installed for the refrigerator finally. I was really hesitant to cut through one of the wall supports for this, but went ahead anyway. I figured I'd be having something welded around the vent to make it solid - but so far it doesn't appear to be too bad. I may have a frame welded in sometime in the future though.
Washed it, pulled it into the shop and put 2 coats of wax over the entire thing with a polisher. 🙂 Sometime soon when it cools off I'm going to polish all of the aluminum.

Ordered some blinds from Lowe's last month and put them in. They're 2 layer shades - one of them nearly blacks out the window, the other lets some light through. Good Lord they were not cheap.

I plan on pulling it out of the shop this weekend - maybe even taking it camping for the first time! That is if I have a little help... I broke fingers on both of my hands so I can't do much but stand around with splints on my fingers looking like Edward Scissorhands. 😞
Options
- Mark as New
- Bookmark
- Subscribe
- Mute
- Subscribe to RSS Feed
- Permalink
- Report Inappropriate Content
Nov-25-2013 06:10 AM
Not the best pictures... I will take several of everything when it is completely finished with a real camera.
Installed some LED lights in the light fixtures.
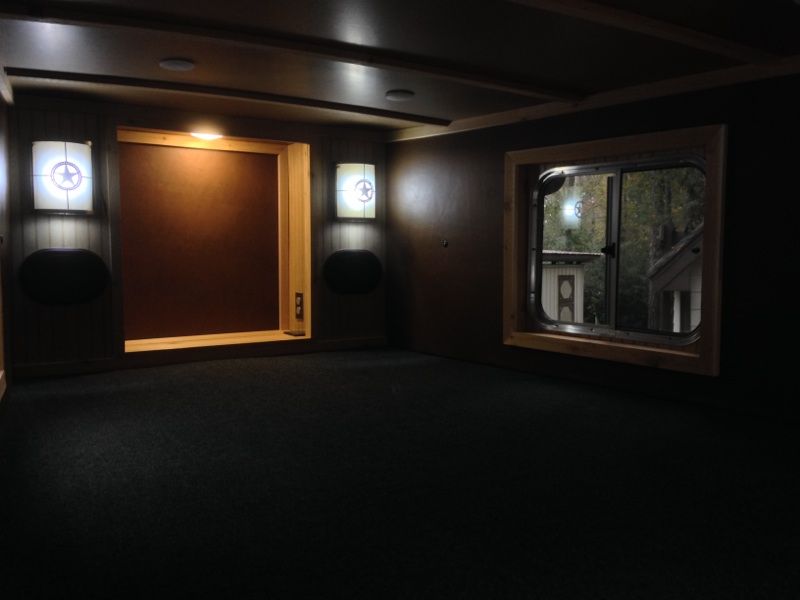
Installed some LED lights in the light fixtures.

Options
- Mark as New
- Bookmark
- Subscribe
- Mute
- Subscribe to RSS Feed
- Permalink
- Report Inappropriate Content
Nov-25-2013 06:09 AM


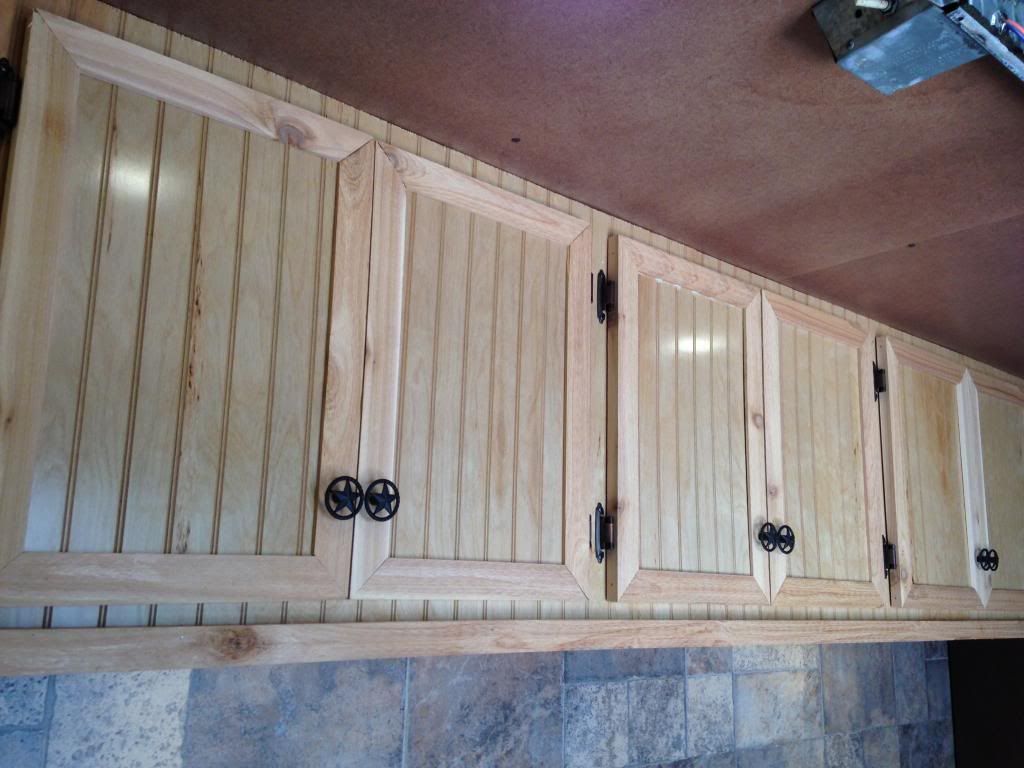
Small cabinets and steps up to bunk complete.


Bunk area and nose finally finished.

Options
- Mark as New
- Bookmark
- Subscribe
- Mute
- Subscribe to RSS Feed
- Permalink
- Report Inappropriate Content
Nov-25-2013 06:06 AM
Finally coming together and I'm almost done...
So last week we had a crazy storm - and I found out that my A/C unit had a leak. Had to cut out every inch of the laminate flooring and one section of the ceiling. All of it was ruined. Luckily that was the only thing that was damaged.
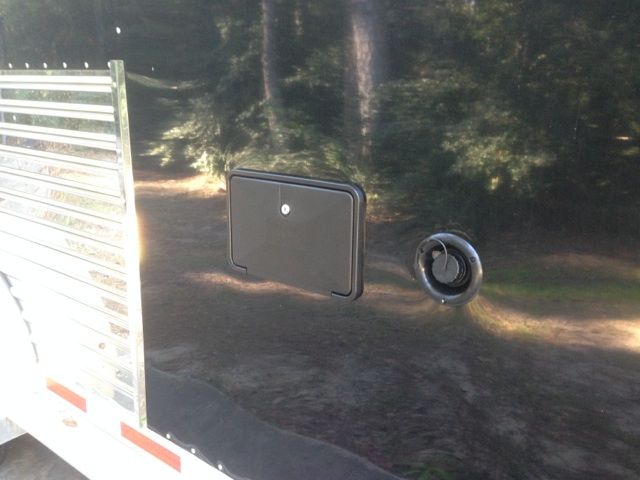
Exterior shower and water fill in..
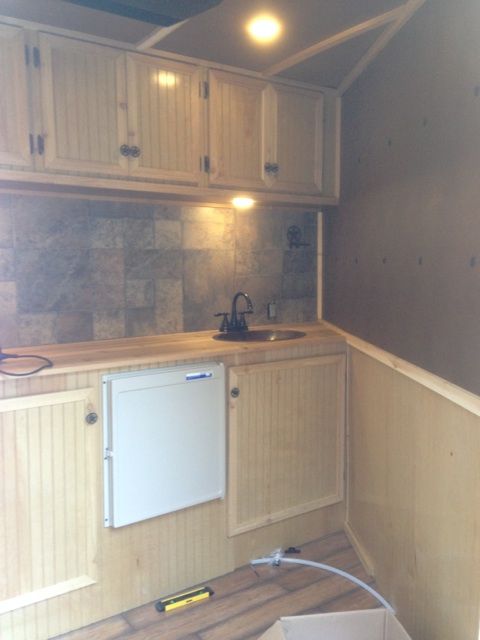
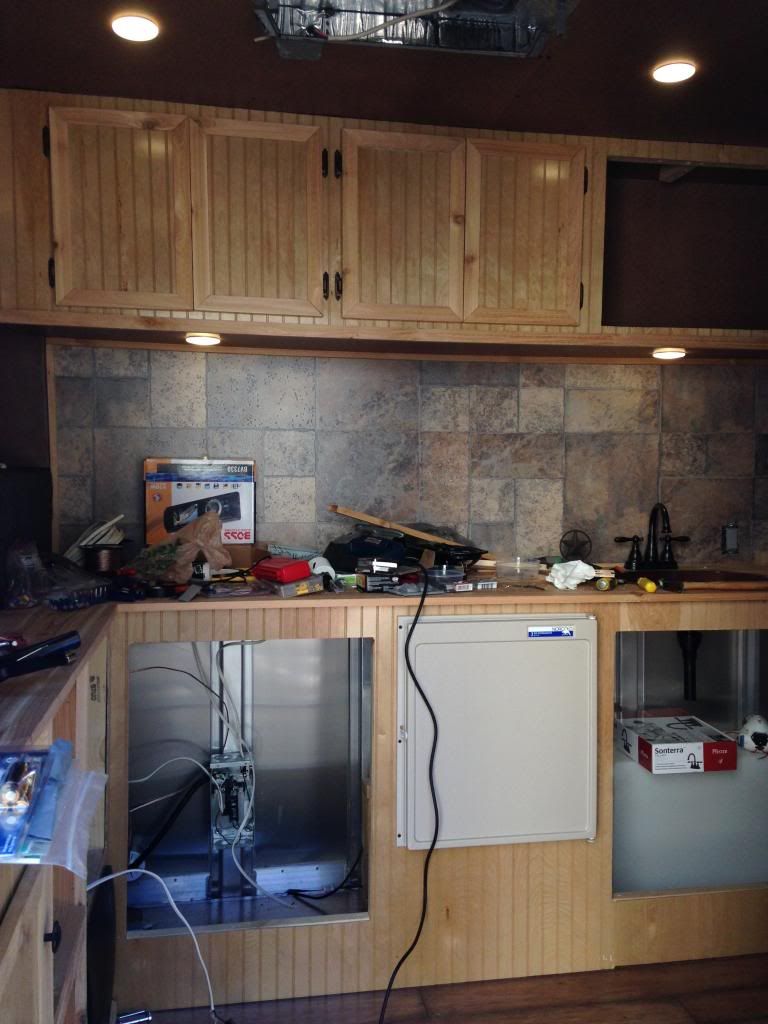
Cabinets, walls, backsplash, lighting... DONE!
So last week we had a crazy storm - and I found out that my A/C unit had a leak. Had to cut out every inch of the laminate flooring and one section of the ceiling. All of it was ruined. Luckily that was the only thing that was damaged.
Exterior shower and water fill in..

Cabinets, walls, backsplash, lighting... DONE!

Options
- Mark as New
- Bookmark
- Subscribe
- Mute
- Subscribe to RSS Feed
- Permalink
- Report Inappropriate Content
Nov-15-2013 04:13 PM
How's the progress coming along? Any new build pics to share? Looks great so far
We the willing, led by the unknowing, are doing the impossible for the ungrateful. We have done so much, with so little, for so long, we are now qualified to do anything, with nothing.
Options
- Mark as New
- Bookmark
- Subscribe
- Mute
- Subscribe to RSS Feed
- Permalink
- Report Inappropriate Content
Oct-31-2013 08:45 AM
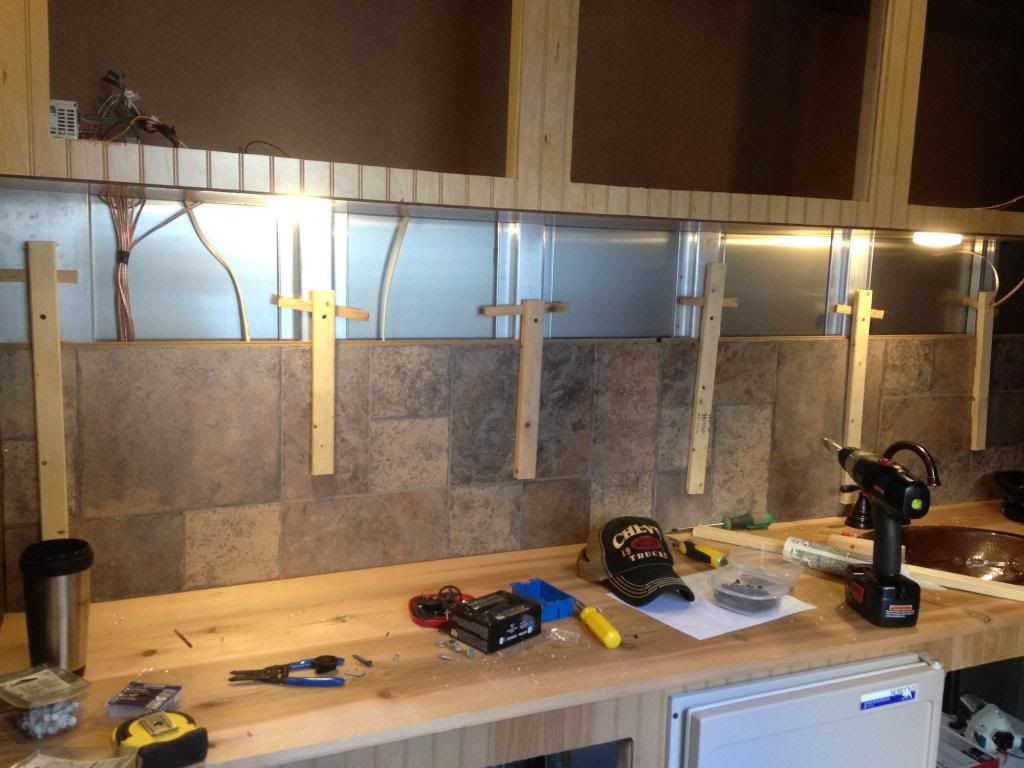
Last weekend I tackled the lower cabinets. The small cabinet against the front of the trailer I had a hard time deciding on... I wanted to incorporate some sort of steps into it along with the converter box but couldn't really think of anything unique. I ended up going this route and just building a couple of steps in the center for the bunk.
The upper cabinet was a real pain because I really couldn't figure out how I wanted to build & attach it to the trailer... So I kinda built it as I went along. Turned out a heck of a lot better than I thought it would.
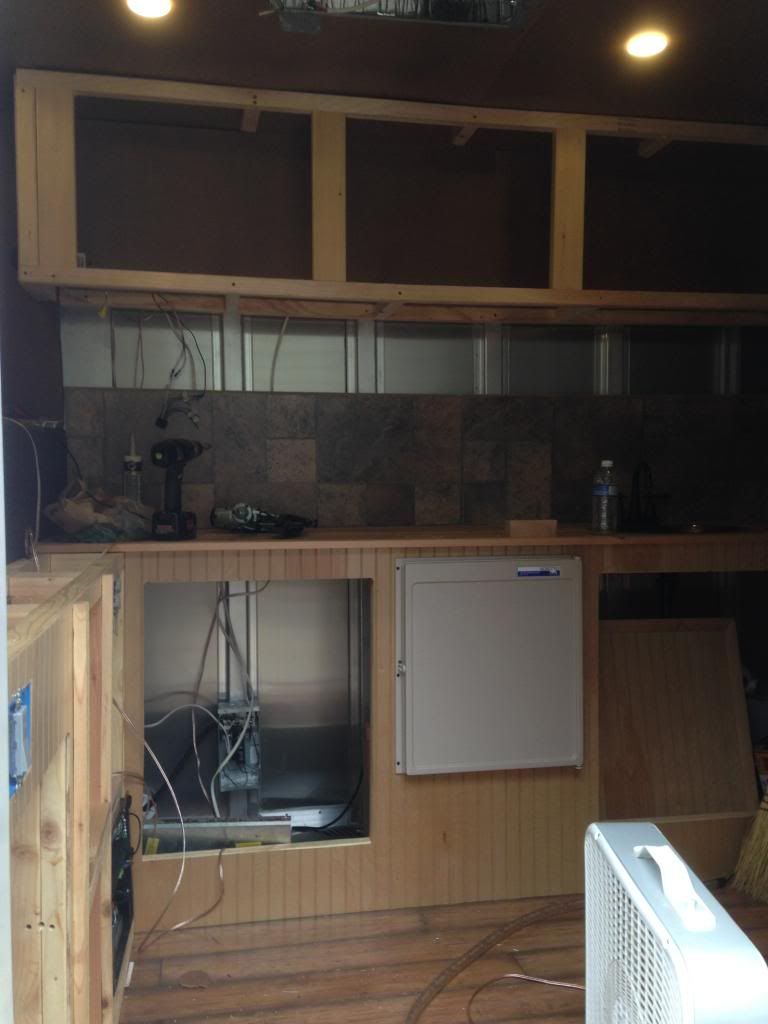
I also got the laminate tile backsplash up. I didn't want any holes in it so I just used some liquid nails.
The upper cabinet was a real pain because I really couldn't figure out how I wanted to build & attach it to the trailer... So I kinda built it as I went along. Turned out a heck of a lot better than I thought it would.
I also got the laminate tile backsplash up. I didn't want any holes in it so I just used some liquid nails.
Options
- Mark as New
- Bookmark
- Subscribe
- Mute
- Subscribe to RSS Feed
- Permalink
- Report Inappropriate Content
Oct-31-2013 08:20 AM
So the past few weeks have been a little crazy - I've only been able to work on this thing about one day a week... But I have made some progress! 🙂
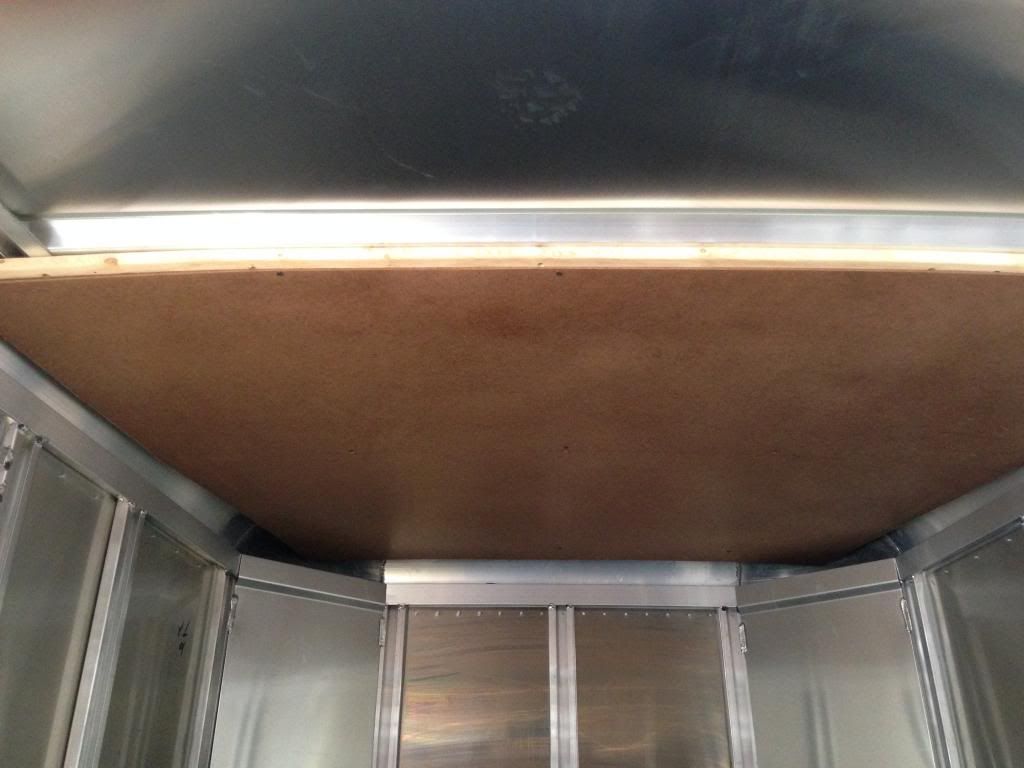
This is the start of the ceiling. In the other pictures it looks awful at the moment... But once I get the trim over the seams it'll look good. I had to screw lathe to the beams across the ceiling to fasten everything to.
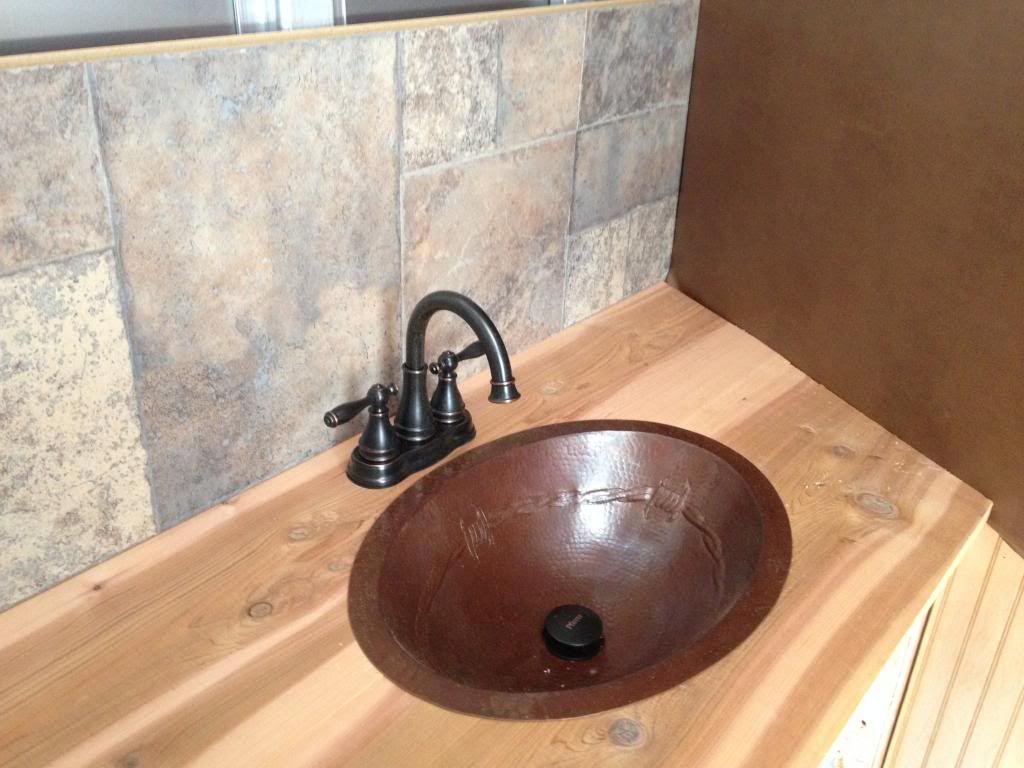
Copper sink I picked up
The beginning of the nose... I framed up each side and installed the lights along with a 6x9 speaker on either side. I honestly don't like the way the speakers look - so those may get changed sometime in the future. Also got all my puck lights in!
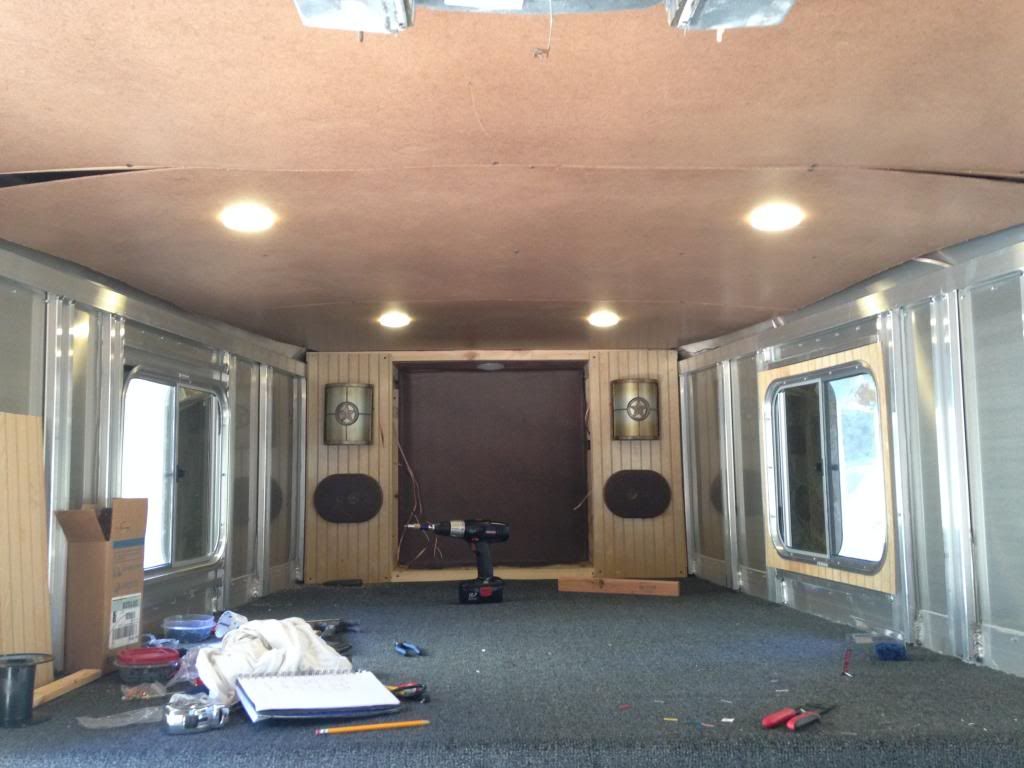
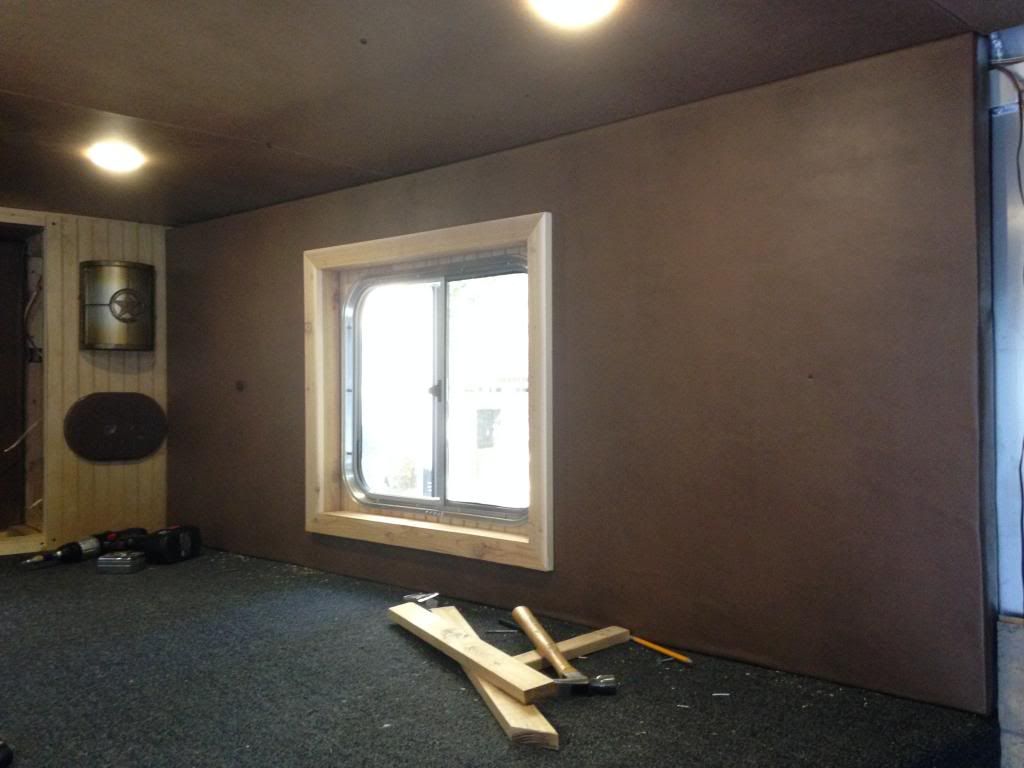
I removed the window frames and cut out paneling to go around the edges before I framed up the wall to go on either side of the nose area... Then framed up a little 2x wall that I covered with the leather.. Then framed around the window with some cedar.
This is the start of the ceiling. In the other pictures it looks awful at the moment... But once I get the trim over the seams it'll look good. I had to screw lathe to the beams across the ceiling to fasten everything to.
Copper sink I picked up
The beginning of the nose... I framed up each side and installed the lights along with a 6x9 speaker on either side. I honestly don't like the way the speakers look - so those may get changed sometime in the future. Also got all my puck lights in!
I removed the window frames and cut out paneling to go around the edges before I framed up the wall to go on either side of the nose area... Then framed up a little 2x wall that I covered with the leather.. Then framed around the window with some cedar.
Options
- Mark as New
- Bookmark
- Subscribe
- Mute
- Subscribe to RSS Feed
- Permalink
- Report Inappropriate Content
Oct-17-2013 12:10 PM
Sorry for the slow reply - work has been crazy lately.
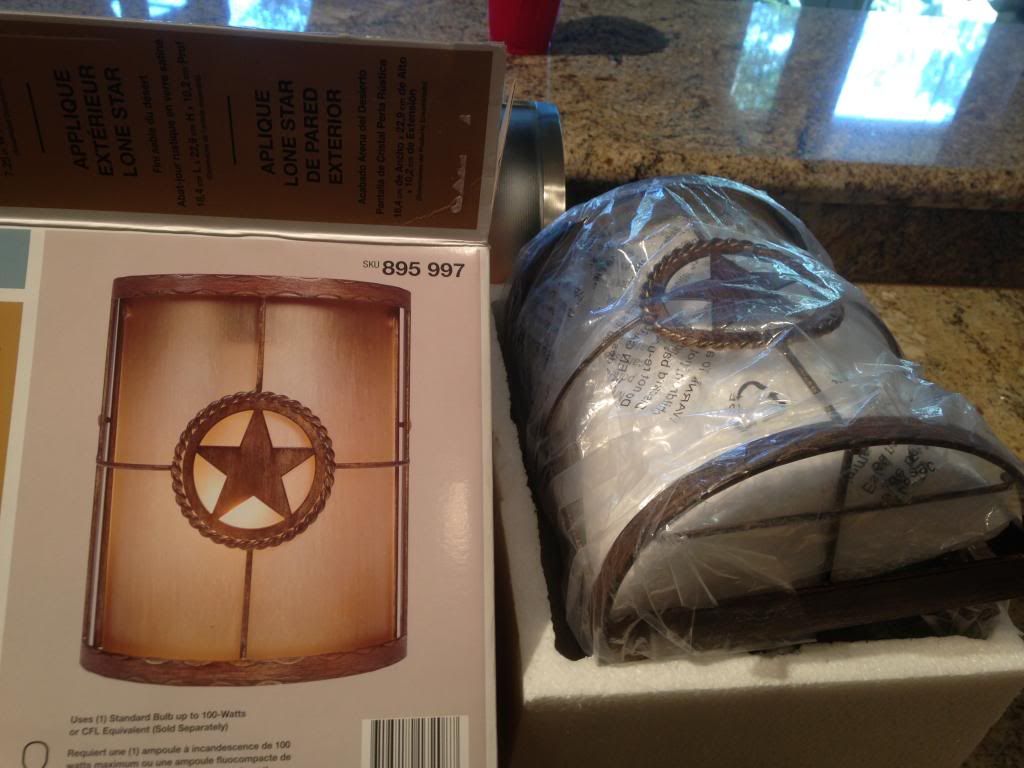
I was actually found these scones (Online only) through Home Depot.
The fabric pins I found at a local rustic furniture store (R&D Furniture) in Magnolia, TX. They have a huge selection.
I was actually found these scones (Online only) through Home Depot.
The fabric pins I found at a local rustic furniture store (R&D Furniture) in Magnolia, TX. They have a huge selection.
Options
- Mark as New
- Bookmark
- Subscribe
- Mute
- Subscribe to RSS Feed
- Permalink
- Report Inappropriate Content
Sep-23-2013 09:05 AM
So what is your source for Texas Lone Star wall sconces and fabric pins? We found some towel hangers once at a flea market in Shipshewana, IN, but can never find anything online in the bronze.
The ones I bought still need to be spray painted bronze to match our new décor.
The ones I bought still need to be spray painted bronze to match our new décor.
2014 DRV Mobile Suite Estates 38RSB3....our custom home
2014 Ford F450 KR CC 4x4......his office
2015 Lance 1172 TC.....mobile Motel FOR SALE
Working Fulltimers since 3/2005
"Shoot for the Moon! Even if you miss it, you will land among the Stars."
2014 Ford F450 KR CC 4x4......his office
2015 Lance 1172 TC.....mobile Motel FOR SALE
Working Fulltimers since 3/2005
"Shoot for the Moon! Even if you miss it, you will land among the Stars."
Options
- Mark as New
- Bookmark
- Subscribe
- Mute
- Subscribe to RSS Feed
- Permalink
- Report Inappropriate Content
Sep-23-2013 07:24 AM
Ah yeah that's what I'll do if I do one... I'll put an outdoor shower in the wall from the LQ to the rear, then just let it run out the bottom or something... I don't have a shower in the LQ but just as long as I have a way to rinse off from time to time after riding I'll be good.
Options
- Mark as New
- Bookmark
- Subscribe
- Mute
- Subscribe to RSS Feed
- Permalink
- Report Inappropriate Content
Sep-19-2013 08:22 AM
BoxerPitMix wrote:
Hmm that's not a bad idea! May buy another exterior shower and mount it to the wall just the opposite side of the water tank!
Doing it that way frees up a lot of space in the tack room/LQ area. I suppose you could rig it to drain into a gray tank, but most cowboy showers just drain out the back/bottom of the trailer directly onto the ground.
2012 Dutchmen Voltage Epic 3795
2010 Dodge 3500 DRW MC
2009 GMC 2500 DA CC
2012 Smart-for-two (sometimes hitches a ride in the Voltage!)
2005 Sundowner Sunlite 777
2010 Dodge 3500 DRW MC
2009 GMC 2500 DA CC
2012 Smart-for-two (sometimes hitches a ride in the Voltage!)
2005 Sundowner Sunlite 777
Options
- Mark as New
- Bookmark
- Subscribe
- Mute
- Subscribe to RSS Feed
- Permalink
- Report Inappropriate Content
Sep-19-2013 08:17 AM
Got some more goodies in the mail...
These two lights are going up in the nose at the foot of the bed. Planning on building some sort of cabinetry accent lighting there of some sort...
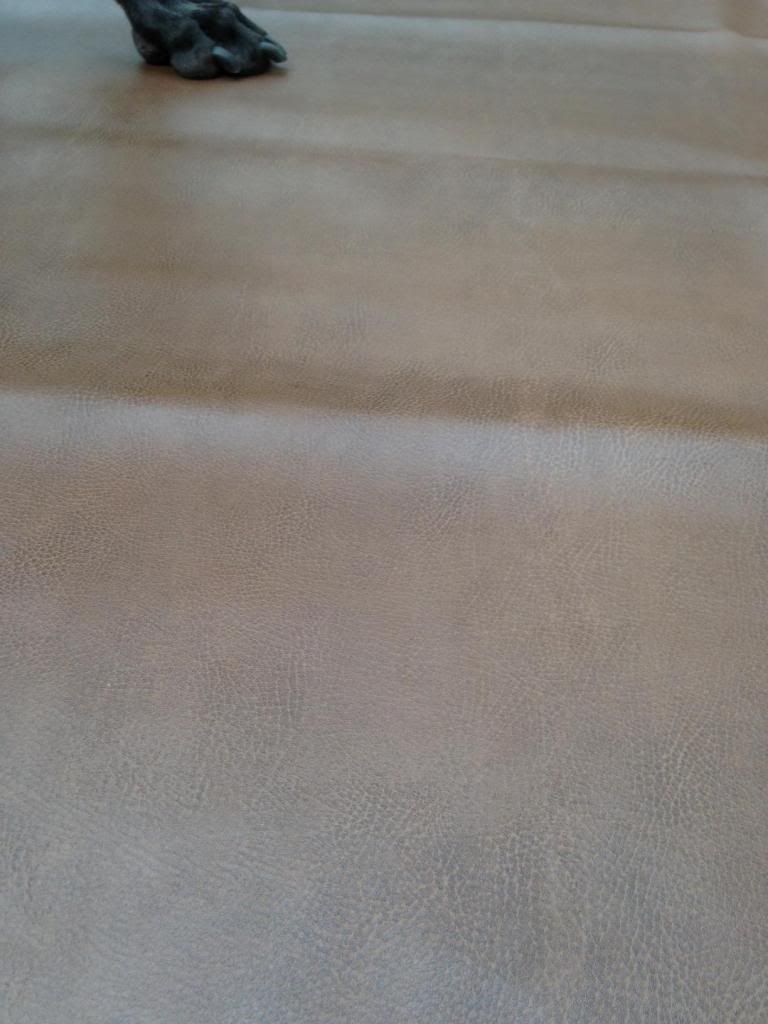
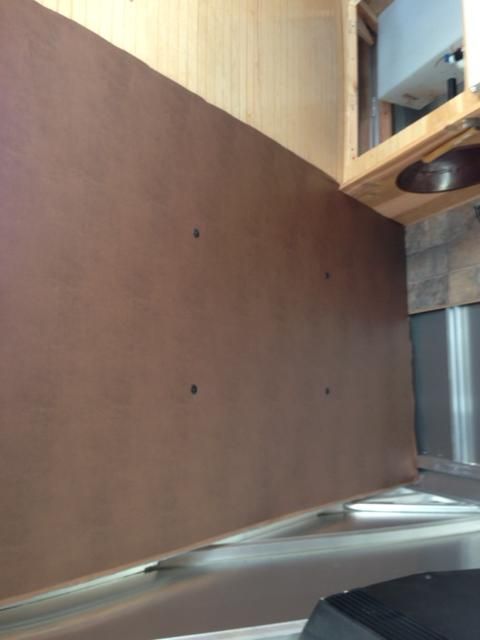
Picked up a ton of this "leather" at Hobby Lobby. I'll be doing parts of the walls in it.
The push pins I'm using

The divider wall I covered in bead board 36" up and I'm going to do some sort of cedar chair rail, then from there up is the leather backing.
I've got the hammered copper sink in and the faucet - just need to take some more pictures.
These two lights are going up in the nose at the foot of the bed. Planning on building some sort of cabinetry accent lighting there of some sort...
Picked up a ton of this "leather" at Hobby Lobby. I'll be doing parts of the walls in it.
The push pins I'm using

The divider wall I covered in bead board 36" up and I'm going to do some sort of cedar chair rail, then from there up is the leather backing.

I've got the hammered copper sink in and the faucet - just need to take some more pictures.


