Turn on suggestions
Auto-suggest helps you quickly narrow down your search results by suggesting possible matches as you type.
Showing results for
- Good Sam Community
- Everything RV
- Technical Issues
- Re: My insulation theory, take a look.
Options
- Subscribe to RSS Feed
- Mark Topic as New
- Mark Topic as Read
- Float this Topic for Current User
- Bookmark
- Subscribe
- Mute
- Printer Friendly Page
My insulation theory, take a look.
Options
- Mark as New
- Bookmark
- Subscribe
- Mute
- Subscribe to RSS Feed
- Permalink
- Report Inappropriate Content
Apr-24-2016 05:10 PM
Hi everyone,
Please read this post completely before giving me your opinions, thanks!
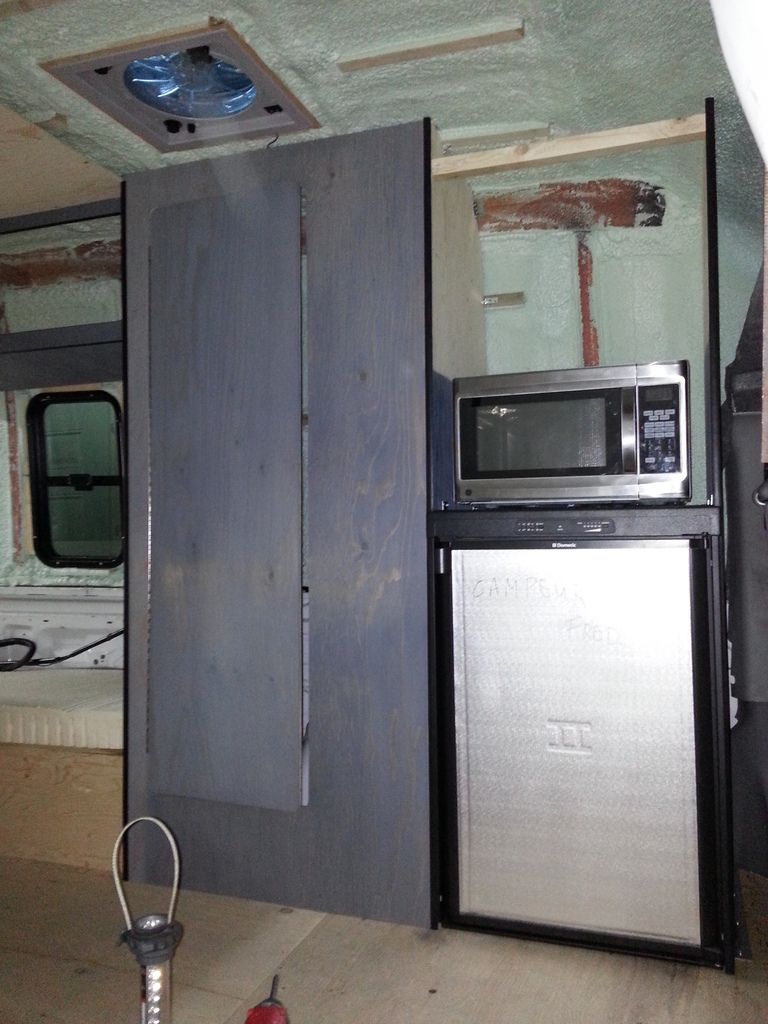
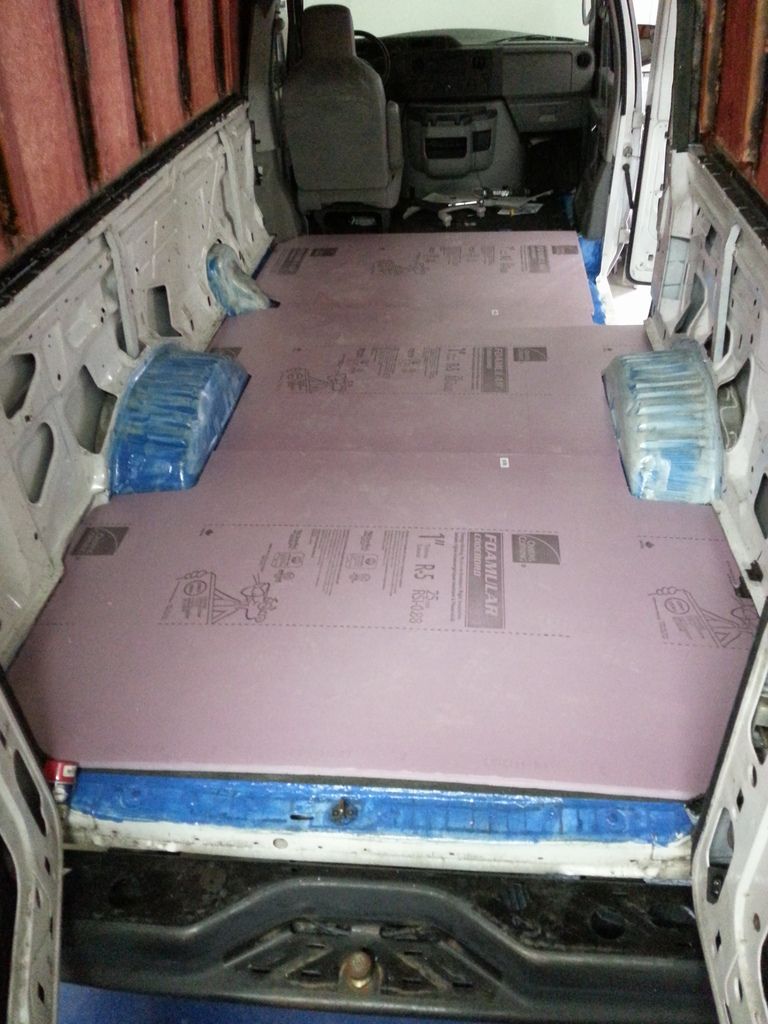
I'm working on my very first DIY camper conversion, using a 2010 extended Ford E250.
At this moment the floor, upper wall and ceiling is insulated.
The lower walls, doors and wheel wells aren't insulated yet.
But before insulating the lower walls I wanted just wanted your opinion on this subject, I know it's been debated over the "correct" method to insulate a campervan.
I'm an Architectural technician so I know a little bit about insulation but this is not a house, I don't believe in Reflectix (sorry I know a lot of you do) I don't even consider it to be insulation, it's basically a thermal bridge breaker, I'm not saying it doesn't work, I just don't want to use it.
Also I know there's a lot of people afraid of polyurethane foam, there's some talk of panel warping, I'm aware of that, from what I have learned there's 2 main reasons for that, the insulation company that did the upper walls and ceiling of my van told me that the temperature of the polyurethane coming out of the nozzle is something like well over 200 degrees and that's why the panels warp (from the heat).
The other reason is expansion, when the foam is trapped it won't stop expanding and will warp the panels.
I have red many many articles here and there on the net and I think that's what it comes down to.
So here's my theory, take a look at my drawing, it's a section of the outer wall and floor.
I plan on using a different and relatively new product : Sika post fix
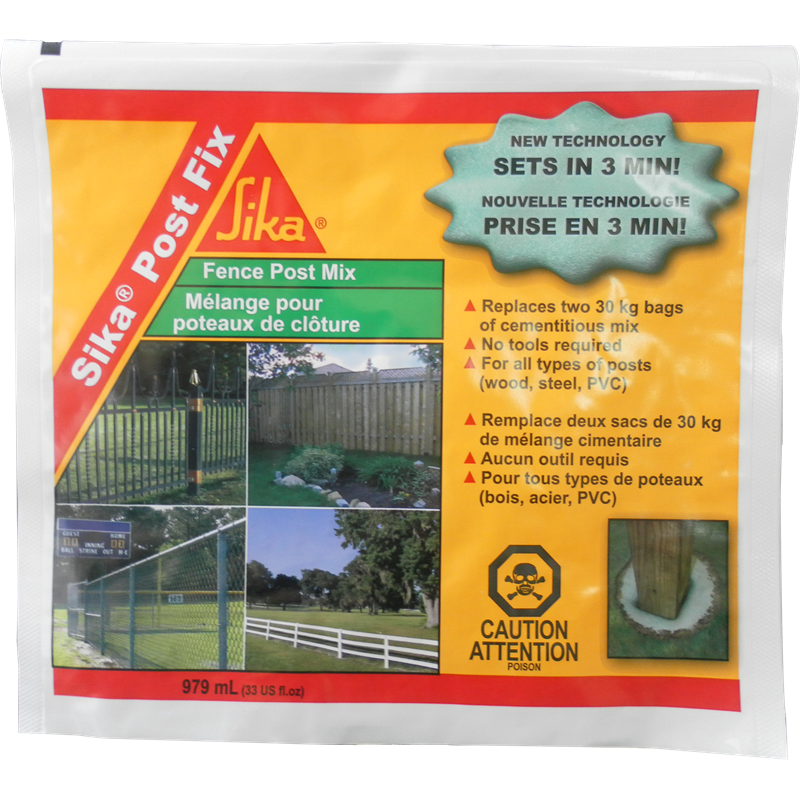
You can see it in action here :
https://www.youtube.com/watch?v=r9J2Rec2MjE
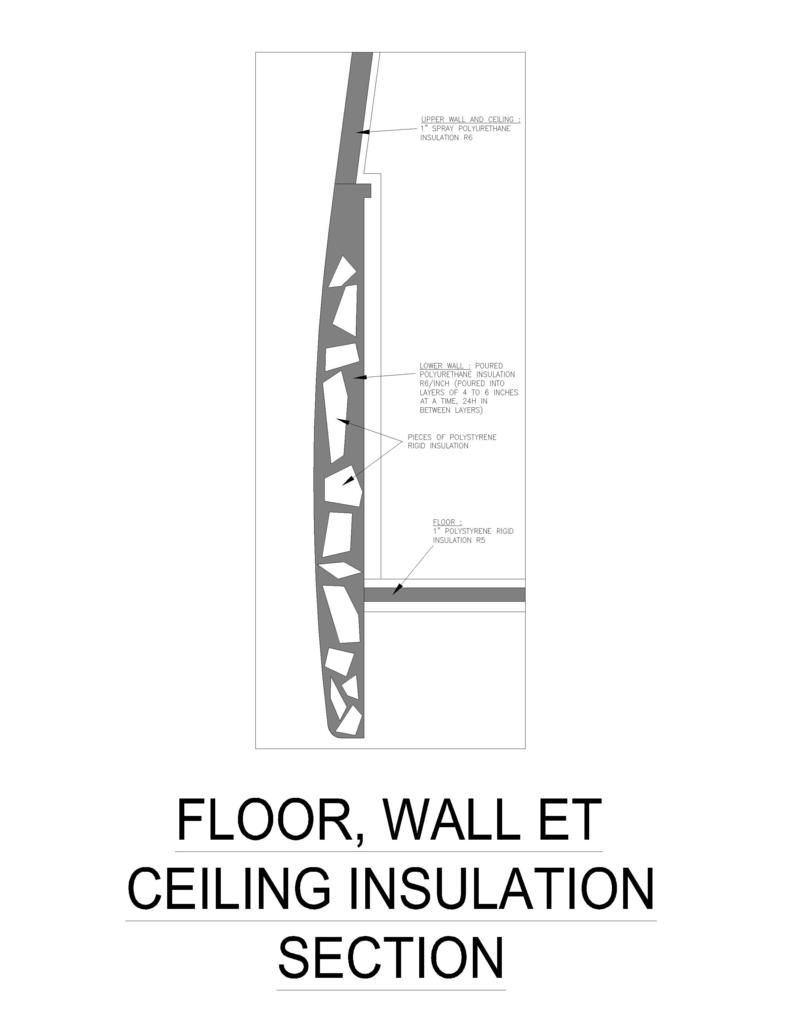
But the idea is to pour it in small layers of 4 to 6 inches (expanded) maximum at a time (that's my opinion) so the expansion would only be towards the top, So I would start pouring at one end making my way towards the other end, pouring it through the holes on the inside of the walls waiting 24h in between layers. Also I have a lot of scrap foam boards/pieces laying around, I would brake them up in small pieces and put them inside the panels, the expanding foam would fill the void in between the pieces, also I would need much less of that liquid post fix polyurethane.
So there's my theory... what do you think about it?
I'm actually waiting to do this because it's still pretty cold up here.
Please read this post completely before giving me your opinions, thanks!
I'm working on my very first DIY camper conversion, using a 2010 extended Ford E250.
At this moment the floor, upper wall and ceiling is insulated.
The lower walls, doors and wheel wells aren't insulated yet.
But before insulating the lower walls I wanted just wanted your opinion on this subject, I know it's been debated over the "correct" method to insulate a campervan.


I'm an Architectural technician so I know a little bit about insulation but this is not a house, I don't believe in Reflectix (sorry I know a lot of you do) I don't even consider it to be insulation, it's basically a thermal bridge breaker, I'm not saying it doesn't work, I just don't want to use it.
Also I know there's a lot of people afraid of polyurethane foam, there's some talk of panel warping, I'm aware of that, from what I have learned there's 2 main reasons for that, the insulation company that did the upper walls and ceiling of my van told me that the temperature of the polyurethane coming out of the nozzle is something like well over 200 degrees and that's why the panels warp (from the heat).
The other reason is expansion, when the foam is trapped it won't stop expanding and will warp the panels.
I have red many many articles here and there on the net and I think that's what it comes down to.
So here's my theory, take a look at my drawing, it's a section of the outer wall and floor.
I plan on using a different and relatively new product : Sika post fix
You can see it in action here :
https://www.youtube.com/watch?v=r9J2Rec2MjE

But the idea is to pour it in small layers of 4 to 6 inches (expanded) maximum at a time (that's my opinion) so the expansion would only be towards the top, So I would start pouring at one end making my way towards the other end, pouring it through the holes on the inside of the walls waiting 24h in between layers. Also I have a lot of scrap foam boards/pieces laying around, I would brake them up in small pieces and put them inside the panels, the expanding foam would fill the void in between the pieces, also I would need much less of that liquid post fix polyurethane.
So there's my theory... what do you think about it?
I'm actually waiting to do this because it's still pretty cold up here.
_______________________________________________
DIY conversion build, extended 2010 Ford 5.4L E250 + high top, from Montreal Canada, new to all this so please be patient and clear with me (never built or camped in a van yet)
DIY conversion build, extended 2010 Ford 5.4L E250 + high top, from Montreal Canada, new to all this so please be patient and clear with me (never built or camped in a van yet)
55 REPLIES 55
Options
- Mark as New
- Bookmark
- Subscribe
- Mute
- Subscribe to RSS Feed
- Permalink
- Report Inappropriate Content
Mar-03-2024 10:47 PM
when i go to the link for your video about the foam , it says private. could you send me a link to your video ? dverseboy@gmail.com
Options
- Mark as New
- Bookmark
- Subscribe
- Mute
- Subscribe to RSS Feed
- Permalink
- Report Inappropriate Content
Mar-04-2024 02:18 PM
Evy's last post was 2019. Hopefully they are still around.
.
2001 Suburban 4x4. 6.0L, 4.10 3/4 ton **** 2005 Jayco Jay Flight 27BH **** 1986 Coleman Columbia Popup
2001 Suburban 4x4. 6.0L, 4.10 3/4 ton **** 2005 Jayco Jay Flight 27BH **** 1986 Coleman Columbia Popup
Options
- Mark as New
- Bookmark
- Subscribe
- Mute
- Subscribe to RSS Feed
- Permalink
- Report Inappropriate Content
May-30-2016 08:32 PM
You have a good approach to your project. The heat you feel is an exothermic reaction, all two part resins do this as they cross link or polymerize the way to reduce the heat is to spread the mix thin or make multiple mixes with less volume. I used to use 4 and 8 lb poly foam in work and mix it and pour a few oz in a paper cup and you can see what kind if expansion you will get. If you contain it and put too much into a closed mold you will increase the density and sometimes warp the mold. With all the large openings I would not worry about excessive expansion because you can tape the openings to contain the foam and cut the excess off with a sharp knife or razor if you use the lighter density foams 2-4 lbs, the heavier densities 8-16lbs or higher would require a saw because the get hard. You can also mix macro balloons into the foam to increase its insulating properties and reduce the volume of foam which would reduce the heat. Hope this helps and good luck with your project.
Options
- Mark as New
- Bookmark
- Subscribe
- Mute
- Subscribe to RSS Feed
- Permalink
- Report Inappropriate Content
May-30-2016 08:14 PM
I have used that foam.... to fix a fence post :B
The only issue I see is that you are stuck with a full bag even if you need only half.
On a long pour I would have suggested a bit shorter mix and start pouring quickly but you probably have the hang of it now. Yes it gets hot enough to burn your hands. I used latex gloves for easy removal. Let it cool before you trim the excess.
I have two more posts to fix next month. Will do two posts with one bag this time.
After seeing the videos looks like you could have done one or two spots with the bag. Easy to cut away excess after it cools and hardens a bit.
Options
- Mark as New
- Bookmark
- Subscribe
- Mute
- Subscribe to RSS Feed
- Permalink
- Report Inappropriate Content
May-30-2016 08:11 PM
free radical wrote:
I guess its too late now since you already have the foam,
however this would be much easier to do this with one of those guns that you screw the expanding foam can into,,
Its just a handle with trigger and about foot long nozle,,gives excelent control as you can spray it very slow or fast and stop anytime..
Hint..to screw the expanding foam can onto this it helps to spray WD 40 onto the gun tread..
Also theres a special cleaner sold in presurized cans to clean the nozle after
All these are sold in Home depot or most hardware stores..
Those cans would not be able to go down all the way to the bottom, I bought about 6 of these cans and I will do the parts that I can't pour into (higher parts of the lower wall), simply drill a hole and stick the nozzle in, only small areas at a time so the expension doesn't warp my outside panels.
_______________________________________________
DIY conversion build, extended 2010 Ford 5.4L E250 + high top, from Montreal Canada, new to all this so please be patient and clear with me (never built or camped in a van yet)
DIY conversion build, extended 2010 Ford 5.4L E250 + high top, from Montreal Canada, new to all this so please be patient and clear with me (never built or camped in a van yet)
Options
- Mark as New
- Bookmark
- Subscribe
- Mute
- Subscribe to RSS Feed
- Permalink
- Report Inappropriate Content
May-30-2016 07:59 PM
I guess its too late now since you already have the foam,
however this would be much easier to do this with one of those guns that you screw the expanding foam can into,,
Its just a handle with trigger and about foot long nozle,,gives excelent control as you can spray it very slow or fast and stop anytime..
Hint..to screw the expanding foam can onto this it helps to spray WD 40 onto the gun tread..
Also theres a special cleaner sold in presurized cans to clean the nozle after
All these are sold in Home depot or most hardware stores..
Options
- Mark as New
- Bookmark
- Subscribe
- Mute
- Subscribe to RSS Feed
- Permalink
- Report Inappropriate Content
May-30-2016 07:03 PM
It's finally hot enough to start testing my theory.
Here's a little video of the inner walls before pouring the polyurethane.
https://youtu.be/9ipZ0UjM4BQ
And this is after the first pour.
https://youtu.be/J8z_lnoPzEY
And this is what I observed.
After mixing the two parts for 20 seconds normally you would dump the whole thing in the hole but in my case I have to pour 1/4 of the bag at a time in 4 different places. By the time I've poured 1/2 of the bag, what I'm pouring isn't liquid anymore, I'm pouring foam.
As I was emptying the bag I noticed how hot it became, almost too hot to handle.
It was easy to see where the polyurethane went inside the walls just by touching the outside panels of the van.
Second pouring tomorrow.
_______________________________________________
DIY conversion build, extended 2010 Ford 5.4L E250 + high top, from Montreal Canada, new to all this so please be patient and clear with me (never built or camped in a van yet)
DIY conversion build, extended 2010 Ford 5.4L E250 + high top, from Montreal Canada, new to all this so please be patient and clear with me (never built or camped in a van yet)
Options
- Mark as New
- Bookmark
- Subscribe
- Mute
- Subscribe to RSS Feed
- Permalink
- Report Inappropriate Content
Apr-29-2016 09:00 AM
myredracer wrote:
Talk to a company or individual that has done Class B van conversions or search the internet. For example, here's a guy who did a conversion and used spray foam insulation and sounds like he did a bunch of research first. Build a green RV
Thanks for the info, I have already red his article, but the big difference is the van model, he has a ProMaster, and he has access to all the outer panels from the inside, just like my ceiling and higher walls, but this thread is about insulating the lower walls which have an inner panel that would block the spray from getting to the outer panel, so the only solution I came up with (if you absolutely want to use polyurethane foam) is to pour it through the openings, but nobody seems to have tried it...
Like I mentioned earlier I hired a professional company to shoot the ceiling and higher walls and they wouldn't touch the lower walls for that reason 😞
I also thought of buying that kit and doing it myself but the commercial company I hired use much higher density foam and I needed that to stiffen the whole van up, If you noticed the way they added that High top on my van is very different vs the standard 24" or 30" high fiberglass tub on a roof opening. The van was kind of wobbly when I first drove it, but after having the foam done the difference was amazing and it also blocked the sound very good, that's a big part of the reason I went with polyurethane foam.
I haven't driven it in a while now, I've added a lot of interior panels, walls and roof rack, I think that will also help to stiffen the whole thing up.

_______________________________________________
DIY conversion build, extended 2010 Ford 5.4L E250 + high top, from Montreal Canada, new to all this so please be patient and clear with me (never built or camped in a van yet)
DIY conversion build, extended 2010 Ford 5.4L E250 + high top, from Montreal Canada, new to all this so please be patient and clear with me (never built or camped in a van yet)
Options
- Mark as New
- Bookmark
- Subscribe
- Mute
- Subscribe to RSS Feed
- Permalink
- Report Inappropriate Content
Apr-29-2016 08:32 AM
Contact a company or individual that has done Class B van conversions or search the internet. For example, here's a guy who did a conversion and used spray foam insulation and sounds like he did a bunch of research first. Build a green RV
From what I know of the stuff, it is very important to get foam into all the voids as moisture WILL migrate through the walls to cold exterior sheet metal. Need to think about dew point, RH and differential temp. and have adequate thickness. You may need to drill/cut some small holes for access in some places. I would most definitely hire a pro for this. It tends to be very expensive partly due to setup and cleanup time - maybe you could tag onto the tail end of a building construction job if you drive the van to a site?? It might be that spray foam in a can is the way to go to get into small voids. If heat is a concern, would it be possible to drape sheets on the exterior and wet them?
From what I know of the stuff, it is very important to get foam into all the voids as moisture WILL migrate through the walls to cold exterior sheet metal. Need to think about dew point, RH and differential temp. and have adequate thickness. You may need to drill/cut some small holes for access in some places. I would most definitely hire a pro for this. It tends to be very expensive partly due to setup and cleanup time - maybe you could tag onto the tail end of a building construction job if you drive the van to a site?? It might be that spray foam in a can is the way to go to get into small voids. If heat is a concern, would it be possible to drape sheets on the exterior and wet them?
Options
- Mark as New
- Bookmark
- Subscribe
- Mute
- Subscribe to RSS Feed
- Permalink
- Report Inappropriate Content
Apr-29-2016 08:21 AM
DutchmenSport wrote:
"evy, I believe that you have already made up your mind and are only seeking affirmation of your decision."
I also drew the same conclusion when the OP posted his FIRST rebuttal. Unfortunately, when I was typing, he had already posted. Otherwise, I would have never responded at all.
I also say, "Good luck!"
Maybe you're right, maybe my decision was already set in my mind and I was seeking approval.
If you read the replies, some are in my favor, some are neutral and some are against the idea. I have to admit I like to debate, and understand before going forward.
One thing I don't like about internet debating is that the often the readers will miss interpret the tone or the intent of a message and will be insulted by a comment a will take it personal.
That's the feeling I got after reading some of the replies on this thread.
I'm a very easy going guy, the least arrogant person you will meet, very respectful, and like I said before I don't know where I'd be without these forums, If you read my other threads and look at my photo bucket you will see that I've come a long way in this project, I still have a long way to go before being done.
Also I normally speak french every day, I very rarely speak english so I may use the wrong words to express myself.
That being said I hope you will still give me your opinions even if you think my mind is already set (on this subject)... 🙂
_______________________________________________
DIY conversion build, extended 2010 Ford 5.4L E250 + high top, from Montreal Canada, new to all this so please be patient and clear with me (never built or camped in a van yet)
DIY conversion build, extended 2010 Ford 5.4L E250 + high top, from Montreal Canada, new to all this so please be patient and clear with me (never built or camped in a van yet)
Options
- Mark as New
- Bookmark
- Subscribe
- Mute
- Subscribe to RSS Feed
- Permalink
- Report Inappropriate Content
Apr-28-2016 03:30 PM
"evy, I believe that you have already made up your mind and are only seeking affirmation of your decision."
I also drew the same conclusion when the OP posted his FIRST rebuttal. Unfortunately, when I was typing, he had already posted. Otherwise, I would have never responded at all.
I also say, "Good luck!"
I also drew the same conclusion when the OP posted his FIRST rebuttal. Unfortunately, when I was typing, he had already posted. Otherwise, I would have never responded at all.
I also say, "Good luck!"
Options
- Mark as New
- Bookmark
- Subscribe
- Mute
- Subscribe to RSS Feed
- Permalink
- Report Inappropriate Content
Apr-28-2016 02:06 PM
bob_nestor wrote:
Spray foam, when installed by someone who knows what they're doing, doesn't cause damage thru expansion. It just needs to be sprayed a little at a time in layers.
I had open cell spray foam installed in the house I'm renovating. I wanted it in the ceiling, and to do that I laid construction paper over the tops of the joists and stapled it down. The insulation contractor sprayed into the that and there were very few places where the pressure from expansion displaced the paper, usually only in areas where I didn't put in enough stapes. Never saw one place where the paper was torn from expansion, but I did see a lot of small nooks and crannies that were nicely filled with the foam.
There are also different formulas for the spray foam and you can see that in the types available at home improvement stores. The formula recommended for use around doors and windows expands but only to the point where it meets an obstruction so it doesn't warp the frames.
1) I agree with Bob. Hire a professional who has the right spray equipment with specialty nozzles and the correct foam product for the application. It will be a labor-intensive task for the lower section of the van - as in: the hourly rate times several hours.
2) evy, I believe that you have already made up your mind and are only seeking affirmation of your decision. If that is the case then there is nothing more to say other than, good luck.
2005 Cruise America 28R (Four Winds 28R) on a 2004 Ford E450 SD 6.8L V10 4R100
2009 smart fortwo Passion with Roadmaster "Falcon 2" towbar & tail light kit - pictures
2009 smart fortwo Passion with Roadmaster "Falcon 2" towbar & tail light kit - pictures
Options
- Mark as New
- Bookmark
- Subscribe
- Mute
- Subscribe to RSS Feed
- Permalink
- Report Inappropriate Content
Apr-27-2016 09:11 PM
evy wrote:Naio wrote:
IMO (!) your thinking is quite sound about encouraging expansion upward by pouring in short layers. I agree that it would be wise to test the theory first, because why not?
How does condensation work with spray foam on a metal wall? S&B house walls are designed to pass water vapor out through the exterior walls.
I did some tests in my house once. up here we have cold winters so insulation is very important.
I installed 1.5" rigid insulation boards on a concrete wall (industry standard at the time, today it's 3")
I installed 1.5" of polyurethane foam from a can directly on the wall
I also left a part of concrete completely exposed
after a week of -4F temperatures this is what happened when I removed everything.
The exposed concrete had 1/4" of ice on it, from the condensation freezing on the concrete who was acting as a thermal bridge (just like the van's outer panels).
After removing the 1.5" rigid insulation it had frost and some thin ice behind it, because it was not completely and perfectly in contact with the concrete.
And after removing the polyurethane with a scraper, it was completely dry and not even cold.
The enemy is air pockets, voids, cavities call it what you will, when air moisture touches a cold panel it will condensate and maybe freeze or drip depending on how cold it is.
So this is what my theory is based upon, filling the voids, having no air at all. If for some reason the polyurethane gets loose and creates an air gap between the foam and the outer panel, moisture will condensate and drip to the bottom and eventually rust, but by filling the space completely all the way to the top, I think it will hold.
Today it is around 48F so it's still too cold to do a test, 75F to 80F is the right temp...
Excellent experiments!
I think what happens with spray foam is that condensation occurs on the interior side of the foam. If yours was exposed to the air in the room, it would gave just evaporated again and been unnoticeable (unless the air was very humid, e.g. bathroom walls after you shower).
Are you familiar with buildingscience.com?
I see they have a paper on spray foam tests!
http://buildingscience.com/documents/reports/rr-0912-spray-polyurethane-foam-need-for-vapor-retarders-in-above-grade-walls/view
On a quick skim, it looks like you will be fine as long as your interior wall covering is vapor permeable.
This could be tricky for your lower walls. I wonder if there is any reasonably easy way to get an air gap between the foam and the inner metal layer? Maybe the holes will be enough? How do you plan on handling the bigger holes, anyway? Putting some screen over them before spraying?
3/4 timing in a DIY van conversion. Backroads, mountains, boondocking, sometimes big cities for a change of pace.
Options
- Mark as New
- Bookmark
- Subscribe
- Mute
- Subscribe to RSS Feed
- Permalink
- Report Inappropriate Content
Apr-25-2016 12:12 PM
greenrvgreen wrote:
P Tuna is talking about my suggestion, and the OP is rather touchy. Then again he's talking about living inside a van.
Yes Tuna, the open-caell idea is going to fail the condensation test. In fact ANY insulation that is not itself a moisture barrier is going to become a moisture habitrail. I'm trying to think of something that would smooth out the obvious corrugations in the roof/upper wall treatment. Ensolite will do this, and is closed-cell.
IMO, the van presents certain unique challenges, IMO. #1 IMO the metal skin is highly conductive, and #2 IMO is doesn't breathe the way that metal siding can and does, IMO.
Again, IMO I think the OP's made good progress IMO and some sort of shot foam is called for in the lower areas IMO. I wouldn't mess with chunks IMO just fire away with the foam.
IMO.
haha you win the IMO battle, I concede.
_______________________________________________
DIY conversion build, extended 2010 Ford 5.4L E250 + high top, from Montreal Canada, new to all this so please be patient and clear with me (never built or camped in a van yet)
DIY conversion build, extended 2010 Ford 5.4L E250 + high top, from Montreal Canada, new to all this so please be patient and clear with me (never built or camped in a van yet)
Options
- Mark as New
- Bookmark
- Subscribe
- Mute
- Subscribe to RSS Feed
- Permalink
- Report Inappropriate Content
Apr-25-2016 12:08 PM
Naio wrote:
IMO (!) your thinking is quite sound about encouraging expansion upward by pouring in short layers. I agree that it would be wise to test the theory first, because why not?
How does condensation work with spray foam on a metal wall? S&B house walls are designed to pass water vapor out through the exterior walls.
I did some tests in my house once. up here we have cold winters so insulation is very important.
I installed 1.5" rigid insulation boards on a concrete wall (industry standard at the time, today it's 3")
I installed 1.5" of polyurethane foam from a can directly on the wall
I also left a part of concrete completely exposed
after a week of -4F temperatures this is what happened when I removed everything.
The exposed concrete had 1/4" of ice on it, from the condensation freezing on the concrete who was acting as a thermal bridge (just like the van's outer panels).
After removing the 1.5" rigid insulation it had frost and some thin ice behind it, because it was not completely and perfectly in contact with the concrete.
And after removing the polyurethane with a scraper, it was completely dry and not even cold.
The enemy is air pockets, voids, cavities call it what you will, when air moisture touches a cold panel it will condensate and maybe freeze or drip depending on how cold it is.
So this is what my theory is based upon, filling the voids, having no air at all. If for some reason the polyurethane gets loose and creates an air gap between the foam and the outer panel, moisture will condensate and drip to the bottom and eventually rust, but by filling the space completely all the way to the top, I think it will hold.
Today it is around 48F so it's still too cold to do a test, 75F to 80F is the right temp...
_______________________________________________
DIY conversion build, extended 2010 Ford 5.4L E250 + high top, from Montreal Canada, new to all this so please be patient and clear with me (never built or camped in a van yet)
DIY conversion build, extended 2010 Ford 5.4L E250 + high top, from Montreal Canada, new to all this so please be patient and clear with me (never built or camped in a van yet)


