Turn on suggestions
Auto-suggest helps you quickly narrow down your search results by suggesting possible matches as you type.
Showing results for
- Good Sam Community
- Groups
- Travel Trailer Group
- Forum
- How to: AF Camper Skylight Replacement (w/pics)
Options
- Subscribe to RSS Feed
- Mark Topic as New
- Mark Topic as Read
- Float this Topic for Current User
- Bookmark
- Subscribe
- Mute
- Printer Friendly Page
How to: AF Camper Skylight Replacement (w/pics)
Options
- Mark as New
- Bookmark
- Subscribe
- Mute
- Subscribe to RSS Feed
- Permalink
- Report Inappropriate Content
Mar-22-2017 08:10 PM
Well, I finally found a few days to dedicate to my leaking Skylight - although it hasn't rained for a while so that’s good. For background see my previous post here:
Link to post
I want to thank all the campers who replied--it certainly helps formulate a COA (course of action) for fixing the leak.
I purchased a replacement skylight on-line with rvskylights I was impressed with their easy ordering and "beefier" product. It is about double the thickness of the original. My only negative with these guys is you need to plan a minimum of 14 days turn time (time for them to manufacture it and then ship it). Other than that superior and even with the cost shipped all the way across country I was still just over $80.
Removal:
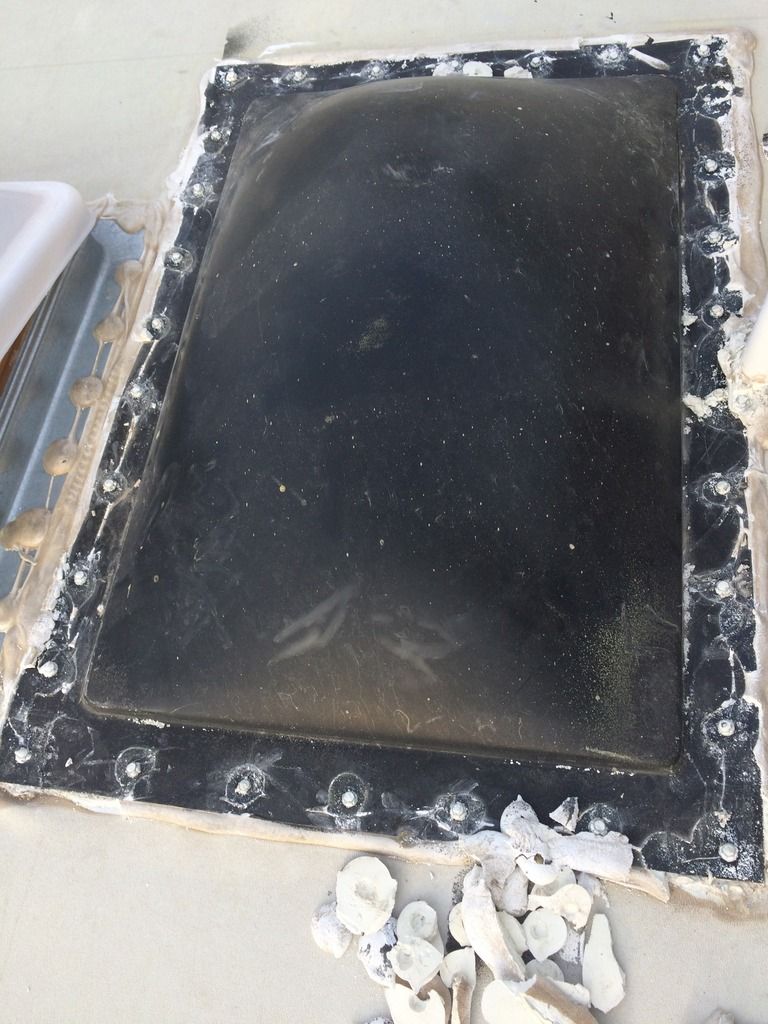
First, make sure you know what type of roof you have. For my Arctic Fox 990 I was able to discern I had a TPO (Thermoplastic polyolefin (TPO) single-ply roofing membrane) or rubber roof. It does not have a black back like EPDM. As I looked at the skylight I noticed they had mounted a luggage rack support stand right on top of the skylight flange (RT side on pic below) and on the opposite side I had huge gobs of sealant connecting the space between the skylight and the bathroom exhaust fan--you can't dream this stuff up! As an aviation craftsman/mechanic and pilot this production BS irritates the **** out of me. Bottom-line its just poor quality and terrible quality assurance....Rant Off for now. So, it was also necessary to remove the luggage rack support (just the one right on top of the skylight flange) and the ton of sealant surrounding it.
To get started you need to remove the sealant from the attachment screw heads. I used my fingers and a plastic lever to get under and around the screw head sealant to uncover the screw heads. Expose all of the heads.
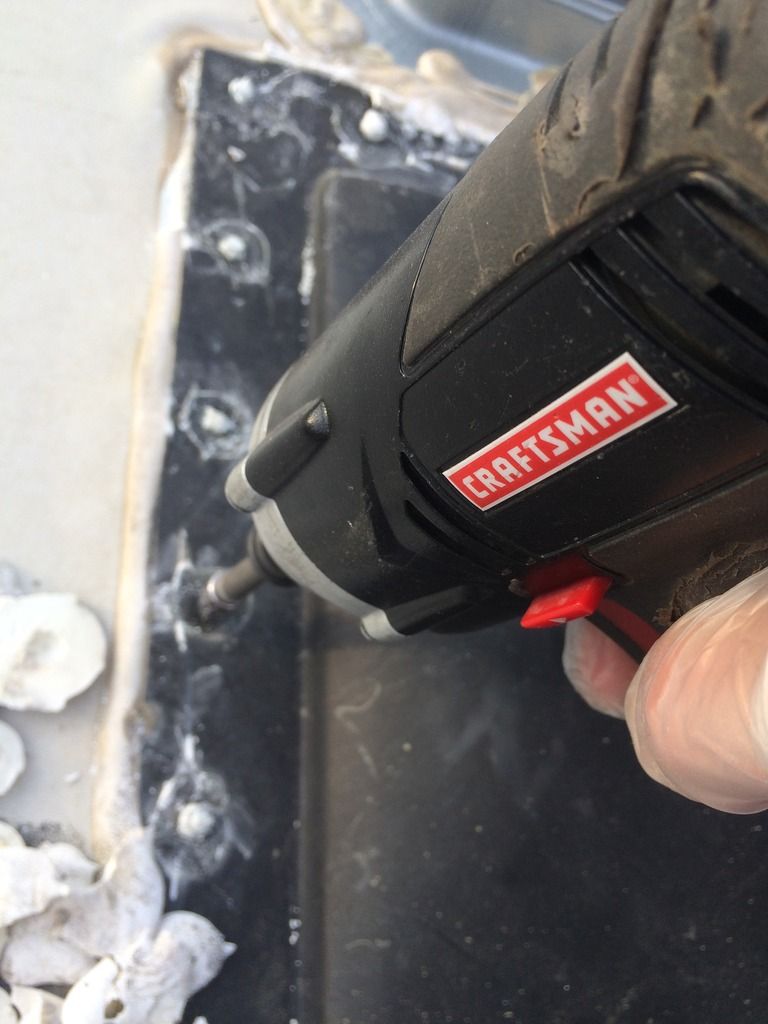
Next, grab a socket/drill and remove all the screws. Put them in a container, as you'll need to use them later.
Next, grab a plastic body tool or upholstery tool and patiently wedge it under the skylight.
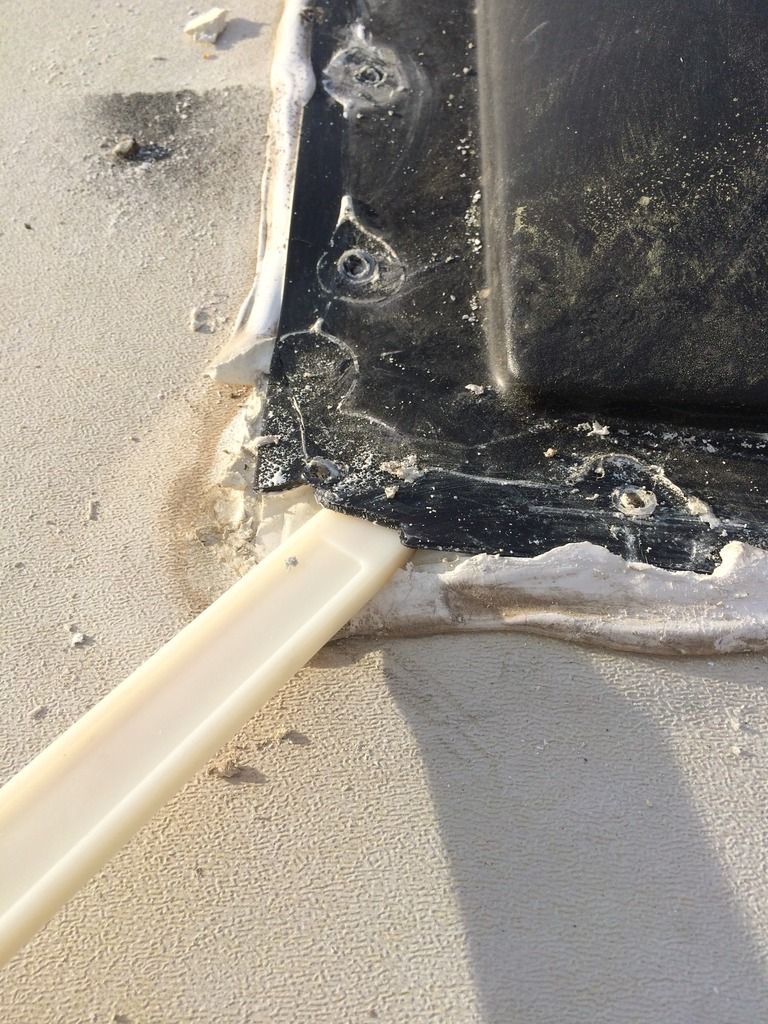
Be careful NOT to damage the rubber roof. Patience is key here as you are just trying to get under enough of the skylight in order to just pull it or pry it up and off. They are usually bonded quite firmly. Take your time and just slowly make some space between the skylight and the roof.
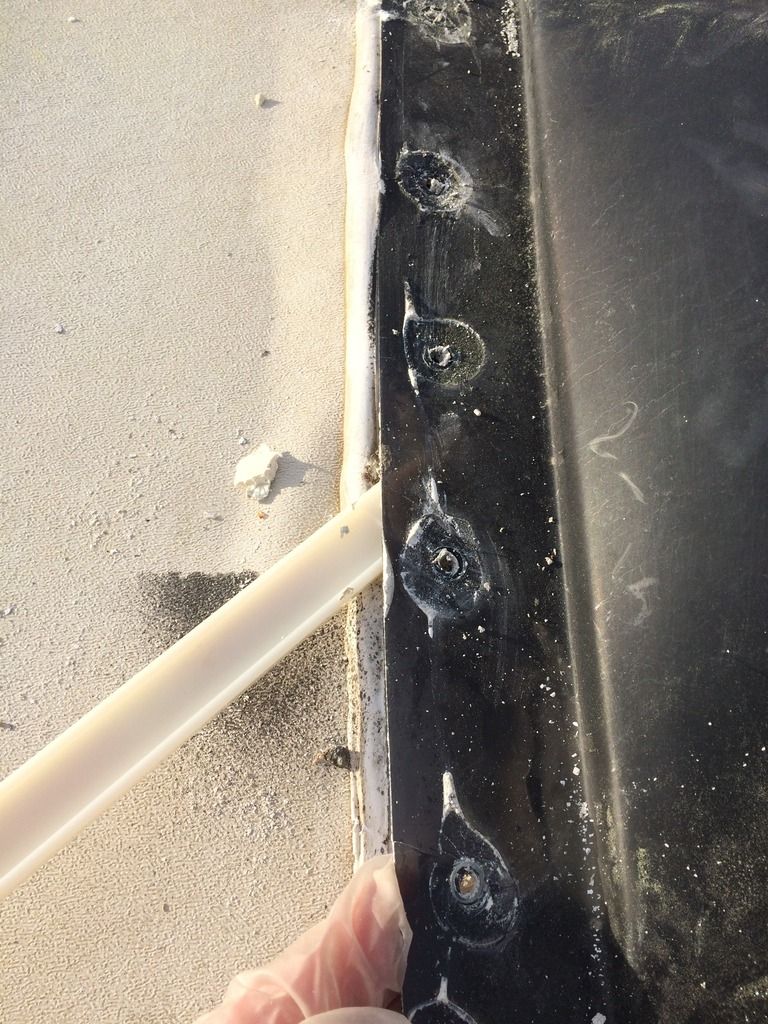
Any overlapping sealant around the edges will need to be removed too. I used a piece of wood 6" long with a good straight edge to push it off the skylight. Once I got enough sealant removed I as able to pry off the skylight. Now the real work begins.
Preparation:
Your final job is only going to be a good as the time you spend to correctly prepare the roof by removing all the old sealant. Put your patience cap on, grab a heat gun and get to work. No need for any chemicals right now as you are just removing sealant. My HF heat gun in action....

Take the heat gun and heat up a small 3-4" area and then take a plastic body buddy tool and slowly pry away the sealant. Be careful not to dig into the rubber roof. This is going to take quite awhile but it has to be removed so you can bond the new sealant to the rubber.
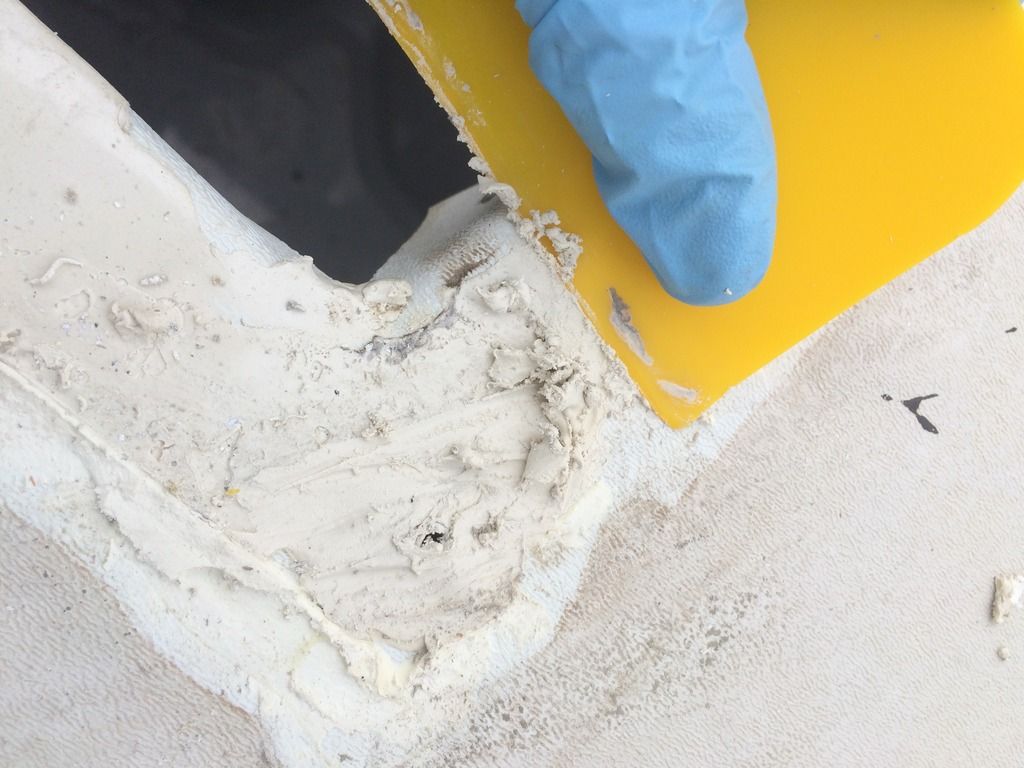
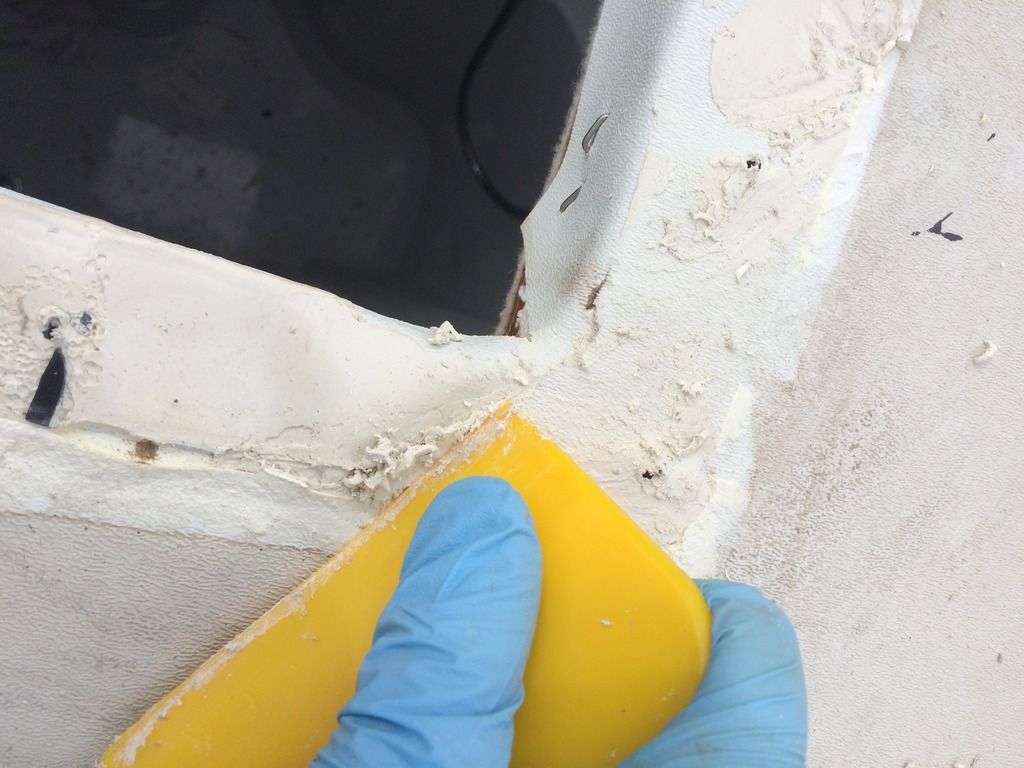
Once you get the vast majority of sealant off the next thing you'll do is get the roof membrane as clean as possible. You are going to find areas where the roof rubber is not exactly flat and you'll have to deal with the holes from the crews. Just do the best you can and clean the area with a rag with some acetone on it and some elbow grease. Don't let the acetone sit, puddle, or linger. Wipe it on and scrub it off. Bits of sealant will roll off with the rag. Be patient. If you are very careful you can use a chisel or buddy knife and slowly scrape up the softened sealant. Again, watch the edge of the tool and don't cut into the rubber roof!!!! Use these tools at your own peril. Finally, you’ll begin to see some progress and soon it will be clean and ready.

One thing I did notice as I cleaned and inspected was the aft portion of the skylight was mounted right where the roof begins a slope aft of the opening. Putting a level on the roof and measuring the edge it was 3/16ths up to a ¼ inch drop away.
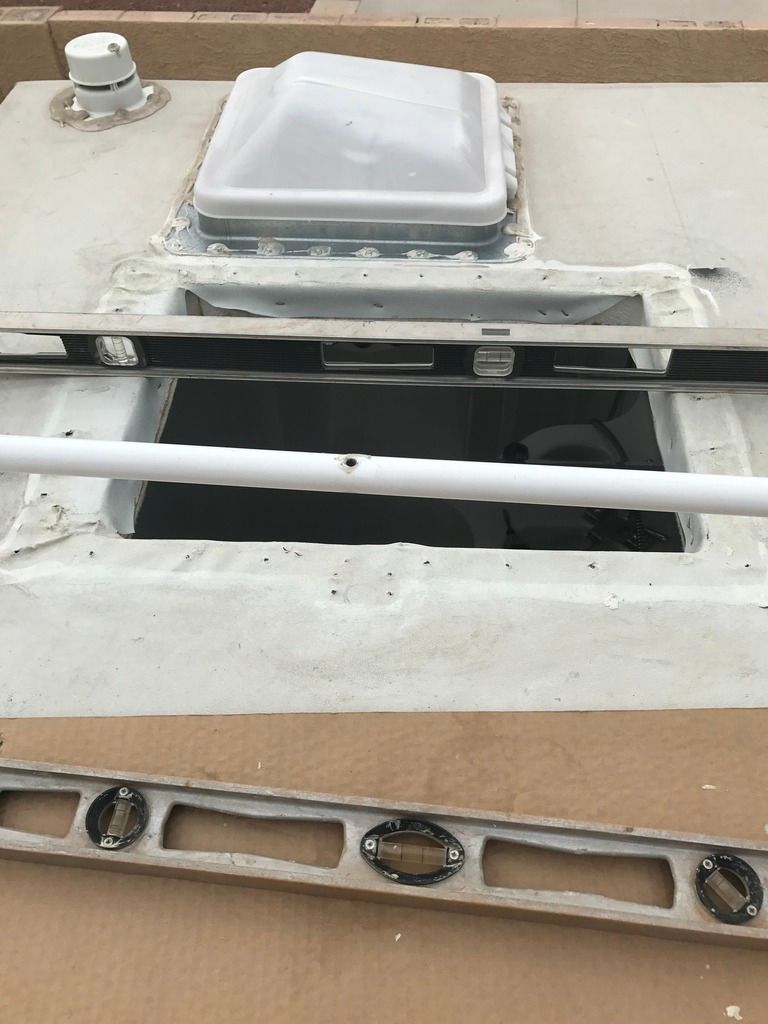
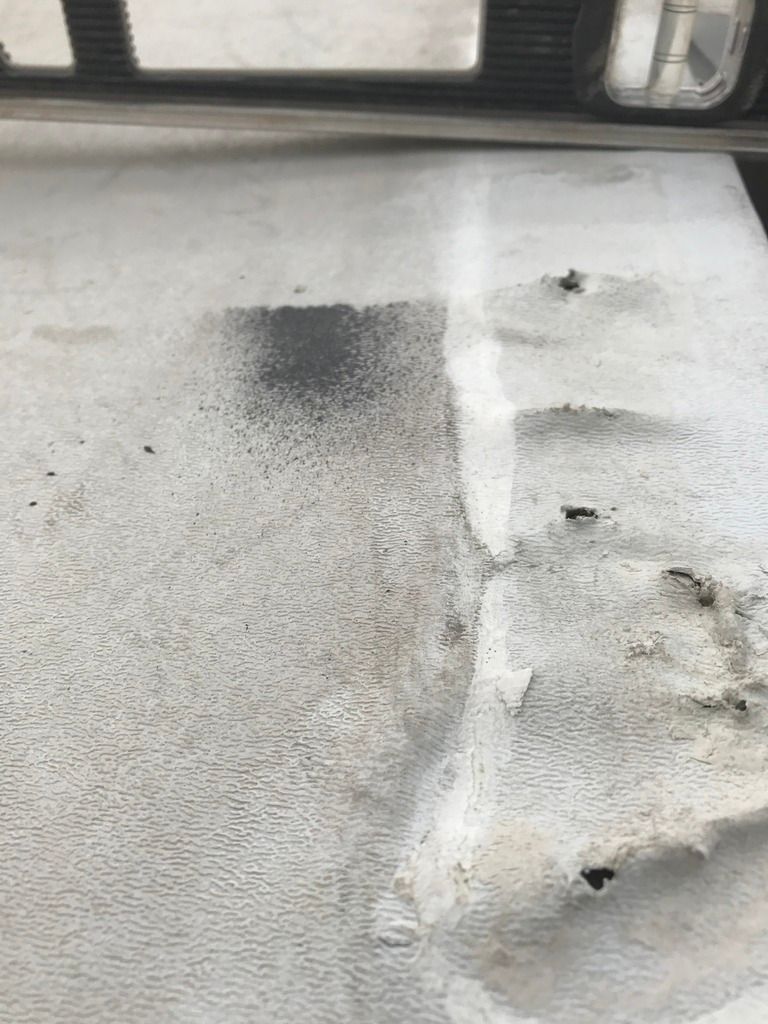
I was determined to ascertain whether I could slide the new skylight forward just a half-inch or so to get out of the crease area where the roof starts down. As I pre laid the skylight into place I was able to move it forward without any impacts. It did expose the mounting holes from the previous skylight.

Install:
Grab the new skylight and cover it the outside and inside mounting flange with masking tape if it didn’t deliver that way. This protects it while you pre-fit, fit, mount, and seal the skylight.
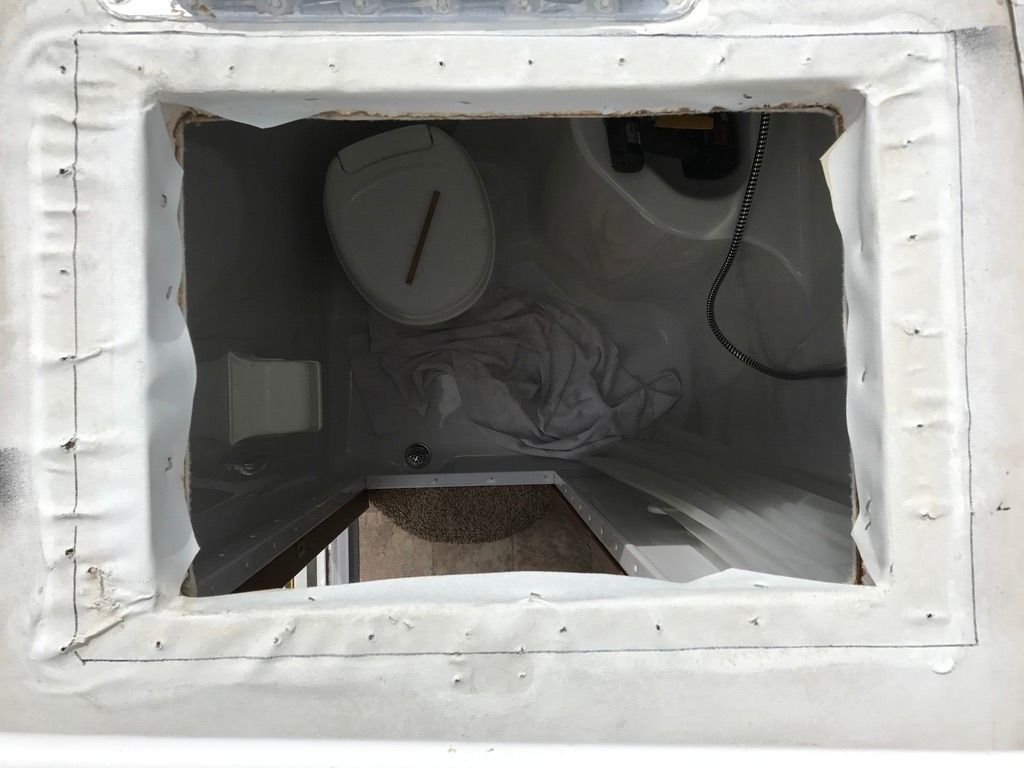
After you make numerous trips up and down the ladder to get the skylight in the position you want it (centered etc.) also check the inner window plastic fairing for fitment (the big square plastic piece that screws in above the shower). Mine will require just a little trimming where it comes in contact with the skylight on the inside. Once you are happy get out the Sharpie and trace it onto the roof. Also, mark front or rear or left/right…something so you can’t flip the skylight 180 degrees without knowing it’s been rotated.
Next, measure up the flange and determine where you intend to put your mounting screws. I evenly spaced mine on the flange and marked the holes for drilling. I did not use all the screws from the previous install. I spaced my screws out three and three quarters of an inch but evenly along the flange. Next, set the skylight on some 2x4s and drill the mounting holes. I used a #8 drill size hole for my #8 size screws. I want the screw to clear the hole and not bind and crack the plastic.
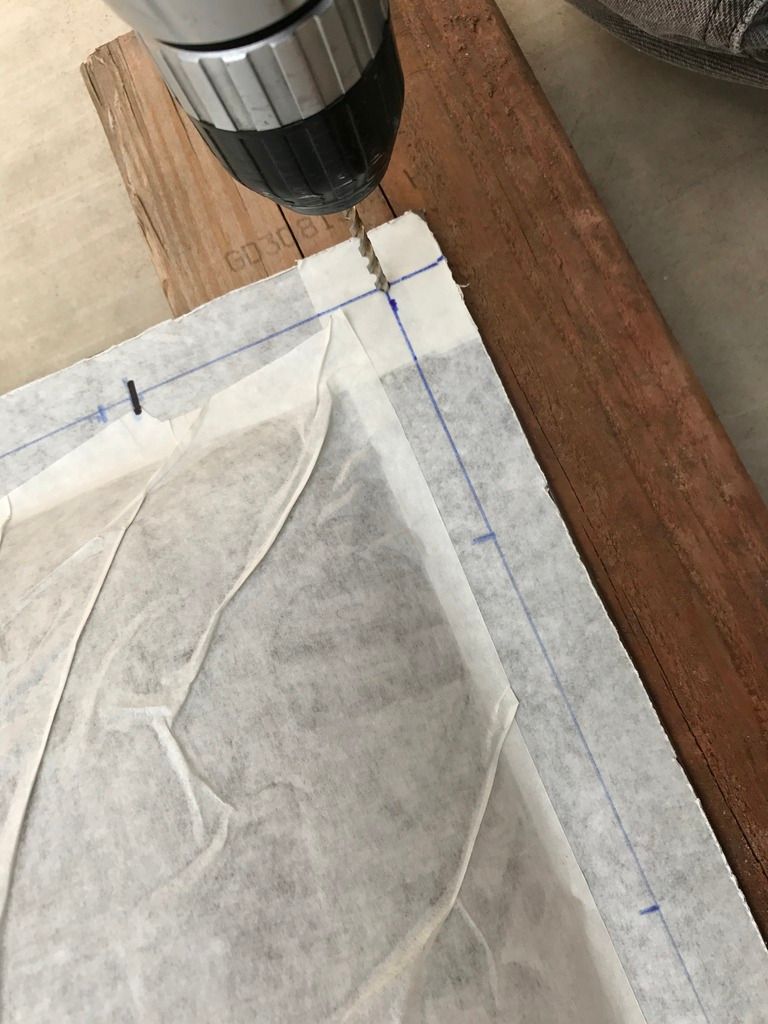 Pic
Pic
Next, get back on the roof, put the skylight down in its place (remember the area we marked with the sharpie) and using a smaller drill bit drill the holes for the skylight into the roof. I drilled the first hole and then screwed in a screw to hold it in place. Then I alternated sides as I drilled the reaming holes.
Next, set aside the skylight and grab the sealant. I freshly wiped down the roof area with acetone then took my DICOR NON-Leveling Sealant and filled the old mounting holes and the new screw holes with sealant.

Now the fun begins. Peel the masking tape away from the flanges on both side of the skylight. Run a bead of sealant between the screw holes and the opening in the roof. Don’t put it on a line too close the roof opening or it will all squish out toward there when screwed down. I then used a putty knife to spread it on the roof area where it was to be mounted. Next, I ran a small bead on the skylight flange following a straight line (hole to hole to hole).
Ok. Now mount the skylight into place. Slowly start all the screws into the roof. You will see the sealant ooze out the edges. As you screw in the mounting screws alternate just like torqueing down a cylinder head (start in the center and work out).
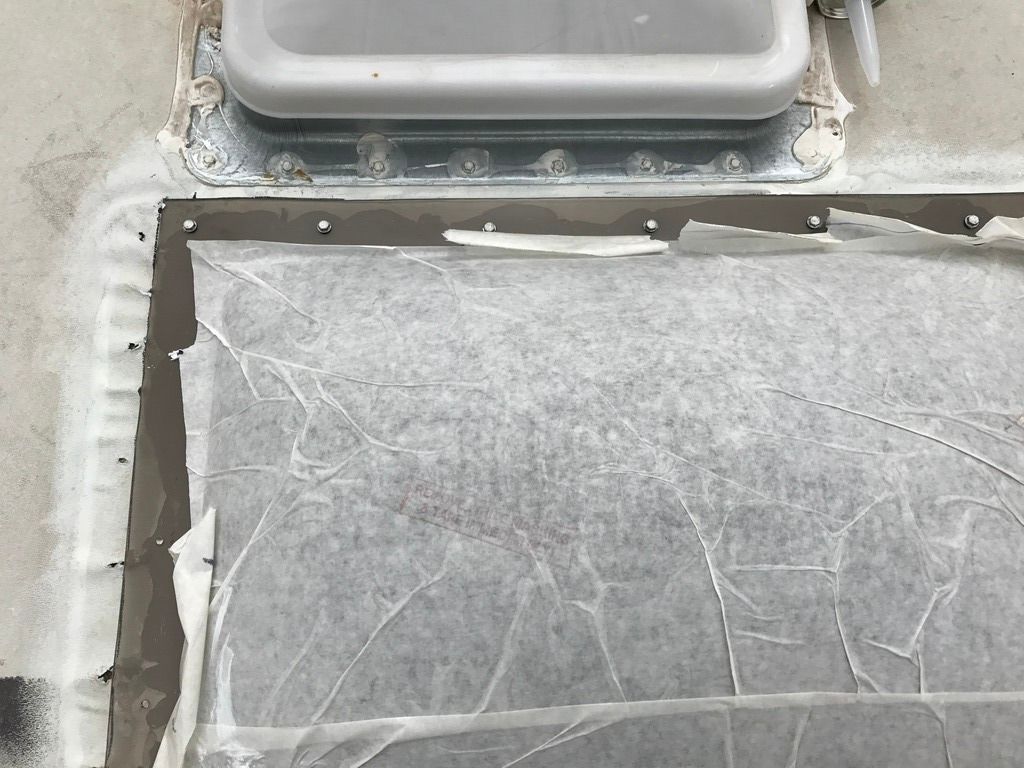
I had an area that looked like the sealant didn’t ooze out the edge (it was sealed however). To be sure but I caulked the edge to ensure a full seal. Then I rechecked the tightness of all screws and sure enough it laid down nice. This is a pic before I did a final torque on the screws.

Lastly, I took some acetone and lightly wiped the rubber roof and old sealant to prep it for some Eternabond Tape. Next I measured the tape and covered the edges of the skylight. You’ll notice I had to trim the tape to fit around the bathroom vent mount.
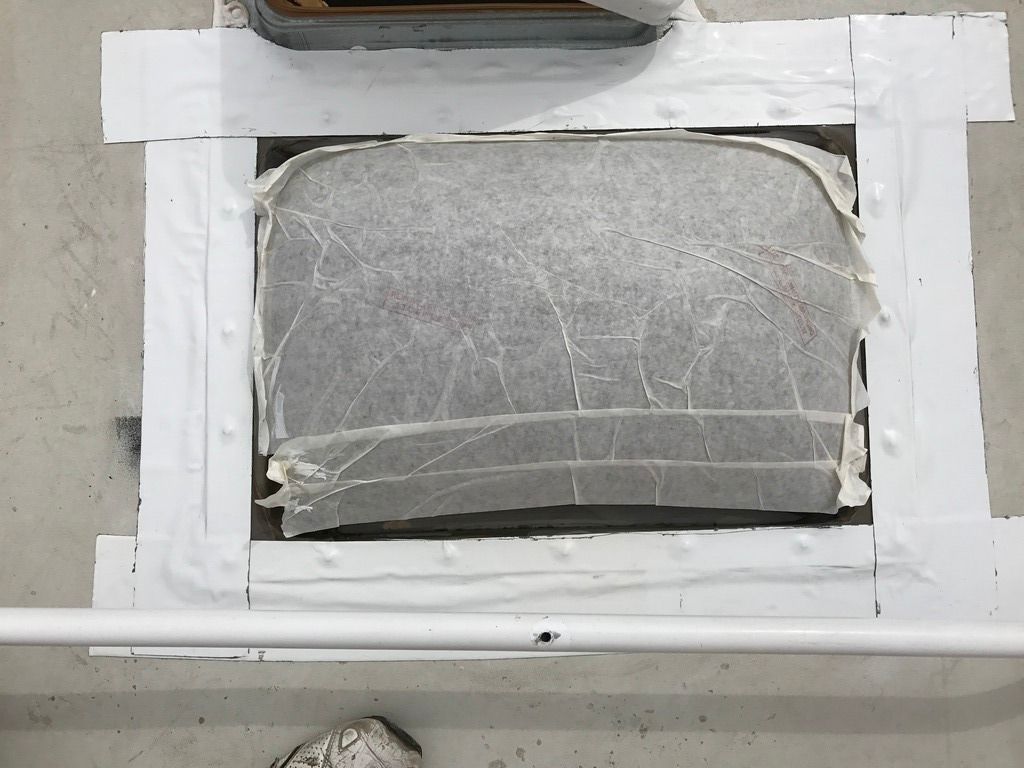
I’m going to let this sit for a day or two then put some DICOR self leveling lap sealant around the Eternabond Tape. Then, I need to attach and seal the luggage rack post. I think I’ll also inspect and add some of the self-leveling sealant where required on the rest of the roof.
Link to post
I want to thank all the campers who replied--it certainly helps formulate a COA (course of action) for fixing the leak.
I purchased a replacement skylight on-line with rvskylights I was impressed with their easy ordering and "beefier" product. It is about double the thickness of the original. My only negative with these guys is you need to plan a minimum of 14 days turn time (time for them to manufacture it and then ship it). Other than that superior and even with the cost shipped all the way across country I was still just over $80.
Removal:
First, make sure you know what type of roof you have. For my Arctic Fox 990 I was able to discern I had a TPO (Thermoplastic polyolefin (TPO) single-ply roofing membrane) or rubber roof. It does not have a black back like EPDM. As I looked at the skylight I noticed they had mounted a luggage rack support stand right on top of the skylight flange (RT side on pic below) and on the opposite side I had huge gobs of sealant connecting the space between the skylight and the bathroom exhaust fan--you can't dream this stuff up! As an aviation craftsman/mechanic and pilot this production BS irritates the **** out of me. Bottom-line its just poor quality and terrible quality assurance....Rant Off for now. So, it was also necessary to remove the luggage rack support (just the one right on top of the skylight flange) and the ton of sealant surrounding it.
To get started you need to remove the sealant from the attachment screw heads. I used my fingers and a plastic lever to get under and around the screw head sealant to uncover the screw heads. Expose all of the heads.
Next, grab a socket/drill and remove all the screws. Put them in a container, as you'll need to use them later.
Next, grab a plastic body tool or upholstery tool and patiently wedge it under the skylight.
Be careful NOT to damage the rubber roof. Patience is key here as you are just trying to get under enough of the skylight in order to just pull it or pry it up and off. They are usually bonded quite firmly. Take your time and just slowly make some space between the skylight and the roof.
Any overlapping sealant around the edges will need to be removed too. I used a piece of wood 6" long with a good straight edge to push it off the skylight. Once I got enough sealant removed I as able to pry off the skylight. Now the real work begins.
Preparation:
Your final job is only going to be a good as the time you spend to correctly prepare the roof by removing all the old sealant. Put your patience cap on, grab a heat gun and get to work. No need for any chemicals right now as you are just removing sealant. My HF heat gun in action....
Take the heat gun and heat up a small 3-4" area and then take a plastic body buddy tool and slowly pry away the sealant. Be careful not to dig into the rubber roof. This is going to take quite awhile but it has to be removed so you can bond the new sealant to the rubber.
Once you get the vast majority of sealant off the next thing you'll do is get the roof membrane as clean as possible. You are going to find areas where the roof rubber is not exactly flat and you'll have to deal with the holes from the crews. Just do the best you can and clean the area with a rag with some acetone on it and some elbow grease. Don't let the acetone sit, puddle, or linger. Wipe it on and scrub it off. Bits of sealant will roll off with the rag. Be patient. If you are very careful you can use a chisel or buddy knife and slowly scrape up the softened sealant. Again, watch the edge of the tool and don't cut into the rubber roof!!!! Use these tools at your own peril. Finally, you’ll begin to see some progress and soon it will be clean and ready.
One thing I did notice as I cleaned and inspected was the aft portion of the skylight was mounted right where the roof begins a slope aft of the opening. Putting a level on the roof and measuring the edge it was 3/16ths up to a ¼ inch drop away.
I was determined to ascertain whether I could slide the new skylight forward just a half-inch or so to get out of the crease area where the roof starts down. As I pre laid the skylight into place I was able to move it forward without any impacts. It did expose the mounting holes from the previous skylight.
Install:
Grab the new skylight and cover it the outside and inside mounting flange with masking tape if it didn’t deliver that way. This protects it while you pre-fit, fit, mount, and seal the skylight.
After you make numerous trips up and down the ladder to get the skylight in the position you want it (centered etc.) also check the inner window plastic fairing for fitment (the big square plastic piece that screws in above the shower). Mine will require just a little trimming where it comes in contact with the skylight on the inside. Once you are happy get out the Sharpie and trace it onto the roof. Also, mark front or rear or left/right…something so you can’t flip the skylight 180 degrees without knowing it’s been rotated.
Next, measure up the flange and determine where you intend to put your mounting screws. I evenly spaced mine on the flange and marked the holes for drilling. I did not use all the screws from the previous install. I spaced my screws out three and three quarters of an inch but evenly along the flange. Next, set the skylight on some 2x4s and drill the mounting holes. I used a #8 drill size hole for my #8 size screws. I want the screw to clear the hole and not bind and crack the plastic.
PicNext, get back on the roof, put the skylight down in its place (remember the area we marked with the sharpie) and using a smaller drill bit drill the holes for the skylight into the roof. I drilled the first hole and then screwed in a screw to hold it in place. Then I alternated sides as I drilled the reaming holes.
Next, set aside the skylight and grab the sealant. I freshly wiped down the roof area with acetone then took my DICOR NON-Leveling Sealant and filled the old mounting holes and the new screw holes with sealant.
Now the fun begins. Peel the masking tape away from the flanges on both side of the skylight. Run a bead of sealant between the screw holes and the opening in the roof. Don’t put it on a line too close the roof opening or it will all squish out toward there when screwed down. I then used a putty knife to spread it on the roof area where it was to be mounted. Next, I ran a small bead on the skylight flange following a straight line (hole to hole to hole).
Ok. Now mount the skylight into place. Slowly start all the screws into the roof. You will see the sealant ooze out the edges. As you screw in the mounting screws alternate just like torqueing down a cylinder head (start in the center and work out).
I had an area that looked like the sealant didn’t ooze out the edge (it was sealed however). To be sure but I caulked the edge to ensure a full seal. Then I rechecked the tightness of all screws and sure enough it laid down nice. This is a pic before I did a final torque on the screws.
Lastly, I took some acetone and lightly wiped the rubber roof and old sealant to prep it for some Eternabond Tape. Next I measured the tape and covered the edges of the skylight. You’ll notice I had to trim the tape to fit around the bathroom vent mount.
I’m going to let this sit for a day or two then put some DICOR self leveling lap sealant around the Eternabond Tape. Then, I need to attach and seal the luggage rack post. I think I’ll also inspect and add some of the self-leveling sealant where required on the rest of the roof.
2013 AF 990
2003 F350 6.0L 4X4 DRW, Oil bypass filter, Coolant Filter, Blue Spring fuel pressure mod, DELO ELC, DashBoss Bluetooth engine monitor, EGT/FP gauge, SuperSprings, torklift hitch/tiedowns, 48" SuperTruss, fastguns, Kenwood CMOS Backup Camera.
2003 F350 6.0L 4X4 DRW, Oil bypass filter, Coolant Filter, Blue Spring fuel pressure mod, DELO ELC, DashBoss Bluetooth engine monitor, EGT/FP gauge, SuperSprings, torklift hitch/tiedowns, 48" SuperTruss, fastguns, Kenwood CMOS Backup Camera.
Labels:
- Labels:
-
Truck Campers
8 REPLIES 8
Options
- Mark as New
- Bookmark
- Subscribe
- Mute
- Subscribe to RSS Feed
- Permalink
- Report Inappropriate Content
Mar-24-2017 06:52 PM
Traver8 wrote:
I also purchased a replacement skylight from the same place and was curious that the installation instructions they link to on-line DO NOT show using any screws to hold it down. They only use sealant and Eternabond tape.
Any of you ever done one this way without screws?
I am still waiting for good weather while I decide what method to use but really do appreciate this excellent writeup and pictures.
Terry
I've never seen one without screws but I'm not in the "industry". Still, there's a lot of lift inflicted on the cover at highway speed and I would feel better with some mechanical fasteners.
Options
- Mark as New
- Bookmark
- Subscribe
- Mute
- Subscribe to RSS Feed
- Permalink
- Report Inappropriate Content
Mar-23-2017 12:42 PM
Troutguy wrote:
Thanks for posting this.......Question...I was under the impression that the AF factory domed skylight was a dual bubble, with an air-space for insulation is that so?
TG
It is on mine. I also have the double pane windows everywhere except the entry door. I believe these are optional and all campers may not have the double layer windows.
06 RAM 3500,Dually,CTD,Auto(ATS Stage 1),QC,4X4,PacBrake,Spyntec Freespin Hubs,60 Gal Titan Tank,EFI Live, Line-X,Torklifts and SuperHitch,Fastguns
2013 Arctic Fox 990, 275 Watts Solar, 2 Grp 31 AGMs
US Navy 1964-1968, 2-Tour Vietnam Vet
2013 Arctic Fox 990, 275 Watts Solar, 2 Grp 31 AGMs
US Navy 1964-1968, 2-Tour Vietnam Vet
Options
- Mark as New
- Bookmark
- Subscribe
- Mute
- Subscribe to RSS Feed
- Permalink
- Report Inappropriate Content
Mar-23-2017 11:36 AM
I also purchased a replacement skylight from the same place and was curious that the installation instructions they link to on-line DO NOT show using any screws to hold it down. They only use sealant and Eternabond tape.
Any of you ever done one this way without screws?
I am still waiting for good weather while I decide what method to use but really do appreciate this excellent writeup and pictures.
Terry
Any of you ever done one this way without screws?
I am still waiting for good weather while I decide what method to use but really do appreciate this excellent writeup and pictures.
Terry
Options
- Mark as New
- Bookmark
- Subscribe
- Mute
- Subscribe to RSS Feed
- Permalink
- Report Inappropriate Content
Mar-23-2017 11:02 AM
Nice job.
I have this hideous job coming up soon. Mine isn't leaking but it looks terribly sun baked and cant be long for the world.
I have this hideous job coming up soon. Mine isn't leaking but it looks terribly sun baked and cant be long for the world.
Options
- Mark as New
- Bookmark
- Subscribe
- Mute
- Subscribe to RSS Feed
- Permalink
- Report Inappropriate Content
Mar-23-2017 06:00 AM
Nice job! I have a skylight like that one and hope I won't need to replace mine.
'10 Ford F-450, 6.4, 4.30, 4x4, 14,500 GVWR, '06 Host Rainer 950 DS, Torklift Talon tiedowns, Glow Steps, and Fastguns. Bilstein 4600s, Firestone Bags, Toyo M655 Gs, Curt front hitch, Energy Suspension bump stops.
NRA Life Member, CCA Life Member
'10 Ford F-450, 6.4, 4.30, 4x4, 14,500 GVWR, '06 Host Rainer 950 DS, Torklift Talon tiedowns, Glow Steps, and Fastguns. Bilstein 4600s, Firestone Bags, Toyo M655 Gs, Curt front hitch, Energy Suspension bump stops.
NRA Life Member, CCA Life Member
Options
- Mark as New
- Bookmark
- Subscribe
- Mute
- Subscribe to RSS Feed
- Permalink
- Report Inappropriate Content
Mar-23-2017 04:28 AM
Thanks for posting this.......Question...I was under the impression that the AF factory domed skylight was a dual bubble, with an air-space for insulation is that so?
TG
TG
2018
2018 Arctic Fox 1140 Truck Camper &
RAM 3500 Crew Cab 4x4 DRW
Cummins HO, Aisin trans and 4:10 gears, 14,000 lb GVWR2018 Arctic Fox 1140 Truck Camper &
Honda EU2000
Options
- Mark as New
- Bookmark
- Subscribe
- Mute
- Subscribe to RSS Feed
- Permalink
- Report Inappropriate Content
Mar-23-2017 04:22 AM
Nice job.
Options
- Mark as New
- Bookmark
- Subscribe
- Mute
- Subscribe to RSS Feed
- Permalink
- Report Inappropriate Content
Mar-22-2017 08:55 PM
Great write up. During disassembly were you able to find the cause of the leak?


