- Good Sam Community
- Groups
- Truck Camper Group
- Forum
- Avion truck campers - Hundreds of photos
- Subscribe to RSS Feed
- Mark Topic as New
- Mark Topic as Read
- Float this Topic for Current User
- Bookmark
- Subscribe
- Mute
- Printer Friendly Page
Avion truck campers - Hundreds of photos
- Mark as New
- Bookmark
- Subscribe
- Mute
- Subscribe to RSS Feed
- Permalink
- Report Inappropriate Content
May-11-2011 10:33 AM
Our planned trip to Montana in June is called off. heh.
However, I have now convinced my dear Jane that its time to really update the TC. After drying for several days we pulled out the interior. Amazingly the Zolatone paint that I had applied last year is good as new after a cleaning.

Without burdening the TC family overmuch, I'd like to ask some advice other than don't park too near a flood :-).
My DW was overjoyed that I had a plan for the bathroom: a composting toilet developed by Nature's Head http://www.natureshead.net/. Our holding tank was practically unusable and there was no real grey water tank on the 67 Avion. Our plan is to rip out the bathroom and install one of these and converting the blackwater to a greywater tank. Any experience with this?
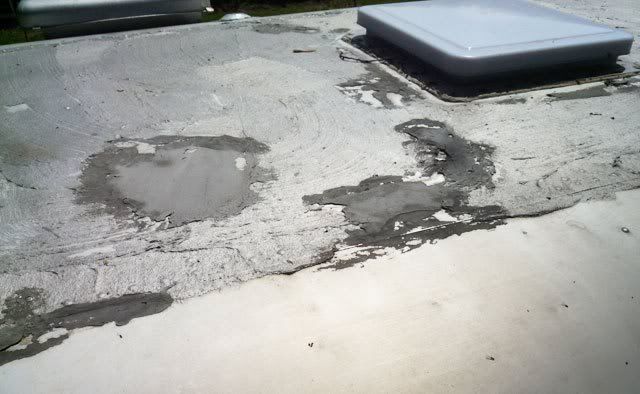
Finally, the roof. I admit that I have not really done the work I should have. Now, I need to remove the various sealants on the roof and repair it. We are also setting up for a solar installation. Any advice as to this?

Here's hoping I have posted the pictures correctly. And many thanks in advance for your advice.
- Labels:
-
Truck Campers
- Mark as New
- Bookmark
- Subscribe
- Mute
- Subscribe to RSS Feed
- Permalink
- Report Inappropriate Content
Dec-13-2015 09:23 AM
For the front I ran a strip of 2" angle aluminum long enough to span the distance under the window. It was then attached again to the vertical channel on either side of the window and multiple screws into the ceder planks. Nice and strong now.
For the wings, with the wood inside the channel I was able to get a good bite through the 2 layers of 3/4' ply using 2&1/2" screws.
I rechecked the interior lights and running lights once more before riveting things back in place.
- Mark as New
- Bookmark
- Subscribe
- Mute
- Subscribe to RSS Feed
- Permalink
- Report Inappropriate Content
Dec-13-2015 08:56 AM
- Mark as New
- Bookmark
- Subscribe
- Mute
- Subscribe to RSS Feed
- Permalink
- Report Inappropriate Content
Dec-13-2015 04:11 AM
garryk6 wrote:
Jack mounts are my tiedowns
x2
I drilled a hole through the gusset of each jack mounting ell bracket .You will have to check if the tie downs have clearance with the truck bed . I am mounted on a flatbed so a little different than a pickup bed .
'02 GMC DRW D/A flatbed
- Mark as New
- Bookmark
- Subscribe
- Mute
- Subscribe to RSS Feed
- Permalink
- Report Inappropriate Content
Dec-13-2015 03:32 AM
The interior will definitely be a non vintage custom install. If I can utilize the original ceiling mount cabinets without a large visual mismatch between old and new, I will. If not they will be up for grabs.
Rastaman you're coming along nicely as well. My interior skin had to be stripped to gain access to the fridge vent, ac and stove vent rivets and clearance light wiring. Most importantly on my C11, it gives access to screw down through the wall channel into the bunk, wings and floor. How did you get to these fasteners when doing your bunk install?
D1, I think thats a good approach, sounds like it might even be... fun?
67, Thanks for the history. It provides motivation and reinforces my belief that this is a worthy project. Looks like your baby is in good hands.
1993 Dodge D250 LE Cummins
- Mark as New
- Bookmark
- Subscribe
- Mute
- Subscribe to RSS Feed
- Permalink
- Report Inappropriate Content
Dec-12-2015 10:46 PM
Wife + 4 kids
Retired Military Family.... Alway's on the move....
2002 F350 CCSB 5.4 6spd 4x4 in AK
1966 Avion C-10 Truck Camper
- Mark as New
- Bookmark
- Subscribe
- Mute
- Subscribe to RSS Feed
- Permalink
- Report Inappropriate Content
Dec-12-2015 01:59 PM
On top is another sheet of 1/2 ply once again epoxied and painted

So.....I have a question...My wings are complete, before I go any further. What are you guys using for tie-down points. Are the jack stand brackets being used or do I need to install separate tie-down hooks?
Could I used an 'eye bolt' for one of the jack mount bolts. My stands are going to be bolted through 2 sheets of 3/4 ply with a piece of 1/8th aluminium plate between jack and the body on the outside.
Inside the bolts go through alum plate also.
- Mark as New
- Bookmark
- Subscribe
- Mute
- Subscribe to RSS Feed
- Permalink
- Report Inappropriate Content
Dec-12-2015 01:46 PM
This is my bunk area....that is 1/2 ply that was epoxied them primed and painted grey with oil paint. Then I used 1x8 ceder boards, in the gaps I placed insulation board.

- Mark as New
- Bookmark
- Subscribe
- Mute
- Subscribe to RSS Feed
- Permalink
- Report Inappropriate Content
Dec-12-2015 12:00 PM
Silver, way-to-go, nice work! I would add, fill
in all those potential voids, or water will pool there. The insulation
will trap it between the plywood, and well, then it all begins
again. Foam works well, except it is hard to control. You could
seal your panels with epoxy as well.
Do consider a modern interior situated to your tastes, not being
a slave to classic vintage, after all everything can be new again.
Michael showed us that.
How's it go D1, pictures?!!!!!!?
D, could we get a pictorial on your solar system?
- Mark as New
- Bookmark
- Subscribe
- Mute
- Subscribe to RSS Feed
- Permalink
- Report Inappropriate Content
Dec-12-2015 07:54 AM
Onward!
- Mark as New
- Bookmark
- Subscribe
- Mute
- Subscribe to RSS Feed
- Permalink
- Report Inappropriate Content
Dec-11-2015 09:17 AM
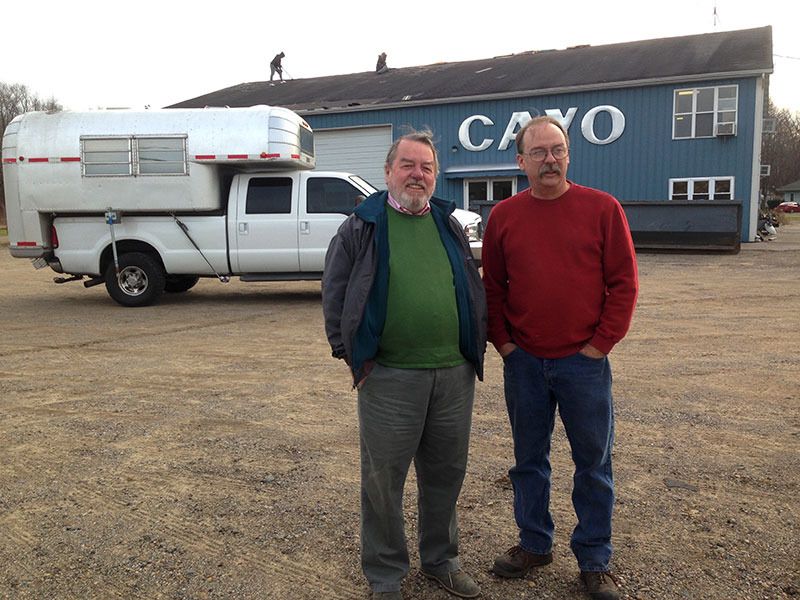
Chuck Cayo met us at his shop. That's Chuck on the right.

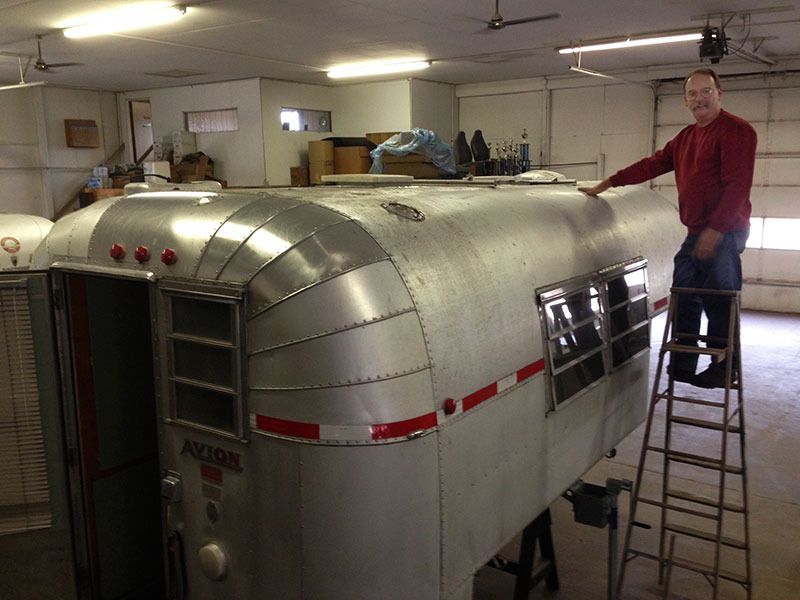
We examined the issues on the roof where the solar panels had been ripped off. We also discovered a lot of problems with the electrical system where shorts had jumped from spot to spot after the solar panels had been damaged. We still don't understand why the fusing didn't stop the wires from burning. It appears that the hot water heater is fried as well as the Wave3 catalytic heater. I think I'm lucky the whole thing didn't burn.
Chuck Cayo inspects the roof.

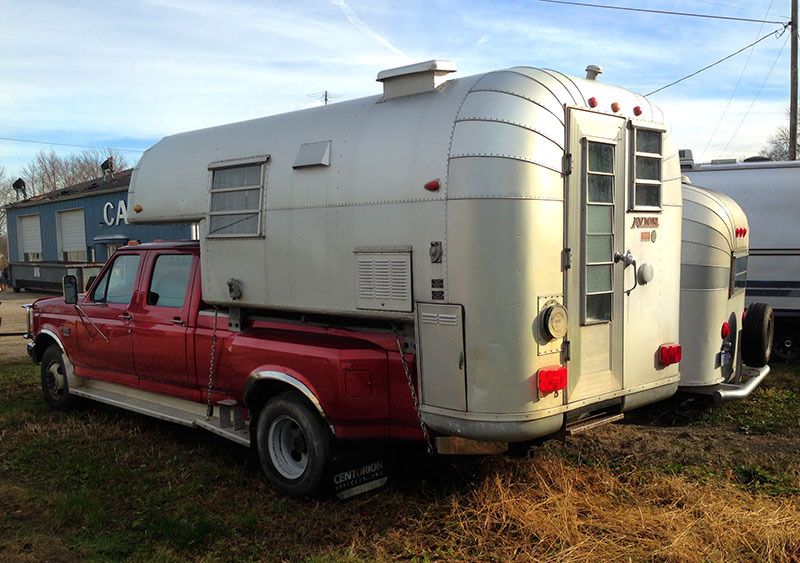
Outside was an historic Avion TC. It was used by Ford Motor Company when they designed their "Camper Specials" in the early 70s. According to Chuck, Ford wanted a camper that wouldn't fall apart during their arduous track testing. Apparently several other TCs had collapsed. Not only did this Avion survive the 250,000 mile test program, it still is still being used.

I am confident that Cayo can handle the damage to my coach and we'll be camping again.
It turns out the road to Muley Point runs through Watervliet, Michigan.
- Mark as New
- Bookmark
- Subscribe
- Mute
- Subscribe to RSS Feed
- Permalink
- Report Inappropriate Content
Dec-10-2015 04:21 PM
Dick
- Mark as New
- Bookmark
- Subscribe
- Mute
- Subscribe to RSS Feed
- Permalink
- Report Inappropriate Content
Dec-10-2015 04:14 PM
The freakish weather here has helped me keep a good pace on the project. At this rate, the Avion might make Toroweap(my Muley pt.) this spring.
1993 Dodge D250 LE Cummins
- Mark as New
- Bookmark
- Subscribe
- Mute
- Subscribe to RSS Feed
- Permalink
- Report Inappropriate Content
Dec-10-2015 09:28 AM
You ARE making good progress. Onward!
- Mark as New
- Bookmark
- Subscribe
- Mute
- Subscribe to RSS Feed
- Permalink
- Report Inappropriate Content
Dec-10-2015 09:06 AM
You are making good progress .
'02 GMC DRW D/A flatbed
- Mark as New
- Bookmark
- Subscribe
- Mute
- Subscribe to RSS Feed
- Permalink
- Report Inappropriate Content
Dec-10-2015 05:07 AM
1993 Dodge D250 LE Cummins


